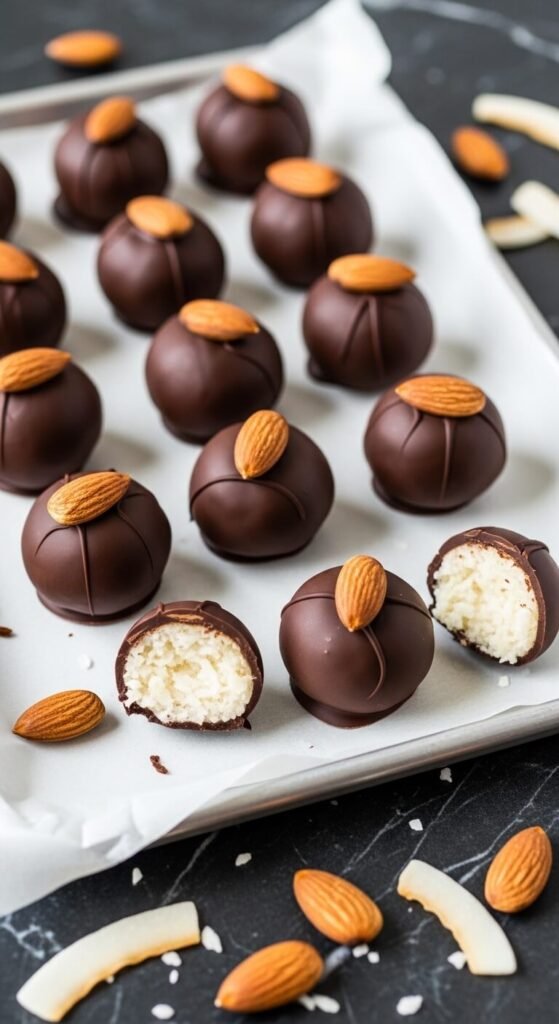
There’s a very specific kind of joy that comes from biting into an Almond Joy. The sweet coconut filling, the whole almond sitting perfectly in the center, the dark chocolate shell that cracks cleanly and melts almost instantly — it’s one of the most satisfying flavor combinations in the entire candy world. Now imagine getting all of that in a homemade version that’s richer, fresher, and more coconutty than anything that comes wrapped in cellophane. No oven required, no candy-making experience needed, and no special equipment beyond a bowl, a freezer, and the patience to wait 20 minutes while they chill. These Almond Joy balls are genuinely extraordinary — and they take about 15 minutes of actual work.
Why Homemade Beats the Original
The store-bought Almond Joy is good. The homemade version is better — and here’s specifically why.
The coconut filling is the main event. In the commercial bar, the coconut center is compressed and sweetened with corn syrup, giving it a slightly dense, uniform texture. In this version, the coconut filling is made with real shredded coconut, sweetened condensed milk, and a touch of coconut oil — which means it’s softer, more fragrant, and tastes far more intensely of actual coconut.
The chocolate is real. Using good quality dark or semi-sweet chocolate chips rather than a compound coating means a cleaner snap, a deeper flavor, and none of the waxy aftertaste that cheaper chocolate coatings can leave behind.
The almond is right-sized. In a homemade ball, the whole almond is the perfect proportion to the filling. You get almond in every single bite rather than hoping the one almond in the bar lines up with your teeth.
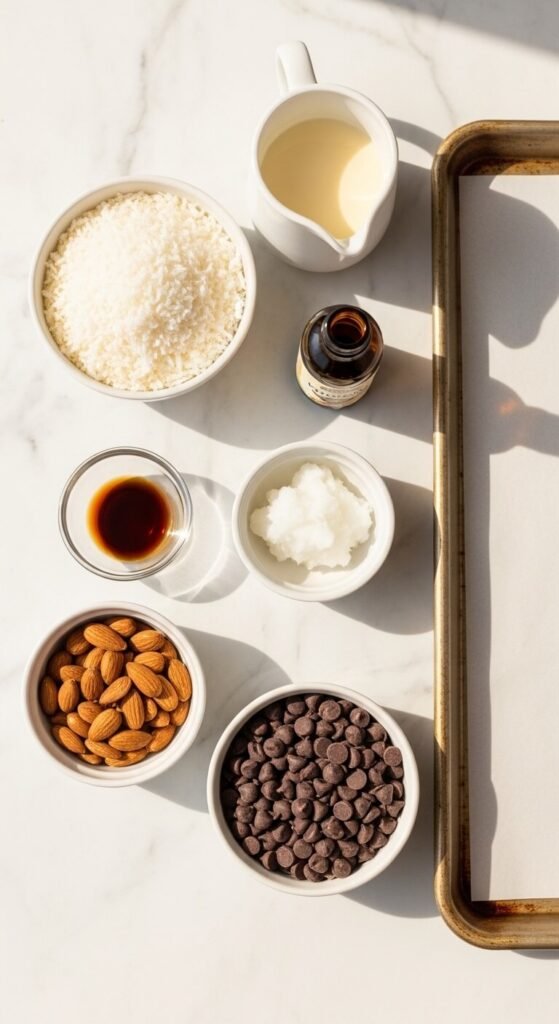
What You’ll Need
For the coconut filling (makes about 24 balls):
- 2 cups (170g) sweetened shredded coconut — this is the filling. Sweetened gives the right flavor and binds better than unsweetened.
- ⅓ cup (80ml) sweetened condensed milk — the binder that holds the coconut together and gives it that signature sticky sweetness
- 2 tablespoons coconut oil, melted — adds richness and helps the filling firm up when chilled
- 1 teaspoon pure vanilla extract
- Pinch of salt — amplifies every flavor in the mixture
For assembly:
- 24 whole roasted almonds — one per ball, pressed into the center of each coconut mound before dipping
For the chocolate coating:
- 2 cups (340g) dark or semi-sweet chocolate chips
- 1 tablespoon coconut oil — added to the chocolate for a thinner, smoother coating that sets with a slight sheen
Make the Coconut Filling
This is genuinely the easiest part of the entire recipe — and it smells extraordinary while you’re making it.
Combine the shredded coconut, sweetened condensed milk, melted coconut oil, vanilla, and salt in a large bowl. Stir with a spatula until every strand of coconut is coated and the mixture holds together when pressed. It should feel like wet sand — slightly sticky, cohesive, and dense.
Refrigerate for 20 minutes. This brief chill firms the mixture just enough to make rolling much easier and cleaner. Warm coconut filling is sticky and difficult to shape. Cold coconut filling rolls into smooth, tight balls with minimal sticking.
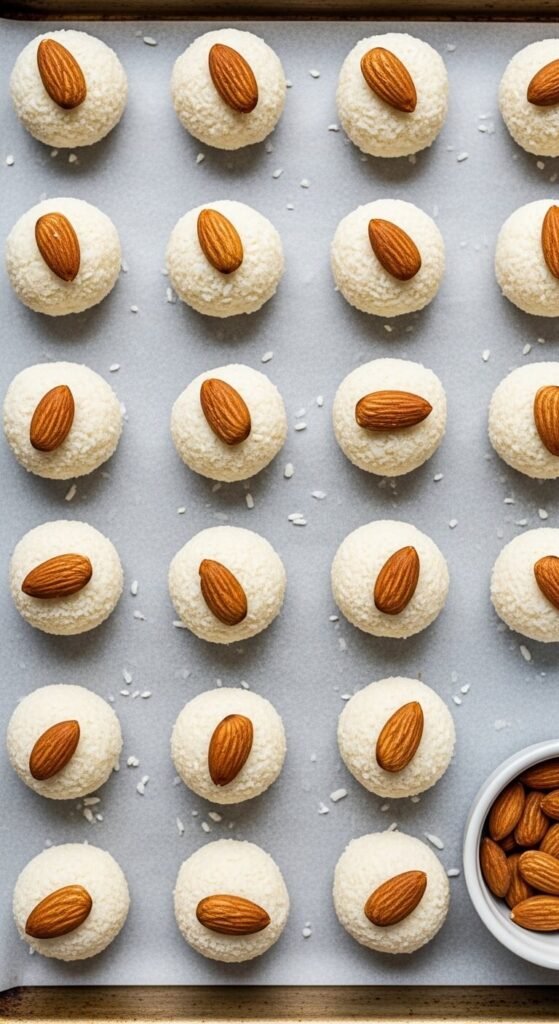
Shape and Press the Almonds
Once the filling is chilled, line a baking sheet with parchment paper. Now the most satisfying assembly step begins.
How to shape perfect coconut balls:
- Scoop approximately 1 tablespoon of the chilled coconut mixture into your palm
- Press firmly and roll between both hands into a compact sphere — squeeze with genuine pressure so the coconut strands bind tightly. Loosely packed balls fall apart during dipping.
- Press one whole roasted almond firmly into the top of each ball, pushing it in slightly so it’s anchored rather than just sitting on the surface
- Place each finished ball on the parchment-lined tray
- Freeze for 20 minutes until completely firm before dipping
Why freezing before dipping matters: A frozen coconut ball stays firm when warm chocolate is poured over it, allowing the chocolate to set quickly and cleanly on contact. A room-temperature ball softens when it meets warm chocolate, losing its shape and making dipping messy and uneven. The 20-minute freeze is the step that makes the finished balls look professional.
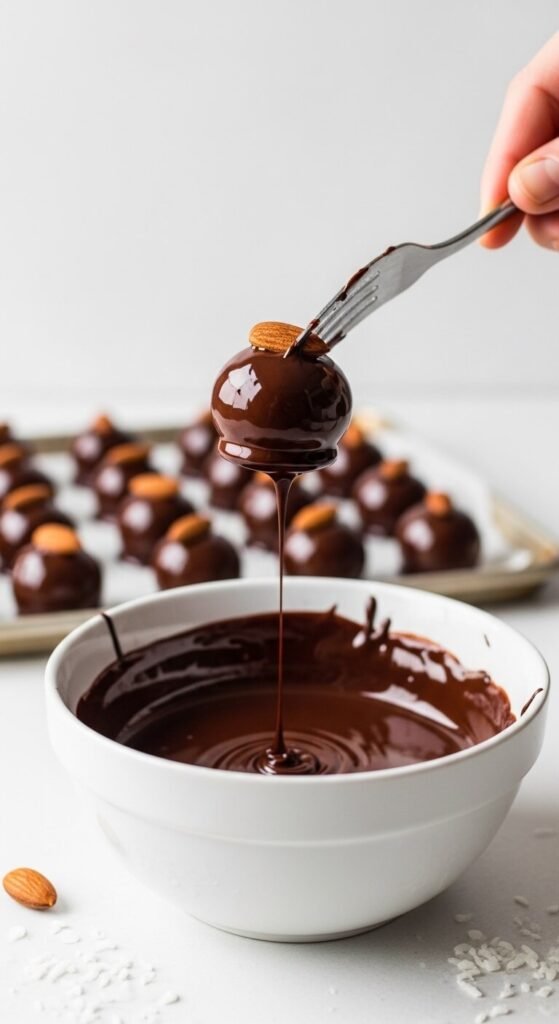
Dip in Chocolate
This is the final step — and once you master it, you’ll use it for every chocolate-dipped treat you make going forward.
Melt the chocolate: Combine chocolate chips and coconut oil in a microwave-safe bowl. Microwave in 30-second intervals, stirring after each, until completely smooth. Let the melted chocolate cool for 2 minutes — it should be warm and fluid but not steaming hot. Hot chocolate on a frozen ball creates steam that bubbles the coating.
The dipping method:
- Drop one frozen coconut ball into the melted chocolate
- Use a fork to roll it, coating all sides completely
- Lift with the fork, letting the excess chocolate drip back into the bowl — tap the fork gently on the bowl rim to encourage dripping
- Slide off the fork onto the parchment using a second fork or a toothpick to push it cleanly
- Before the chocolate sets, press the almond on top down very slightly so it’s secure
Work in batches of 6–8 balls at a time, returning the rest to the freezer between batches to keep them firm.
The Final Set and Finishing Touches
Place all dipped balls back on the parchment-lined tray. Let them set at room temperature for 30 minutes, or refrigerate for 15 minutes if you’re in a hurry.
Optional finishing touches that elevate the presentation:
- A sprinkle of flaky sea salt on each ball right after dipping — the salt-chocolate-coconut combination is exceptional
- A light drizzle of white chocolate across the finished tray for a bakery-style visual
- A sprinkle of toasted coconut flakes pressed onto the top of each ball alongside the almond
- A second thin coat of chocolate for an extra-thick shell — dip once, let set, dip again
Storage and Gifting
- Refrigerator: Airtight container for up to 2 weeks. Serve slightly cool for the best texture — the chocolate shell stays firm and the coconut filling is at its creamiest.
- Freezer: Up to 3 months. Thaw in the fridge for 30 minutes before serving.
- Gifting: Layer in a small box or tin between parchment sheets. These make exceptional holiday gifts, especially packaged with a note that they’re homemade.
The Takeaway
Almond Joy balls are the rare homemade treat that genuinely surpasses its store-bought inspiration — more coconut flavor, better chocolate, and a freshness that no candy bar can match. Fifteen minutes of work, twenty minutes in the freezer, and you have something extraordinary.
Save this recipe before the holidays, before a gift exchange, or before the next time you’re craving the candy bar — because this version is better in every way that matters, and it’s yours to make whenever the craving arrives. 🥥🍫✨