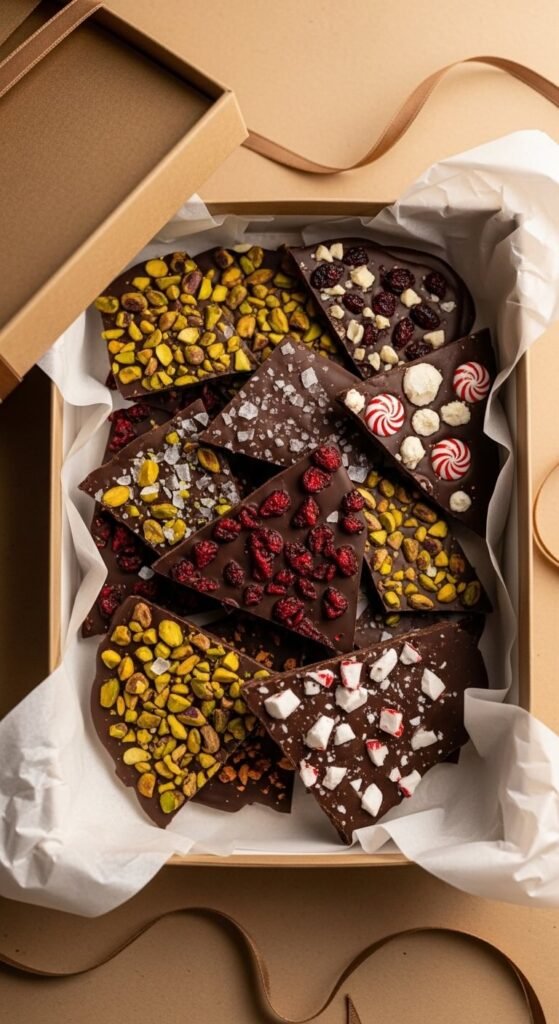
Chocolate bark is the most democratically delicious thing you can make in a kitchen. No special equipment. No technique beyond melting and spreading. No precise measurements beyond the bag of chocolate chips already in your pantry. And the result — a thin, snapping slab of dark chocolate covered in whatever combination of toppings your imagination produces — looks like something from a gourmet chocolate shop and costs roughly $6 for enough to fill a large gift box or satisfy a serious chocolate craving from an entire household. It also happens to be the single best edible gift for every occasion on the calendar, simply by changing the toppings to match the season. The bark itself never changes. Everything else is up to you.
Here is the complete guide to making chocolate bark perfectly every time — and the topping combinations worth trying first.
The Chocolate: Choose It Carefully
The chocolate is the foundation of every shard of bark you produce. Since it is essentially the only ingredient in the base, its quality directly determines the result.
What works:
- 70% dark chocolate chips or a chopped dark chocolate bar — the best choice for bark. High cocoa content means a firm snap, a complex flavor, and a bark that holds its shape at room temperature without becoming soft.
- Milk chocolate — softer, sweeter, and more crowd-pleasing for people who prefer a milder chocolate. It melts and spreads easily but sets slightly softer than dark.
- White chocolate — works as a base or as a drizzle layer over dark chocolate. Use for a clean, pale canvas that makes colorful toppings pop visually.
What to avoid:
- Chocolate-flavored coating or candy melts — they produce a waxier texture and a less genuine chocolate flavor
- Chips with high sugar content that do not contain real cocoa butter — they do not snap, they bend
Quantity: Two cups of chocolate chips or 12 oz of chopped chocolate produces a standard-size sheet of bark on a 9×13 parchment-lined tray — approximately 20 shards.
Melt It Low and Slow
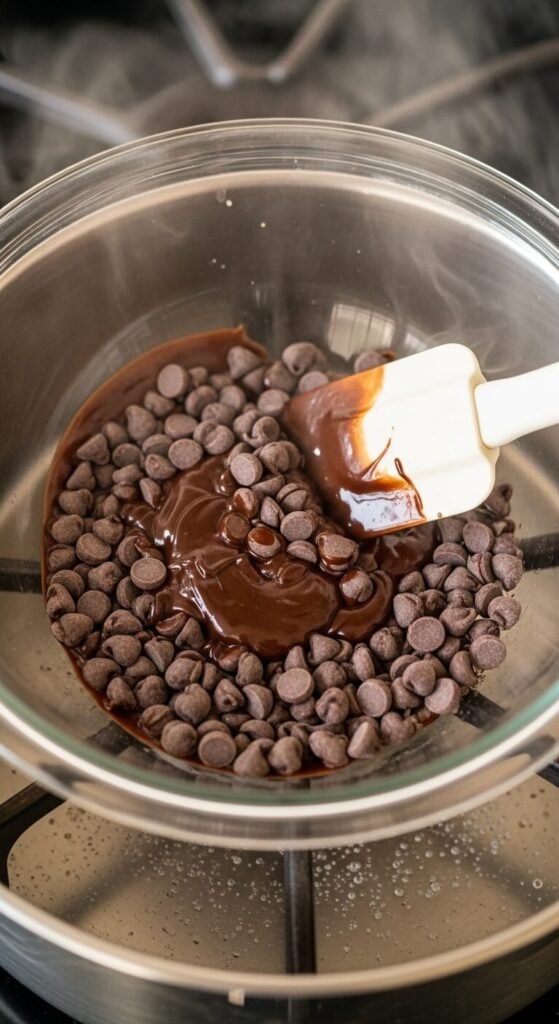
Chocolate seizes — turns grainy and lumpy — when it gets too hot or when any moisture gets in. Low and slow prevents both.
Double boiler method (most reliable):
- Bring two inches of water to a gentle simmer in a saucepan
- Set a heatproof bowl over the pan — base not touching the water
- Add chocolate and stir gently until just melted
- Remove from heat immediately and let cool for two to three minutes before spreading
Microwave method:
- Microwave at 50% power in 30-second intervals
- Stir between each interval
- Stop microwaving when the chips are about 80% melted — stir the remaining chips into the warm chocolate off the heat until fully smooth
The chocolate is ready to spread when it is smooth, glossy, and pourable — not steaming hot.
Spread Thin and Even
Line a rimmed baking sheet with parchment paper. Pour the melted chocolate onto the center and spread outward using an offset spatula or the back of a spoon.
Target thickness: ¼ inch. Thinner than this and the bark is fragile and difficult to handle. Thicker and it loses the satisfying snap and takes too long to set.
Leave the edges slightly uneven — a hand-spread edge looks genuinely artisan. A perfectly even rectangle looks machine-made.
Work quickly — chocolate begins to cool and thicken as it spreads. If it starts to pull and drag rather than flowing smoothly, it is setting too fast. This means either the chocolate was too cool when poured or the kitchen is cold. Return the bowl briefly to the double boiler for 30 seconds to re-melt slightly.
Add Your Toppings Immediately
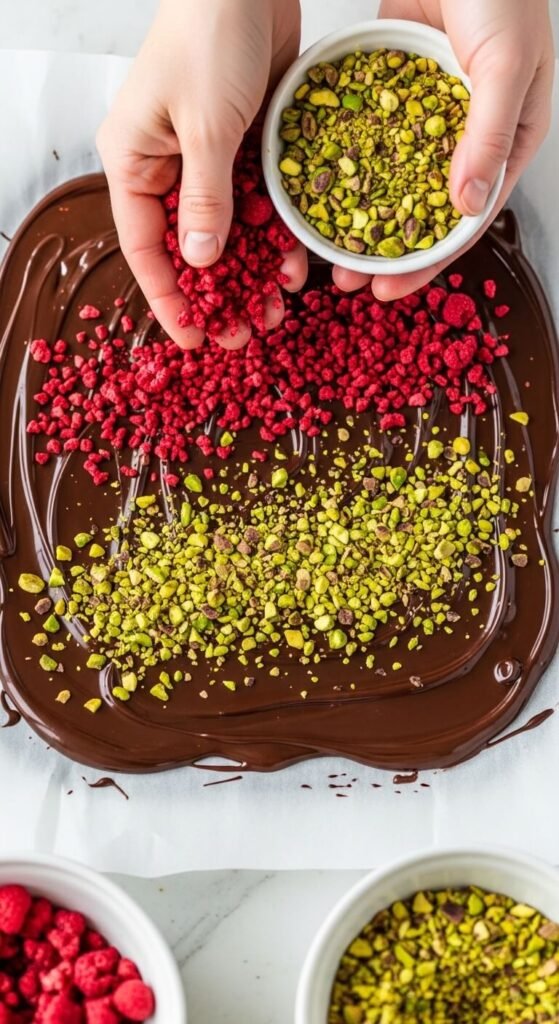
Toppings must go on while the chocolate is still fully liquid — this is the window when they will embed and bond to the surface. Wait more than five minutes and the chocolate begins to set on top, toppings slide off when the bark is broken, and the visual effect is completely lost.
The approach: Scatter toppings from a height of six to eight inches above the surface rather than placing them individually — scattering produces a natural, random distribution that looks more beautiful than carefully arranged toppings.
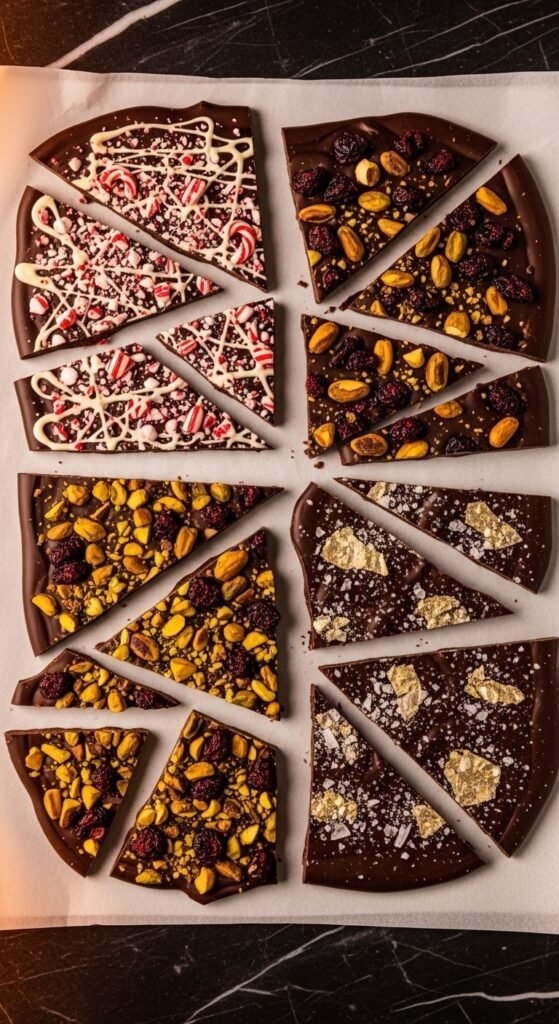
Topping combinations that work beautifully:
Classic and simple:
- Flaky sea salt + dark chocolate = the flavor combination that never fails
Festive and gifting:
- Crushed candy cane + white chocolate drizzle on dark chocolate
- Dried cranberry + chopped pistachio + white chocolate drizzle
- Gold luster dust + edible rose petals
Nutty and textured:
- Toasted almond slices + orange zest
- Whole roasted hazelnuts + a dark chocolate drizzle
- Pepitas + sunflower seeds + dried mango pieces
Indulgent and crowd-pleasing:
- Mini marshmallows + crushed graham crackers (s’mores bark)
- Crushed Oreos + white chocolate drizzle
- Toffee bits + chopped dark chocolate + sea salt
The rule for great-looking bark: aim for three to four topping elements, mix at least one crunchy element with one colorful element, and scatter generously enough that every shard gets a mix of everything.
Set, Break, and Store
Once toppings are scattered, the bark needs to set completely before breaking.
Setting options:
- Room temperature: 1 to 2 hours in a cool, dry kitchen
- Refrigerator: 20 to 30 minutes for faster results
Once set, lift the parchment sheet and gently flex it — the bark will crack naturally into irregular shards along its own fault lines. Do not try to cut it into neat shapes — the irregular edges are the visual signature of good bark.
Storage:
- Room temperature in an airtight container: up to 2 weeks
- Refrigerator: up to 1 month — allow to come to room temperature before eating for the best snap
- Do not store in a warm or humid environment — the chocolate blooms (turns grey) and the toppings lose their texture
Twenty Minutes to Something Genuinely Special
Chocolate bark is the dessert that rewards creativity more than any other recipe in this category. The base never changes. The toppings are unlimited. A batch made on a Saturday afternoon becomes a gift on Sunday, a holiday treat on a Tuesday, or the dessert at the end of a dinner party that people ask about for weeks.
Save this and pin it as your forever bark guide — because once you realize how easy it is to make something this beautiful, you will never buy a gift box of chocolates again.