If there were a hall of fame for no-bake treats that required minimal effort and delivered maximum reward, chocolate clusters would be in the first class of inductees. They’re exactly what the name promises — pools of melted chocolate loaded with whatever you love most, dropped onto parchment and left to set into individual, perfectly portioned, deeply satisfying bites. No molds, no shaping, no technique beyond melting and stirring. The beauty of clusters is that they’re endlessly customizable — from trail mix-style with nuts and dried fruit to decadent dessert-style with pretzels and caramel — and every single version is delicious. Here’s everything you need to make them perfectly, every time.
The One Rule That Governs Every Great Cluster
Before flavor combinations, before chocolate choices, before any mix-in decisions — there’s one principle that determines whether your clusters look and taste professional or just okay.
The ratio of chocolate to mix-ins must strongly favor the mix-ins.
A cluster that’s mostly chocolate with a few scattered nuts is just a chocolate drop that happens to have something in it. A cluster that’s generously loaded — where the chocolate is the binding agent rather than the main event — is something entirely different. The chocolate holds everything together and provides that rich, smooth background flavor. The mix-ins are the texture, the personality, and the reason people reach for another one.
A good working ratio: for every 1 cup of chocolate chips, plan on 1½ to 2 cups of mix-ins total. This is the number that produces clusters that look abundant and taste balanced.
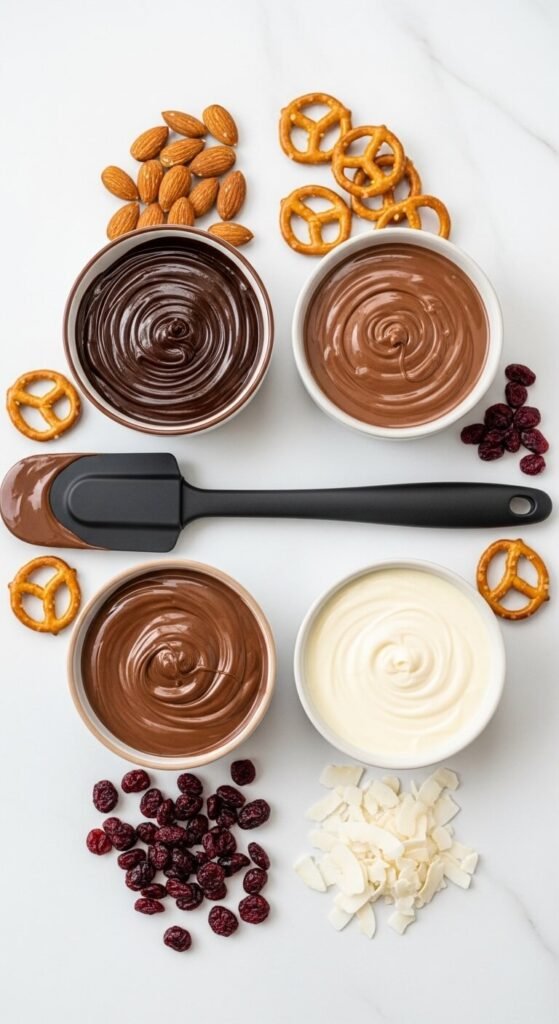
Choosing Your Chocolate Base
The chocolate you choose becomes the flavor backdrop for everything else in the cluster. Choose it deliberately.
Dark chocolate (60–72% cacao) Rich, slightly bitter, and complex. Works beautifully with sweet mix-ins — dried fruit, caramel, coconut, toffee — because the bitterness balances the sweetness. Also the best choice for clusters that are meant to feel like a sophisticated treat rather than a simple snack.
Semi-sweet chocolate The most versatile base. Neither too bitter nor too sweet, it plays well with almost everything — nuts, pretzels, chips, dried fruit, candy pieces. The reliable crowd-pleaser.
Milk chocolate Sweet, creamy, and familiar. Best paired with salty or crunchy mix-ins — pretzels, peanuts, crispy rice — where the contrast creates a classic sweet-salty experience.
White chocolate The sweetest base, and the one that provides the most dramatic visual contrast with colorful mix-ins like pistachios, dried cranberries, freeze-dried fruit, and sprinkles. Pairs especially well with tart ingredients because the sweetness balances the tartness perfectly.
The Best Mix-In Combinations
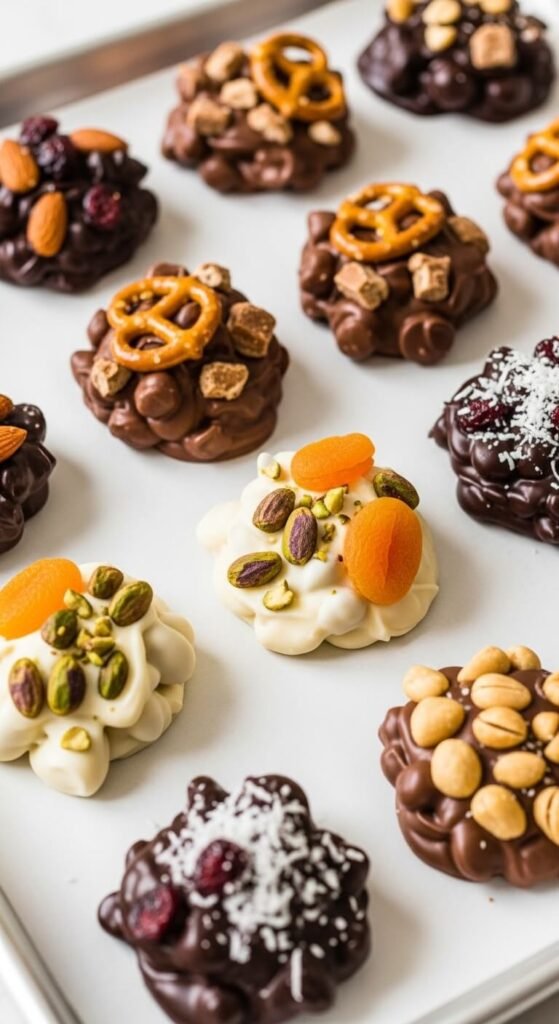
This is where cluster-making becomes genuinely creative. The clusters that get the most attention — the ones people pick up and study before eating — are the ones with a thoughtful combination of textures and flavors in every bite.
The winning formula: one crunchy + one chewy + one salty or tart
Some combinations that consistently deliver:
Dark Chocolate Rocky Road Miniature marshmallows + roasted almonds + dark chocolate The classic combination that works because every element contrasts with the others.
Milk Chocolate Pretzel Toffee Crushed pretzel pieces + toffee bits + sea salt flake on top + milk chocolate Sweet, salty, crunchy, and caramel-rich. Genuinely addictive.
White Chocolate Cranberry Pistachio Dried cranberries + roughly chopped roasted pistachios + white chocolate The visual is stunning — deep red, bright green, creamy white. The flavor is tart, nutty, and sweet in equal measure.
Semi-Sweet Trail Mix Clusters Salted peanuts + raisins + sunflower seeds + semi-sweet chocolate The most snack-like cluster. Satisfying, familiar, and endlessly eat-able.
Dark Chocolate Espresso Almond Whole roasted almonds + espresso chips or a dusting of espresso powder + flaky sea salt + dark chocolate Sophisticated, slightly intense, and perfect for anyone who loves coffee and chocolate together.
How to Make Them — The Method
The process is almost embarrassingly simple. The skill, such as it is, lives entirely in the chocolate melting step.
What you need:
- 2 cups (340g) chocolate chips of your choice
- 1 teaspoon coconut oil or vegetable shortening — keeps the melted chocolate fluid and gives the finished cluster a slight sheen
- 3 to 4 cups of mix-ins, prepared and measured
Step 1 — Melt the chocolate Combine chocolate chips and coconut oil in a microwave-safe bowl. Microwave in 30-second intervals, stirring after each, until the chocolate is just melted and completely smooth — usually 2 to 3 rounds. Stop when a few unmelted pieces remain and stir them in with residual heat. Overheated chocolate turns grainy and won’t set with a clean snap.
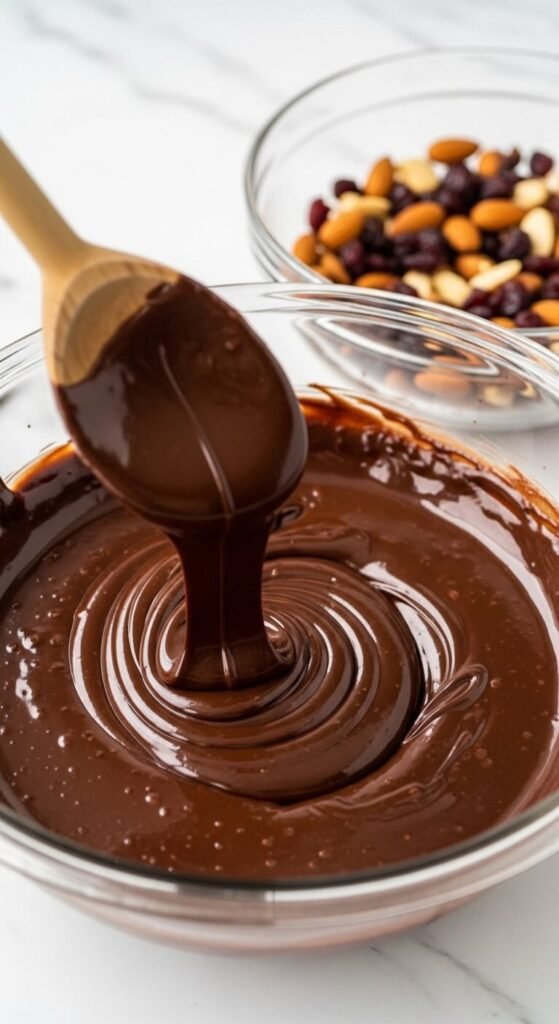
Step 2 — Add the mix-ins Pour all your mix-ins into the melted chocolate at once. Fold with a spatula until everything is evenly coated. Work quickly — the mixture thickens as the chocolate cools, and a slightly stiff mixture is harder to drop into clean cluster shapes.
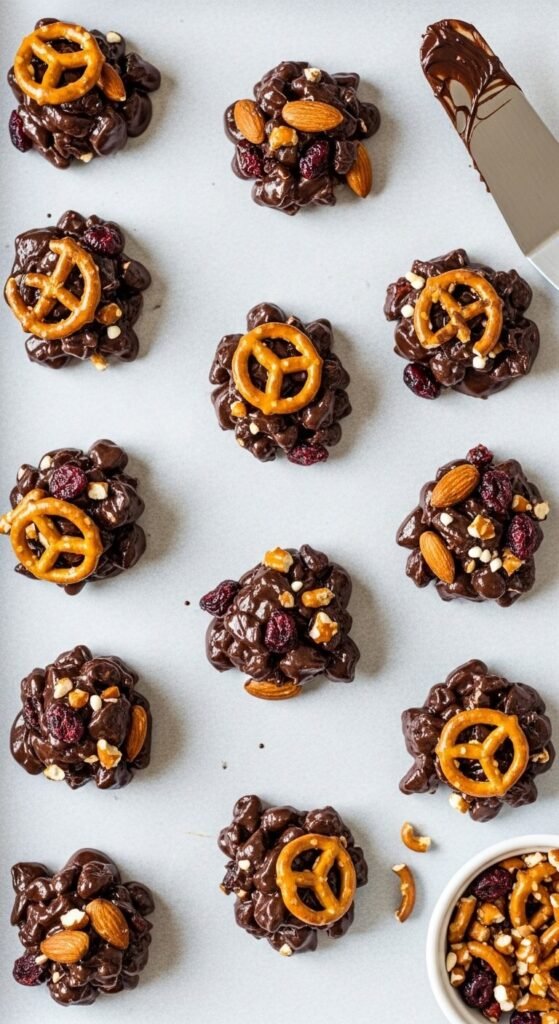
Step 3 — Drop onto parchment Use a tablespoon measure or cookie scoop to drop heaping mounds onto a parchment-lined baking sheet. Let them fall naturally — clusters look best with an organic, irregular shape rather than a perfectly round blob. Aim for about 1½ to 2 inches across.
If you want any finishing touches — a pinch of flaky sea salt, a drizzle of contrasting chocolate, a sprinkle of freeze-dried fruit — add them immediately before the chocolate begins to set.
Step 4 — Set completely Let clusters set at room temperature for 1 to 2 hours until the chocolate is firm and no longer tacky. If your kitchen is warm, refrigerate for 20–30 minutes instead. Don’t rush this step — clusters that are moved before fully set will smear and lose their shape.
Tips for the Best-Looking Clusters
A few finishing details that make the difference between good and genuinely beautiful:
- Add a finishing sprinkle — reserve a small amount of your most visually striking mix-in and scatter it over the cluster immediately after dropping, before it sets. These surface pieces make the cluster look abundant and inviting.
- Use a drizzle for drama — melt a contrasting chocolate (dark over white, white over dark) and drizzle over the set clusters with a fork or piping bag for a professional finish.
- Flaky sea salt on everything — a single pinch of flaky salt on each cluster before it sets enhances every flavor in the mixture and makes even simple clusters taste more complex.
- Make them large enough to matter — clusters that are too small look stingy. A generous tablespoon of mix-ins per cluster is the right volume.
Storage and Gifting
Chocolate clusters are one of the best make-ahead treats in the no-bake world.
- Room temperature: Airtight container for up to 1 week in a cool, dry spot
- Refrigerator: Up to 3 weeks — bring to room temperature before eating for the best texture
- Freezer: Up to 3 months — freeze in a single layer first, then transfer to a bag
For gifting, arrange different flavors together in a small tin or cellophane bag. The variety makes the gift look curated and generous — even when the whole batch took under 30 minutes to make.
The Takeaway
Chocolate clusters are the rare recipe where simplicity and impressiveness coexist completely. Melt chocolate. Load it with things you love. Drop. Set. Done — and done beautifully.
Save this recipe and experiment with a new mix-in combination every time you make them — because the best cluster you’ll ever eat is probably one you haven’t invented yet. 🍫🥜✨