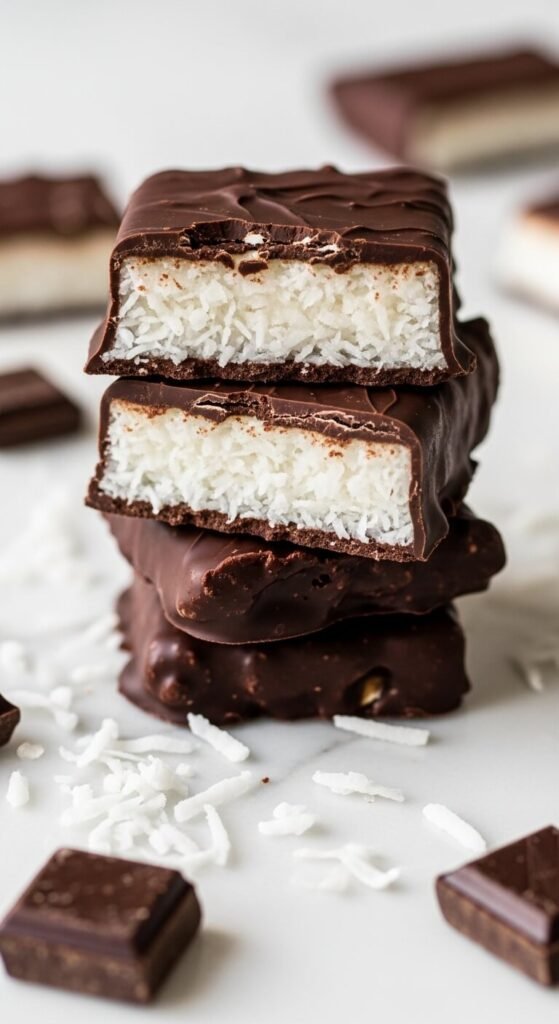
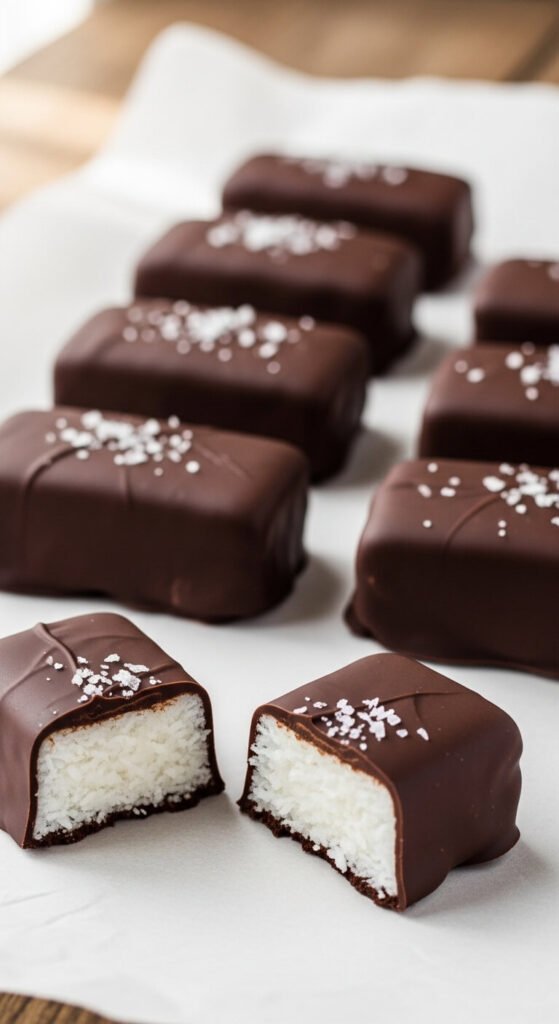
If you’ve ever bitten into a Mounds bar and thought, I could eat an entire tray of this — good news. You absolutely can, and you can make it happen right in your own kitchen with just a handful of simple ingredients. These homemade Chocolate Coconut Bars deliver everything you love about the original: a dense, sweet coconut filling completely enrobed in rich dark chocolate. Except they’re bigger, better, and made entirely by you.
No candy thermometer. No fancy equipment. Just pure chocolate-coconut magic.
Why Homemade Beats the Wrapper Every Time
There’s something deeply satisfying about recreating a beloved candy bar at home — and once you do, the store-bought version honestly can’t compete. Here’s why this recipe wins:
- Better ingredients — real coconut, quality chocolate, and no mystery additives.
- Bigger portions — because a fun-size bar has never once been fun enough.
- Fully customizable — dark, milk, or white chocolate coating; toasted or plain coconut; almonds on top if you want to go the Almond Joy route.
- Surprisingly easy — the whole process takes about 20 minutes of active work, plus chilling time.
- Perfect for gifting — wrap them individually and suddenly you’re everyone’s favorite person.
These bars check every box: impressive, indulgent, and ridiculously simple.
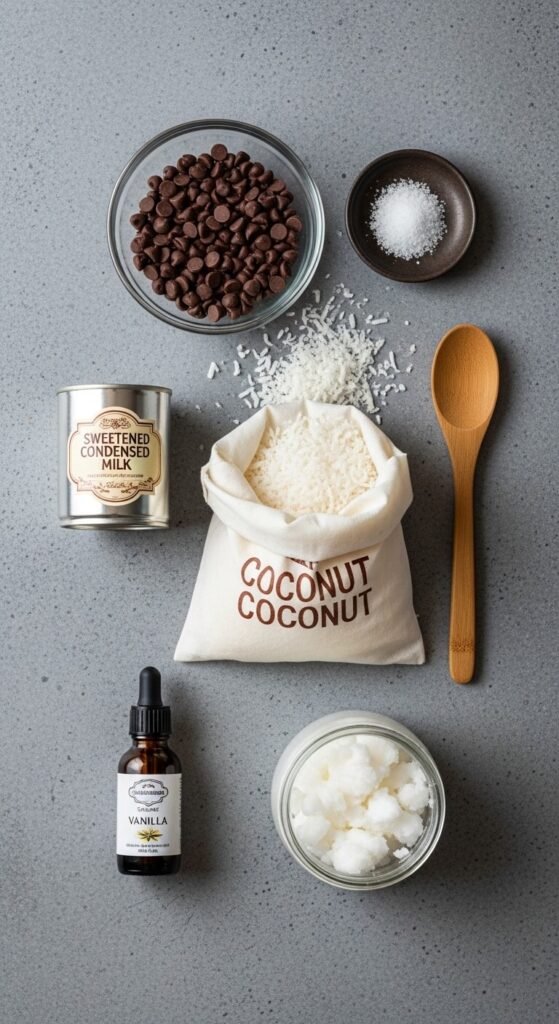
What You’ll Need
The ingredient list is short, sweet, and completely pantry-friendly.
For the coconut filling:
- 3 cups sweetened shredded coconut
- ¾ cup sweetened condensed milk
- 1 teaspoon vanilla extract
- ¼ teaspoon sea salt
- 1 tablespoon coconut oil (helps the filling hold its shape)
For the chocolate coating:
- 2 cups dark chocolate chips or chopped dark chocolate (60–70% cacao for that classic Mounds depth)
- 1 tablespoon coconut oil (gives the coating a glossy, smooth finish)
Optional extras:
- Whole almonds for topping (hello, Almond Joy vibes)
- Flaky sea salt for a sophisticated finish
- A drizzle of white chocolate for presentation
Step 1: Mix the Coconut Filling
This is where the magic starts, and it genuinely could not be easier.
- Combine the shredded coconut, sweetened condensed milk, vanilla extract, sea salt, and coconut oil in a large bowl.
- Stir everything together until fully combined — the mixture should be thick, sticky, and hold its shape when pressed.
- Taste it. Yes, this step is mandatory and completely for quality control purposes.
If the mixture feels too wet or loose, add a small handful of extra shredded coconut and stir again. You want it firm enough to shape without crumbling.
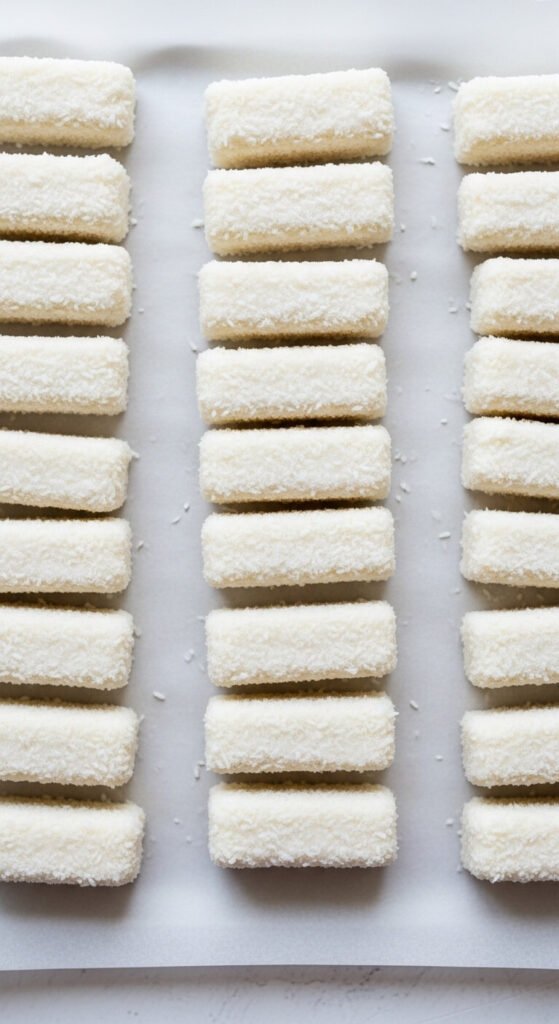
Step 2: Shape and Freeze the Filling
Line a small baking tray or dish with parchment paper.
- Scoop the coconut mixture and press it firmly into small rectangular bars — roughly the size and shape of a classic candy bar.
- Alternatively, press the entire mixture into a lined 8×8-inch pan in an even layer and cut into bars after freezing.
- Place the shaped filling on the tray and freeze for at least 30 minutes until very firm.
Frozen filling is everything here. If it’s not cold and firm before you dip it in chocolate, the bars will fall apart. Don’t rush this step — the patience pays off.
Step 3: Melt the Chocolate
While the filling chills, prepare your chocolate coating.
- Combine the chocolate chips and coconut oil in a heatproof bowl.
- Melt using a double boiler — set the bowl over a pot of barely simmering water, stirring gently until completely smooth.
- Alternatively, microwave in 30-second bursts, stirring between each, until fully melted and glossy.
Let the chocolate cool for 2–3 minutes before dipping — you want it fluid but not scorching hot, which can melt your carefully frozen filling.
Pro tip: Coconut oil is the secret to a smooth, snappy chocolate shell that doesn’t look dull or streaky. Don’t skip it.
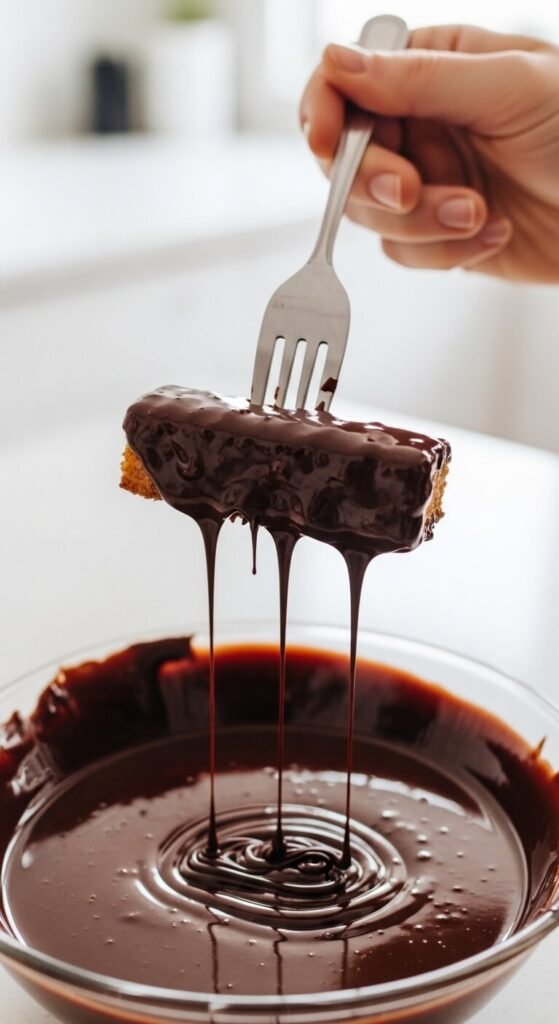
Step 4: Dip, Coat, and Set
Now for the most satisfying part of the whole process.
- Working quickly, drop each frozen coconut bar into the melted chocolate.
- Use a fork to lift it out, letting the excess chocolate drip back into the bowl.
- Place the coated bar back on the parchment-lined tray.
- If you’re adding flaky sea salt or an almond on top, do it immediately before the chocolate sets.
Repeat with all the bars, then transfer the tray to the fridge for 20–30 minutes until the chocolate is completely firm and set.
Step 5: Slice, Serve, and Try Not to Eat Them All at Once
Once the chocolate has fully set, your bars are ready.
- If you used the pan method, lift the entire slab out using the parchment paper and cut into even bars with a sharp knife.
- Run the knife under hot water and dry it between cuts for the cleanest, most satisfying slices.
Store the finished bars in an airtight container in the fridge for up to two weeks, or freeze them for up to three months. They taste incredible straight from the fridge — that cold, snappy chocolate shell against the chewy coconut filling is absolutely next level.
Tips and Tasty Variations
- Toast the coconut first in a dry pan over medium heat for 2–3 minutes to add a warm, nutty depth of flavor.
- Use milk chocolate for a sweeter, creamier coating — great if dark chocolate feels too intense.
- Press a whole almond on top of each bar before the chocolate sets for an easy Almond Joy copycat.
- Make minis — roll the filling into small balls instead of bars for a more bite-sized, party-friendly version.
- Add a layer of caramel between the coconut and the chocolate for a truly over-the-top treat.
Your New Go-To Homemade Candy Bar
These Chocolate Coconut Bars prove that the best candy is the kind you make yourself — with better ingredients, better portions, and the deeply personal satisfaction of knowing exactly what went into every single bite.
They’re rich without being overwhelming, simple without being boring, and impressive enough to bring to any gathering while being easy enough to make on a random Tuesday night just because you felt like it.
Save this recipe, share it with your fellow chocolate-coconut lovers, and make a batch this week — because homemade is always worth it. 🍫🥥