You did everything right. You melted the chocolate, dipped the pretzels, let them set — and then woke up to a tray full of dull, streaky, grayish-white blobs that look nothing like the glossy, Pinterest-perfect treats you had in mind. Sound familiar? That frustrating phenomenon is called chocolate bloom, and it’s the number one reason homemade chocolate covered pretzels fall flat. The good news: it’s 100% preventable, and once you know the secret, you’ll never look back.
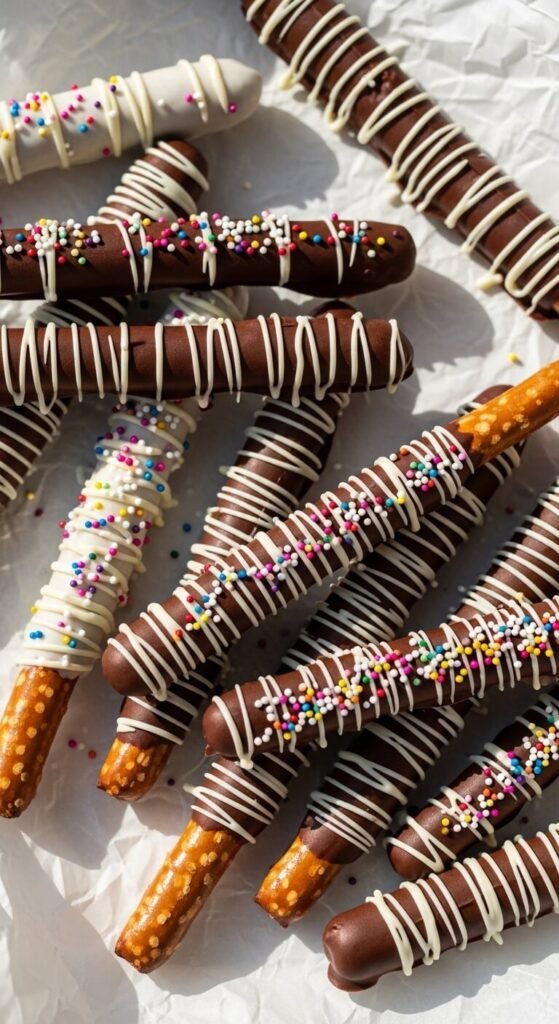
This guide walks you through exactly how to make chocolate covered pretzels that come out shiny, snappy, and stunning — every single time.
First, What Exactly Is Chocolate Bloom?
Before you fix the problem, it helps to understand it. Chocolate bloom comes in two forms:
- Fat bloom — This happens when cocoa butter separates and rises to the surface, leaving gray or white streaks and a greasy feel. It’s usually caused by temperature fluctuations during melting or setting.
- Sugar bloom — This occurs when moisture hits the chocolate, causing the sugar to dissolve and recrystallize on the surface. The result is a dull, rough, chalky coating.
Both types are harmless to eat, but neither is what you’re going for. The fix lies in how you melt and handle your chocolate — and which type you choose.
Choosing the Right Chocolate
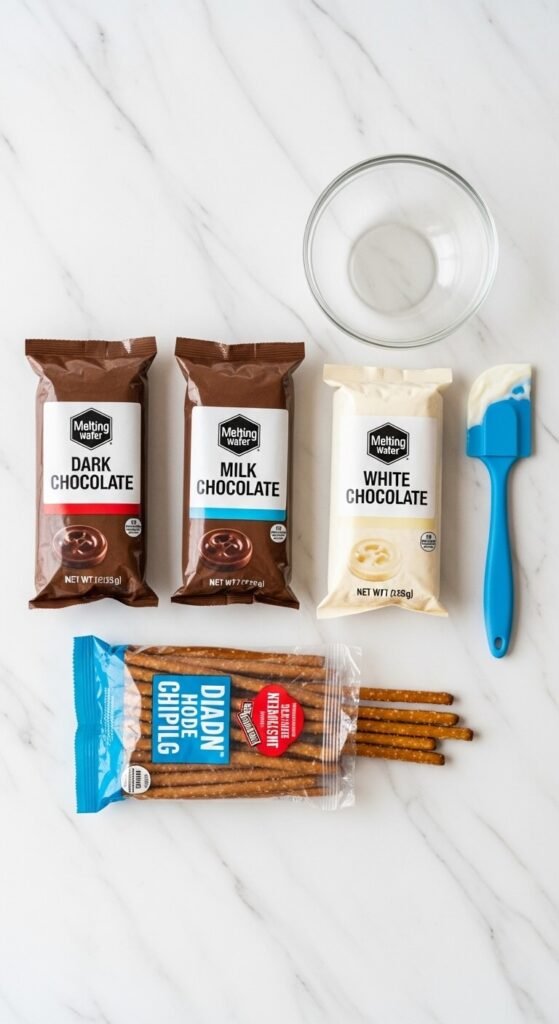
Not all chocolate is created equal when it comes to dipping. Here’s what works best:
- Candy melts or melting wafers — These are specifically designed for dipping and coating. They melt smoothly, set quickly, and don’t require tempering. Great for beginners.
- Couverture chocolate — Higher cocoa butter content gives you an incredibly glossy, professional finish. It does require tempering (more on that below), but the results are stunning.
- Chocolate chips — These work in a pinch, but they contain stabilizers that make them thicker and harder to work with. Add a teaspoon of coconut oil or vegetable shortening to help them flow.
Avoid anything labeled “baking chocolate” without added cocoa butter — it tends to seize up and bloom easily.
The Tempering Trick (And the Easy Shortcut)
Tempering is the process of carefully melting and cooling chocolate so the cocoa butter crystals align correctly. Properly tempered chocolate sets with a gorgeous sheen and a satisfying snap.
The classic method:
- Melt ⅔ of your chocolate to 115°F (dark) or 110°F (milk/white).
- Remove from heat and stir in the remaining ⅓ of finely chopped chocolate.
- Stir continuously until it cools to 88–90°F (dark) or 84–86°F (milk/white).
- Dip immediately and let set at room temperature.
The easy shortcut — seeding with candy melts: If tempering feels intimidating, use candy melts or dipping chocolate instead. Melt them low and slow in the microwave in 30-second bursts, stirring between each, and you’ll get a smooth, bloom-resistant coating without any thermometer required.
How to Dip Pretzels Like a Pro
Once your chocolate is melted and ready, technique matters more than you’d think.
Here’s the step-by-step:
- Line a baking sheet with parchment or wax paper before you start — you’ll need it ready the moment pretzels come out of the chocolate.
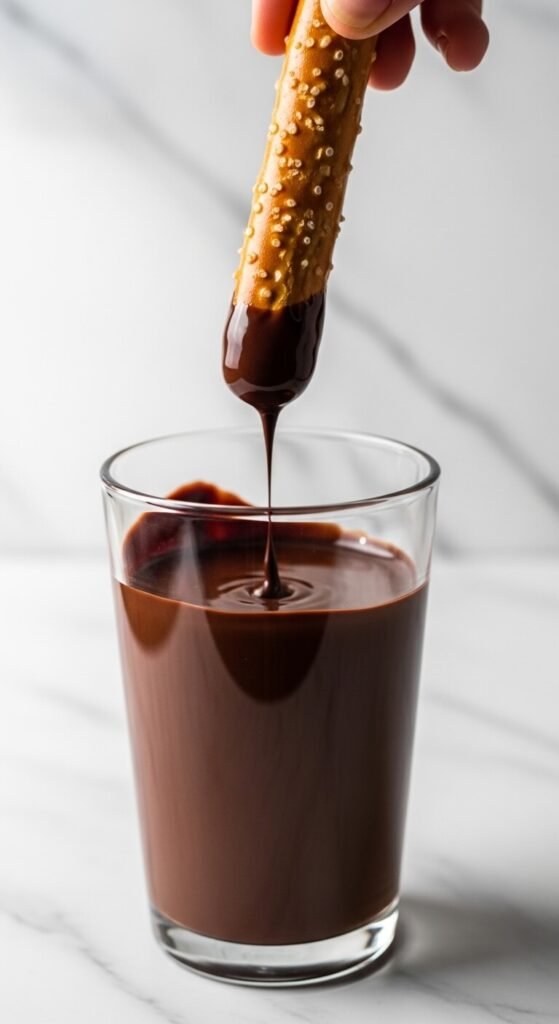
- Use a tall, narrow container for dipping rods, or a wide shallow bowl for twist pretzels. You want enough depth to submerge easily.
- Dip, tap, and shake gently to remove excess chocolate. Too thick a coating traps air and cracks as it sets.
- Lay flat immediately and add any sprinkles or toppings within the first 30 seconds before the chocolate skins over.
- Let set at room temperature — not in the fridge. Cold air introduces moisture and causes sugar bloom. A cool, dry room (around 65–68°F) is ideal.
Storing Them So They Stay Perfect
You made gorgeous pretzels — now keep them that way.
- Room temperature is your friend. Store in an airtight container at a cool room temp for up to two weeks.
- Skip the fridge entirely unless your kitchen is genuinely hot. Refrigerators introduce humidity, which triggers sugar bloom the moment the chocolate warms back up.
- Layer with parchment paper between rows so they don’t stick or scratch.
- Avoid plastic wrap directly on chocolate — it traps condensation right against the surface.
Fun Variations to Try
Once you’ve nailed the basics, the decorating possibilities are endless:
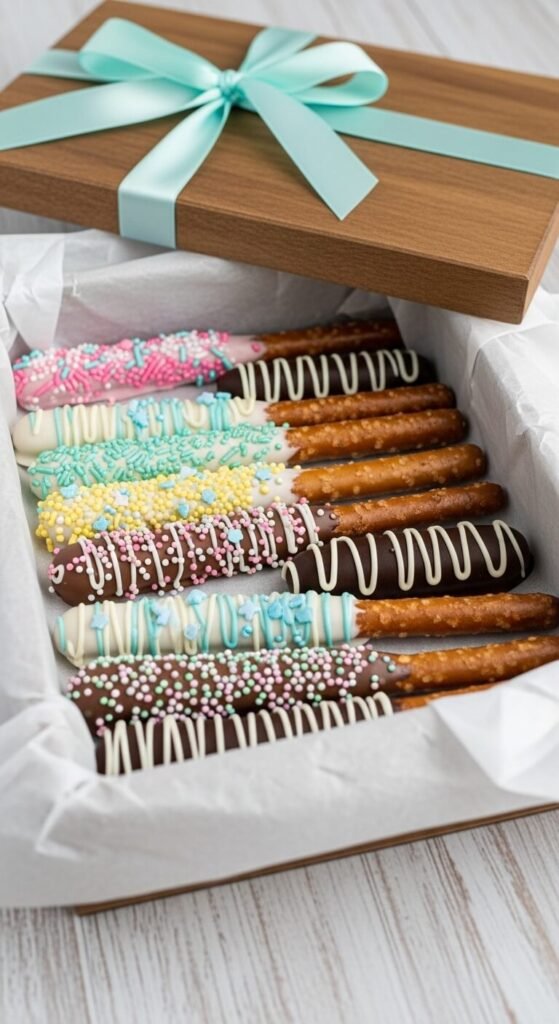
- Seasonal sprinkles for holidays — red and green for Christmas, pastels for Easter, orange and black for Halloween
- Drizzled contrasting chocolate — dark chocolate base with a white chocolate zigzag on top
- Sea salt finish — a pinch of flaky salt on dark chocolate is chef’s kiss
- Crushed toppings — roll in crushed graham crackers, freeze-dried strawberries, or toasted coconut right after dipping
Your New Go-To Treat Awaits
Chocolate covered pretzels that actually look as good as they taste aren’t out of reach — they just need the right chocolate, the right technique, and a little patience while they set. Skip the fridge, respect the temperature, and let the chocolate do its thing.
Save this article for your next baking session, share it with a friend who’s had the bloom struggle, and get dipping — your most beautiful batch yet is just a melt away. 🍫🥨