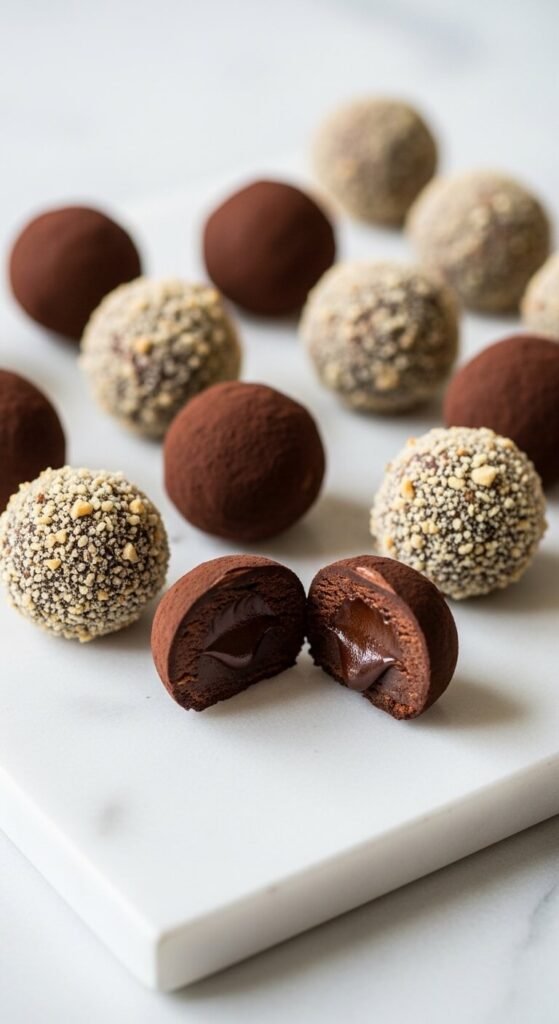
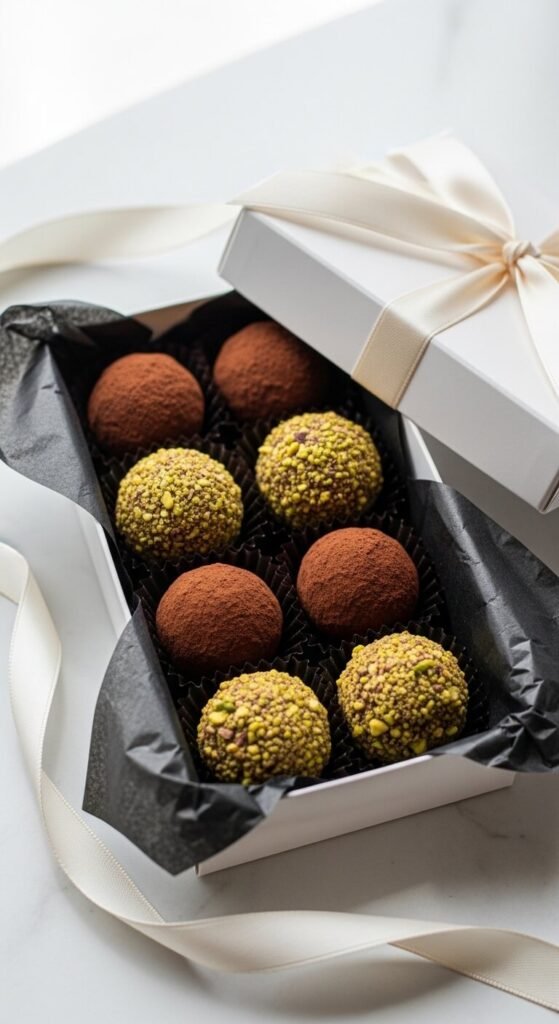
There’s something about a chocolate truffle that feels impossibly luxurious. The glossy shell. The way it yields to the slightest pressure and releases a dense, silky center that melts completely before you’ve even finished chewing. They’re the kind of confection that arrives in expensive gift boxes tied with ribbon — the kind people assume requires professional training, specialized equipment, and ingredients with French names on the label.
They don’t. What they require is good chocolate, heavy cream, and about 30 minutes of actual hands-on time. Everything else is just waiting for things to chill.
This guide walks you through the complete process — from making ganache to rolling and finishing — with every technique detail that separates truly professional-looking truffles from the ones that look homemade in a less flattering way.
Start With the Best Chocolate You Can Afford
Chocolate truffles have four ingredients at their core. When a recipe has four ingredients, every single one matters.
The classic ganache formula:
- 8 oz (225g) dark chocolate — 60% to 70% cacao, finely chopped
- ½ cup (120ml) heavy whipping cream
- 2 tablespoons unsalted butter — softened to room temperature
- 1 teaspoon pure vanilla extract — or your chosen flavoring
Chocolate selection is everything here:
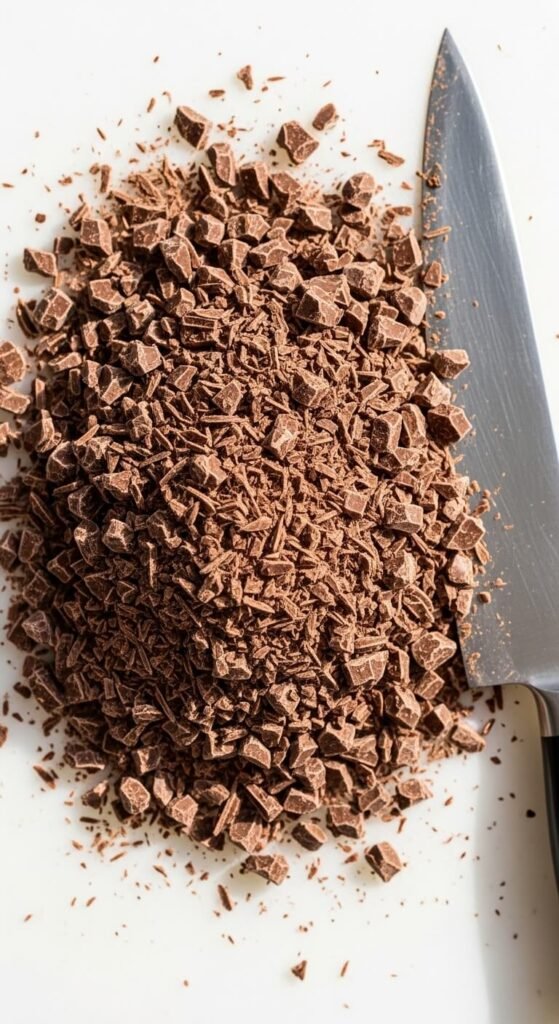
- Use a chocolate bar or baking chocolate, not chocolate chips. Chips contain stabilizers that prevent them from melting smoothly and the resulting ganache has a slightly grainy quality that professional ganache never does.
- Valrhona, Guittard, and Callebaut are the brands pastry chefs actually use and they’re widely available at specialty grocery stores and online for $6 to $12 per bar.
- Chop the chocolate very finely — pieces no larger than a pea. Smaller pieces melt faster and more evenly when the hot cream hits them, which produces a smoother emulsion.
Make the Ganache — The Heart of Every Truffle
Ganache sounds technical. It isn’t. It’s cream poured over chocolate, stirred until smooth, enriched with butter. That’s the whole thing. The technique is what matters.
Step by step:
- Place the finely chopped chocolate in a heatproof bowl. A glass or metal bowl works — just not plastic.
- Heat the heavy cream in a small saucepan over medium heat until it just begins to simmer. You’ll see small bubbles forming around the edges and steam rising from the surface. Do not boil it — boiled cream can separate the ganache.
- Pour the hot cream over the chopped chocolate all at once. Let it sit undisturbed for exactly 2 minutes. This resting period allows the heat to penetrate the chocolate before you start stirring.
- Stir slowly from the center outward using a rubber spatula. Start with small circles in the center of the bowl and gradually widen your strokes. The mixture will look broken and greasy at first — keep going. After 2 to 3 minutes of steady stirring, it will suddenly come together into a glossy, unified emulsion.
- Add the softened butter and vanilla. Stir until the butter is completely melted and incorporated. The ganache should be smooth, glossy, and pourable at this point.
- Cover the surface directly with plastic wrap — press it flat against the ganache — and refrigerate for 2 hours until firm enough to scoop and roll.
The Rolling Technique That Makes Them Look Professional
This is where most home truffle makers lose the plot. They scoop the ganache at the wrong temperature, they roll too slowly, and they end up with lopsided blobs instead of clean spheres.
The key details:
- The ganache should be cold but not rock hard when you scoop it. Press with a finger — it should leave a clean indent but not be squishy. If it’s too hard, let it sit at room temperature for 10 minutes.
- Use a melon baller or small cookie scoop for consistent sizing. Uniform truffles look professional. Varying sizes look amateur regardless of how well they’re finished.
- Work fast when rolling. Place a portion in your palm and roll in quick, circular motions. The heat of your hands melts the surface almost immediately — speed gives you a rounder shape before it softens too much.
- Place rolled truffles on a parchment-lined tray and refrigerate for 15 minutes before finishing. Re-chilled truffles hold their shape during coating.

Finishing Options That Elevate the Final Look
The coating is what makes a truffle look finished and feel complete in the mouth. Choose one of these classic options or mix and match across a batch:
Classic dry coatings — the easiest approach:
- Dutch-process cocoa powder — the most traditional finish, intensely dark and slightly bitter
- Finely chopped toasted nuts — hazelnuts, pistachios, and almonds all work beautifully
- Shredded coconut — toasted lightly in a dry pan for extra flavor and color
- Powdered freeze-dried raspberry — gives a stunning deep pink exterior with a tart flavor contrast
For chocolate-dipped truffles: Melt chocolate wafers or tempered chocolate in a narrow bowl. Drop each chilled truffle in, coat with a fork, tap off excess against the bowl rim, and slide onto parchment. Add a small finishing touch — a flake of sea salt, a dusting of gold luster powder, a thin drizzle of contrasting chocolate — before the coating sets.
Storage and Make-Ahead Notes
Chocolate truffles store beautifully, which makes them perfect for gifting and advance preparation.
- Refrigerator: Store in an airtight container between layers of parchment paper for up to two weeks
- Freezer: Freeze uncoated ganache balls for up to three months — thaw in the fridge overnight and coat just before serving
- Room temperature: Cocoa-dusted truffles can sit at cool room temperature for up to 48 hours — ideal for gift boxes and dessert tables
These Are Yours to Make Now
The gap between store-bought truffles and homemade ones — once you know this process — is mostly price and patience. The technique is accessible to anyone. The ingredients are available everywhere. The results are genuinely indistinguishable from what you’d find in a chocolate shop window.
Make a batch this weekend. Package them in a small box with tissue paper and you have a gift that costs $8 in ingredients and communicates something closer to priceless.
Save this recipe and come back to it every holiday season, every birthday, and every time someone tells you they love chocolate. That covers a lot of occasions.