Traditional fudge is one of the most unforgiving recipes in the candy world. Candy thermometer, precise sugar stages, the constant risk of crystallization, the nerve-wracking beating stage that can go wrong in a dozen different ways — all for a result that’s sometimes grainy, sometimes too soft, and occasionally just a sweet, sticky failure. Freezer fudge exists in an entirely different universe. No thermometer. No sugar stages. No timing anxiety. Just a handful of ingredients stirred together, poured into a pan, and frozen for 20 minutes until firm. The result is smooth, rich, deeply chocolatey, and completely indistinguishable from the kind of fudge that took three times the effort. Here’s exactly how to make it.
Why Freezer Fudge Is Genuinely Better
Traditional fudge relies on cooking sugar to a precise temperature, then beating it during cooling to create the fine sugar crystals that give it that distinctive smooth, dense texture. It’s a process that’s sensitive to humidity, altitude, and the slightest temperature variation. Freezer fudge bypasses all of that.
Instead of crystallized sugar, freezer fudge gets its structure from fat — specifically coconut oil or butter — which solidifies when chilled. The result is:
- Smoother than most traditional fudge — no risk of graininess from sugar crystallization
- Consistently firm — the freezer does the setting, so there’s no guessing whether it’s ready
- Faster by a significant margin — 20 minutes in the freezer versus hours of careful cooking and cooling
- More forgiving — almost any mistake can be fixed before it sets
The only trade-off is that freezer fudge needs to be stored in the freezer or refrigerator — it softens at room temperature more quickly than traditional fudge. At a party or gathering, serve it from a cold plate and it holds its shape beautifully.
The Classic Chocolate Freezer Fudge
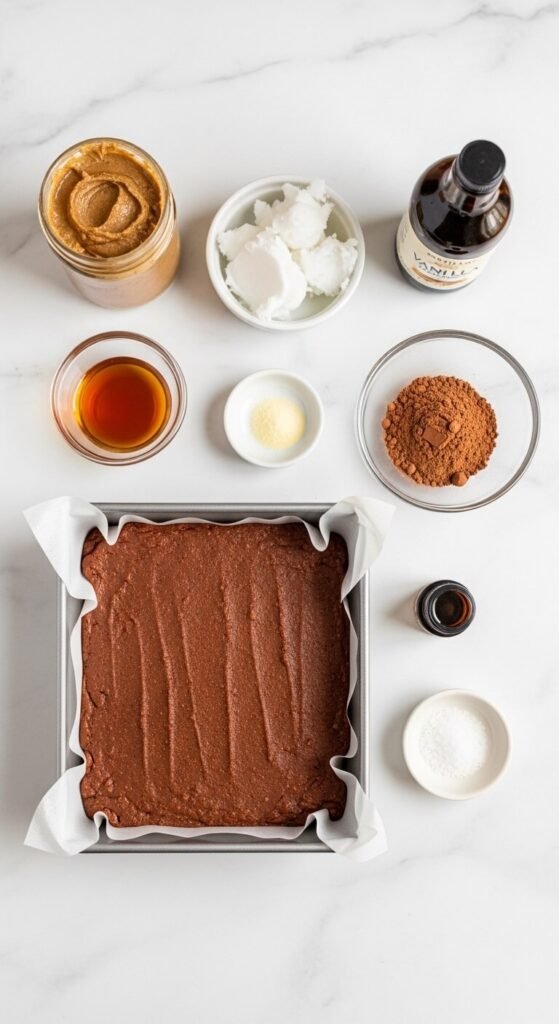
What you need (makes 16–20 pieces in an 8×8 pan):
- 1 cup (260g) nut butter — peanut butter, almond butter, or cashew butter all work. Use creamy, not natural-style (which separates). This is the structural base.
- ¼ cup (55g) coconut oil — solid at room temperature, liquid when warm. The key setting agent.
- 3 tablespoons pure maple syrup or honey — the sweetener. Adjust to taste.
- ½ cup (50g) unsweetened cocoa powder, sifted
- 1 teaspoon pure vanilla extract
- ¼ teaspoon salt — rounds out the chocolate and amplifies every other flavor
Optional finishing touches:
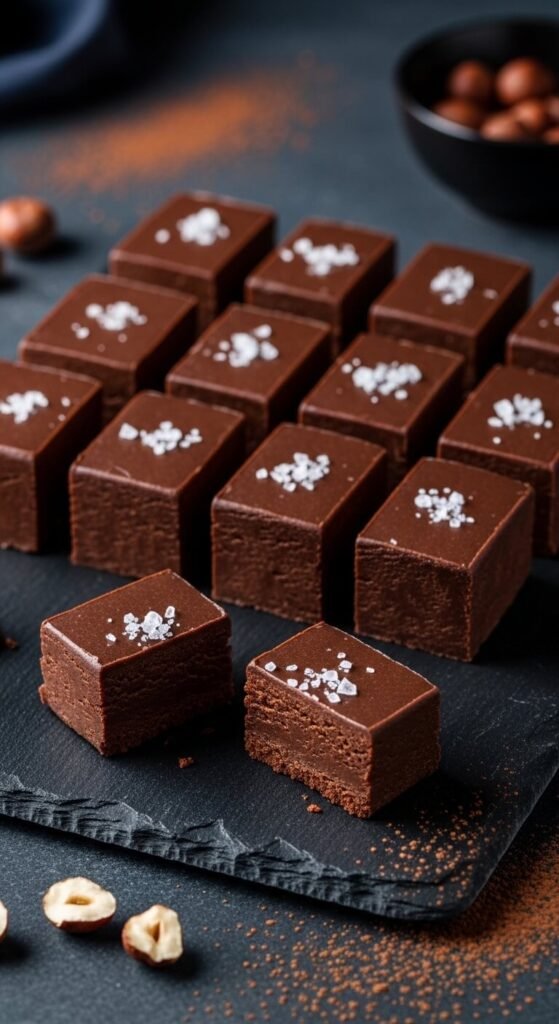
- Flaky sea salt scattered over the top before freezing
- Chopped roasted peanuts or hazelnuts pressed in
- A drizzle of melted white chocolate across the surface
- A layer of crushed graham crackers on the bottom of the pan for a chocolate fudge bar effect
Make the Fudge
This takes under 10 minutes of active time. Everything else is the freezer’s job.
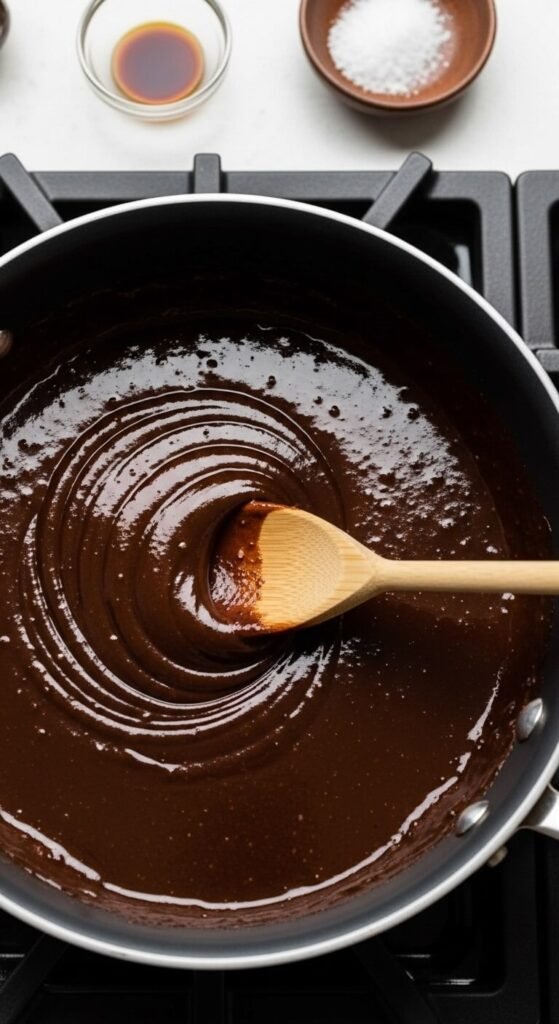
Step 1 — Melt and combine If your nut butter and coconut oil are solid, warm them together in a microwave-safe bowl in 30-second intervals, stirring between each, until both are completely liquid and smooth. You can also do this in a small saucepan over low heat — whichever is easier.
Step 2 — Add the remaining ingredients Add maple syrup, vanilla, salt, and sifted cocoa powder to the warm nut butter mixture. Stir firmly until the cocoa is completely incorporated and the mixture is smooth, glossy, and uniform. No streaks of cocoa, no lumps of nut butter — fully emulsified and silky.
Taste here. This is the moment to adjust everything:
- Not sweet enough? Add another tablespoon of maple syrup.
- Want more chocolate intensity? Add a tablespoon of extra cocoa.
- Want more depth? Add a pinch of espresso powder — it won’t taste like coffee but will make the chocolate flavor dramatically more complex.
Step 3 — Pour and smooth Line your 8×8 inch (20×20cm) pan with parchment paper, leaving overhang on the sides. Pour the fudge mixture in and spread evenly to the edges using an offset spatula or the back of a spoon. The layer should be about ¾ to 1 inch thick — thick enough to slice into proper pieces but not so thick that it takes too long to set.
Add any toppings now — flaky sea salt, chopped nuts, a white chocolate drizzle — while the surface is still liquid so everything adheres as it freezes.
Step 4 — Freeze Place in the freezer for 20 minutes until completely firm. The fudge is ready when it holds its shape when you press it gently and doesn’t leave a fingerprint.
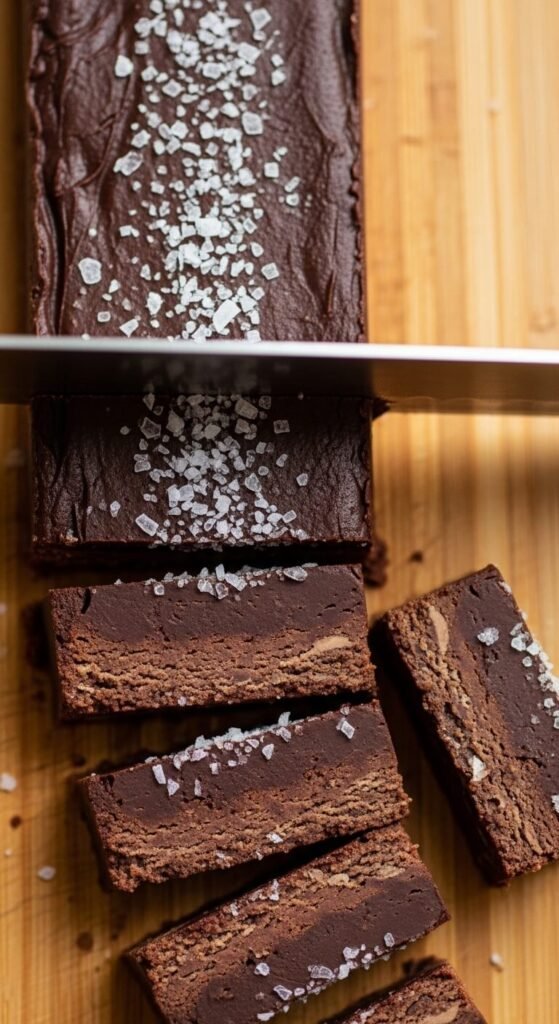
Cut Clean Pieces Every Time
Cold fudge cuts cleanly. This is one area where temperature really matters.
- Lift the entire fudge slab from the pan using the parchment overhang and place on a cutting board
- Let it sit at room temperature for 2 minutes — just enough to take the edge off without softening. Rock-solid frozen fudge crumbles rather than cuts.
- Use a sharp chef’s knife warmed under hot water and dried completely. One firm downward press per cut — no sawing.
- Wipe the blade clean between every cut for sharp, clean edges on every piece.
Five Flavor Variations Worth Making
The classic chocolate version is just the beginning. The formula adapts to almost any flavor direction:
Peanut Butter Banana Replace cocoa powder with ½ cup of mashed ripe banana. Use peanut butter as the base and stir in 1 teaspoon of cinnamon. Top with banana chips before freezing.
Mocha Almond Add 1 tablespoon of instant espresso dissolved in 1 teaspoon hot water to the classic recipe. Press whole roasted almonds into the surface before freezing.
Mint Chocolate Add ½ teaspoon of pure peppermint extract to the classic recipe. Top with crushed candy canes for a holiday variation.
White Chocolate Coconut Replace cocoa with 3 tablespoons of coconut flour and swap maple syrup for coconut cream. Top with toasted shredded coconut and a white chocolate drizzle.
Dark Chocolate Raspberry Stir in 2 tablespoons of freeze-dried raspberry powder and top with whole freeze-dried raspberries before freezing. Tart, fruity, and visually stunning.
Storage Tips
- Freezer: Airtight container for up to 3 months. Stack pieces between parchment sheets so they don’t fuse together.
- Refrigerator: Up to 2 weeks. The fudge will be slightly softer but completely sliceable.
- Room temperature: Serve within 20–30 minutes — it softens but stays intact for long enough to enjoy at a party or gathering.
The Takeaway
Freezer fudge is the answer to every fudge craving that traditional fudge is too complicated to satisfy. Silky, rich, deeply chocolatey, ready in 30 minutes, and stored in your freezer for whenever the moment calls for something indulgent.
Save this recipe before the next holiday season, gift exchange, or late-night craving — because the freezer fudge you make tonight will be ready before you’ve finished cleaning up the bowl. 🍫❄️✨