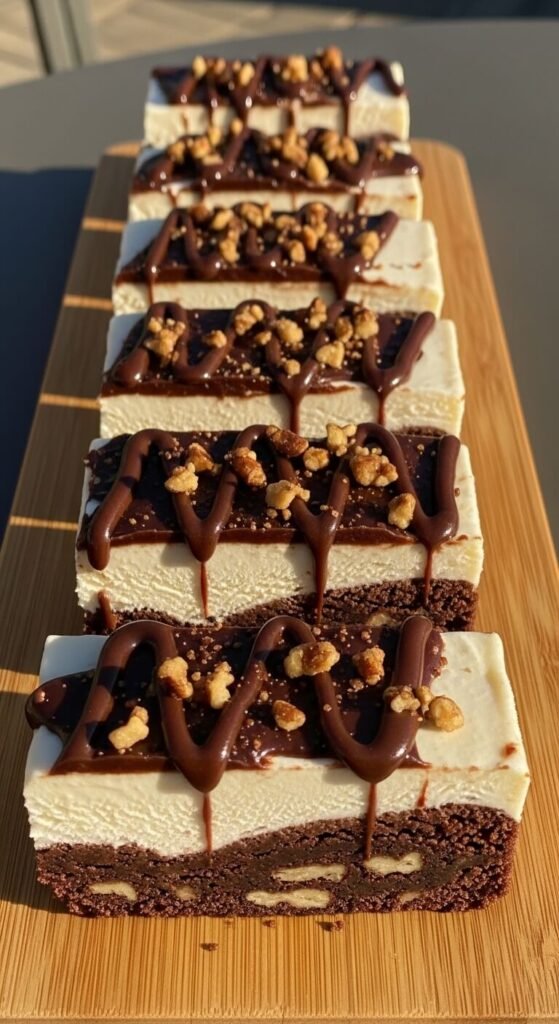
The best kind of dessert is the kind that’s already done when you need it. No last-minute baking, no scrambling for ingredients, no apologising because something didn’t set in time. Frozen Dessert Bars are the ultimate make-ahead treat — layered, creamy, crowd-pleasing, and completely at home in your freezer for up to a month, waiting patiently for the moment you need something spectacular. Make them on Sunday. Pull them out Friday night. Take all the credit.
One afternoon of work. Weeks of ready-to-go dessert. Let’s build something great.
Why Frozen Dessert Bars Are the Smartest Thing in Your Freezer
Make-ahead desserts are a category unto themselves — and frozen bars are the undisputed champion of the format. Here’s why they earn their freezer real estate:
- They’re entirely hands-off after the initial prep — freeze them, forget them, and they’re ready the moment you need them.
- They feed a crowd effortlessly — a single 9×13-inch pan yields twelve generous bars with zero last-minute effort.
- The texture actually improves with time — a day or two in the freezer lets every layer firm up and meld into something more cohesive and satisfying than they are fresh.
- They’re infinitely customisable — swap the base, change the filling, vary the toppings. The formula adapts to every preference and occasion.
- They travel surprisingly well — wrapped individually, they hold their shape for longer than you’d expect, making them perfect for summer gatherings, picnics, and potlucks.
These are the dessert you bring to every gathering — and the reason people start texting you in advance to make sure you’re bringing them again.
The Formula: Three Layers That Always Work
Like all great layered frozen desserts, these bars follow a reliable three-part structure that you can riff on endlessly once you understand how each layer functions.
Layer 1 — The Base: Something firm, slightly crunchy, and structural. This layer anchors everything above it and provides textural contrast to the creamy middle. Think: pressed cookie crumbs, graham crackers, brownie-style chocolate bases, or a nut and date crust.
Layer 2 — The Frozen Filling: The star of the show. Softened ice cream, frozen yogurt, no-churn cream, or a blended frozen fruit layer — thick, creamy, and deeply flavourful. This is where personality lives.
Layer 3 — The Topping: The finishing layer that sets firm over the filling and makes the first visual impression. Hot fudge, caramel, melted chocolate, whipped cream that firms up when frozen, or a streusel pressed into the surface before freezing.
Master the formula once and you’ll never run out of variations.
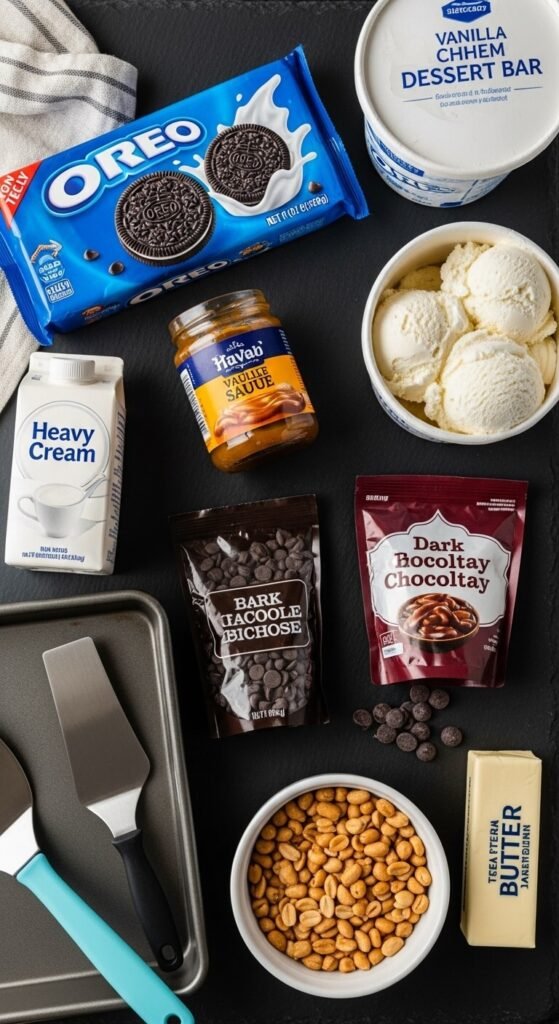
What You’ll Need
This is the classic version — a buttery Oreo base, a vanilla and caramel ice cream center, and a dark chocolate fudge top. Reliable, beloved, and genuinely stunning when sliced.
For the Oreo cookie base:
- 24 Oreo cookies, finely crushed (filling included)
- 5 tablespoons unsalted butter, melted
- Pinch of sea salt
For the frozen filling:
- 1.5 quarts good-quality vanilla ice cream, softened at room temperature for 15 minutes
- ⅓ cup caramel sauce, swirled through the softened ice cream
- 1 teaspoon vanilla extract
For the chocolate fudge top:
- 1 cup dark chocolate chips
- ½ cup heavy cream
- 1 tablespoon unsalted butter
- Pinch of sea salt
For garnish:
- ½ cup salted roasted peanuts or pecans, roughly chopped
- Extra caramel drizzle
- Flaky sea salt
Step 1: Make and Press the Base
- Crush the Oreos into fine crumbs using a food processor, or place in a zip-lock bag and roll firmly with a rolling pin until no large chunks remain.
- Combine with melted butter and sea salt, stirring until every crumb is coated and the mixture holds together when pressed.
- Line a 9×13-inch baking pan with two sheets of parchment paper — one in each direction — leaving overhang on all four sides for easy unmoulding later.
- Press the Oreo mixture firmly and evenly into the base of the pan using the flat bottom of a glass or measuring cup.
- Freeze for 20 minutes until completely firm before adding the ice cream layer.
A firmly pressed, well-chilled base is what gives your bars structure. Don’t rush this step — it holds everything together.
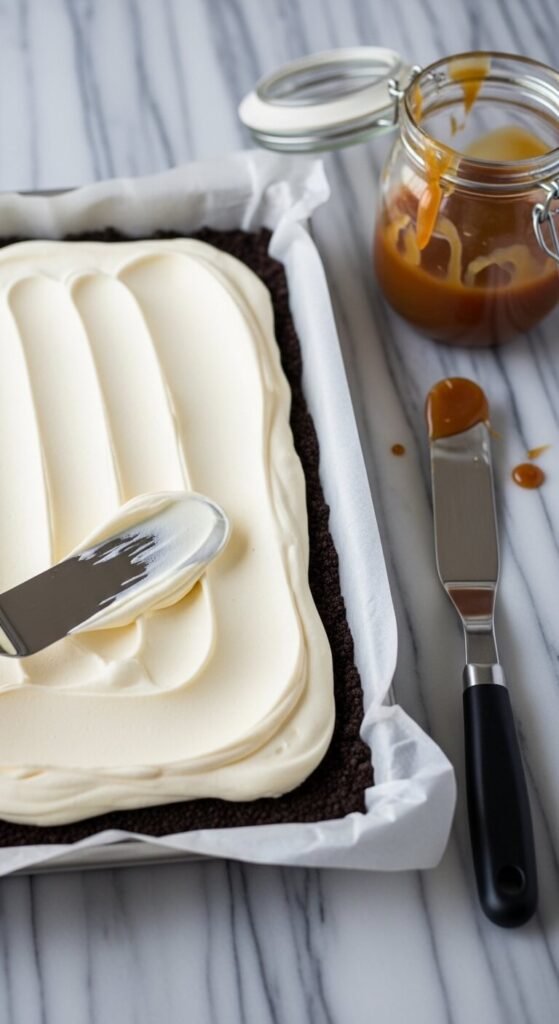
Step 2: Layer the Frozen Filling
Take the ice cream out of the freezer 15 minutes before you need it. You want it soft enough to spread easily but not so melted that it’s liquid — the consistency of very thick, scoopable soft-serve is ideal.
- Spoon the softened ice cream over the chilled base in large dollops.
- Use an offset spatula or the back of a large spoon to spread it into a smooth, even layer.
- Drizzle caramel sauce over the surface and use a knife to swirl it through the top inch of ice cream in lazy figure-eight motions.
- Press a piece of parchment directly onto the surface of the ice cream to prevent ice crystals forming.
- Freeze for a minimum of 3–4 hours, or overnight, until completely solid before adding the chocolate top.
Step 3: Make the Fudge Topping
Once the ice cream layer is rock solid, it’s time for the chocolate crown.
- Heat the heavy cream in a small saucepan over medium heat until it just begins to simmer — don’t let it boil.
- Pour over the dark chocolate chips and butter in a heatproof bowl.
- Let it sit undisturbed for 2 minutes, then stir from the center outward until completely smooth, glossy, and unified.
- Stir in the sea salt and let the ganache cool to room temperature — about 10–15 minutes. It should be pourable but no longer warm.
Do not pour hot ganache onto frozen ice cream. The temperature difference will melt the top of the ice cream layer and create a greasy, uneven surface. Room temperature ganache is the move.
- Pour the cooled ganache over the frozen ice cream layer and spread into an even coat.
- Immediately scatter the chopped nuts over the surface and press them in very lightly.
- Drizzle extra caramel over the top and finish with a pinch of flaky sea salt.
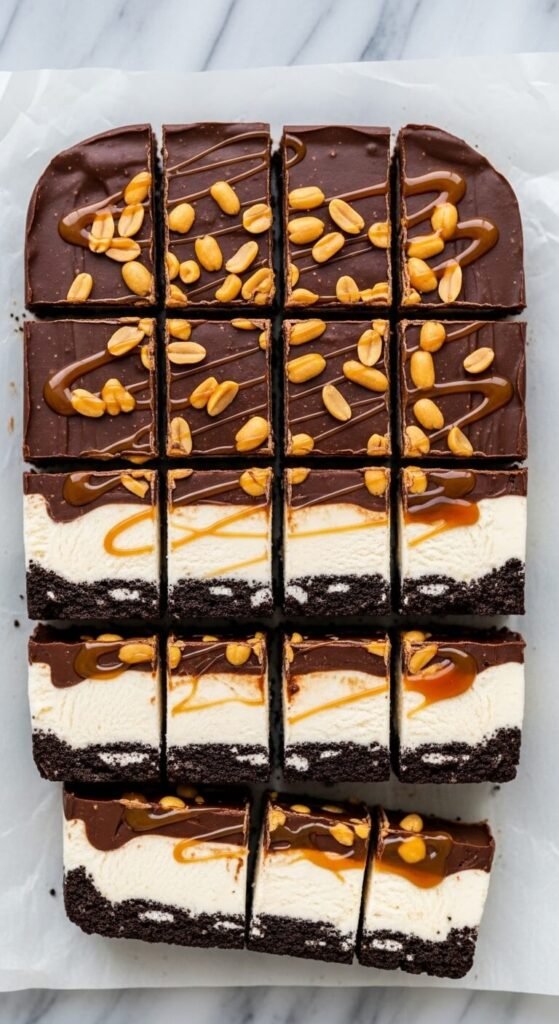
Step 4: Final Freeze and the Perfect Slice
- Return the pan to the freezer uncovered for 30 minutes until the fudge top is firm, then cover with plastic wrap or foil.
- Freeze for at least another 2 hours — or up to four weeks — until ready to serve.
When it’s time to slice:
- Let the pan sit at room temperature for 5–8 minutes — just enough to take the deep-freeze edge off without softening.
- Lift the slab out using the parchment overhang and place on a cutting board.
- Run a large sharp knife under hot water, dry it, and cut with one firm downward press.
- Wipe and rewarm the blade between every cut for clean, sharp edges.
Make-Ahead Variations to Try All Year
- Strawberry Shortcake Bars — golden graham cracker base, strawberry ice cream filling, white chocolate top, crushed freeze-dried strawberries scattered over the surface.
- Peanut Butter Chocolate Bars — chocolate cookie base, peanut butter ice cream swirled with hot fudge, dark chocolate ganache top pressed with chopped Reese’s pieces.
- Tropical Coconut Bars — coconut biscuit base, mango sorbet and coconut cream filling, white chocolate top with toasted coconut flakes.
- Mint Chip Bars — Oreo base, mint chocolate chip ice cream, dark chocolate ganache top finished with crushed candy cane during the holidays.
- Salted Caramel Pretzel Bars — crushed pretzel base, caramel ice cream filling, milk chocolate top pressed with whole mini pretzels and flaky salt.
Tips for Make-Ahead Success
- Label and date your pan before it goes in the freezer — future you will be grateful.
- Wrap individual bars in plastic wrap after slicing for grab-and-go portions that keep for up to four weeks.
- Let bars temper briefly before serving — 5 minutes at room temperature makes slicing cleaner and eating infinitely better.
- Use full-fat ice cream — lower-fat versions contain more water and freeze icier, which affects both texture and sliceability.
- The deeper the pan, the more dramatic the layers — a deeper 9×9-inch pan makes fewer bars but each one is a showstopper cross-section.
The Dessert That’s Always Ready When You Are
Frozen Dessert Bars solve the most persistent problem in entertaining: the dessert that requires your full attention right when you most want to be enjoying yourself. Make them days ahead, stash them in the freezer, and pull them out at exactly the right moment — perfectly set, flawlessly layered, and completely stress-free.
That’s not just a good recipe. That’s a good strategy.
Save this recipe for later, share it with someone who loves a make-ahead win, and fill your freezer this weekend — because the best dessert is always the one that’s already done. 🍫❄️✨