The moment you eat your first homemade frozen peanut butter cup, the store-bought version becomes permanently disappointing. Not because the original is bad — it is genuinely one of the most successful flavor combinations in the history of candy — but because the homemade version is so much better in every specific way. The chocolate is real and snapping-dark. The peanut butter filling is dense, properly salty, and substantial rather than a thin film inside a candy shell. And the whole thing comes from your own freezer at whatever size you want, with whatever chocolate you choose, completely customized to your preference. Making them takes about 20 minutes of active work and costs roughly $6 for a batch of twelve. The results are something people genuinely refuse to believe are homemade until they watch you make them.
Here is the complete recipe — ingredients, ratios, technique, and the specific details that make homemade better than any packaged version.
The Ingredients That Make the Difference
Makes 12 standard cups or 24 mini cups
For the chocolate shell:
- 2 cups dark chocolate chips or chopped dark chocolate bar (60–70% cocoa) — use real chocolate, not chocolate-flavored coating. The snap of a high-cocoa chocolate shell is one of the defining qualities of a great peanut butter cup.
- 1 tablespoon coconut oil — thins the melted chocolate slightly for easier pouring and produces a shell with a better snap when frozen
For the peanut butter filling:
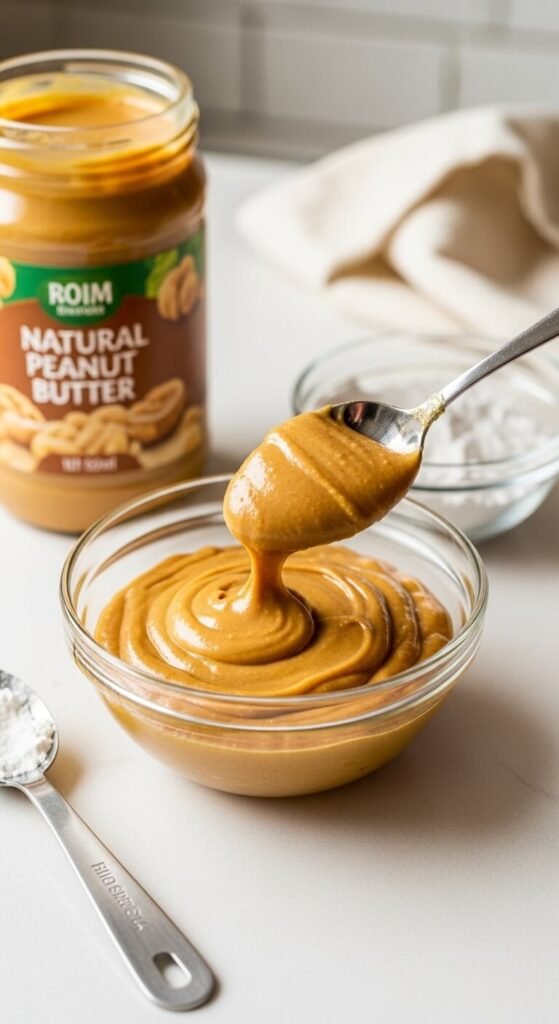
- 1 cup natural peanut butter — the only type that works properly. Commercial peanut butter (Jif, Skippy) contains palm oil and added sugar that makes the filling too soft and too sweet. Natural peanut butter produces a filling with genuine peanut flavor and the right texture.
- 3 tablespoons powdered sugar — provides sweetness without adding moisture
- 2 tablespoons melted coconut oil — helps the filling set firm in the freezer
- ½ teaspoon vanilla extract
- ½ teaspoon fine sea salt — this is what makes homemade better than store-bought. The right amount of salt in the filling is the single difference most people taste immediately.
Finishing:
- Flaky sea salt (Maldon) for the top — optional but genuinely elevating
Melt the Chocolate Properly
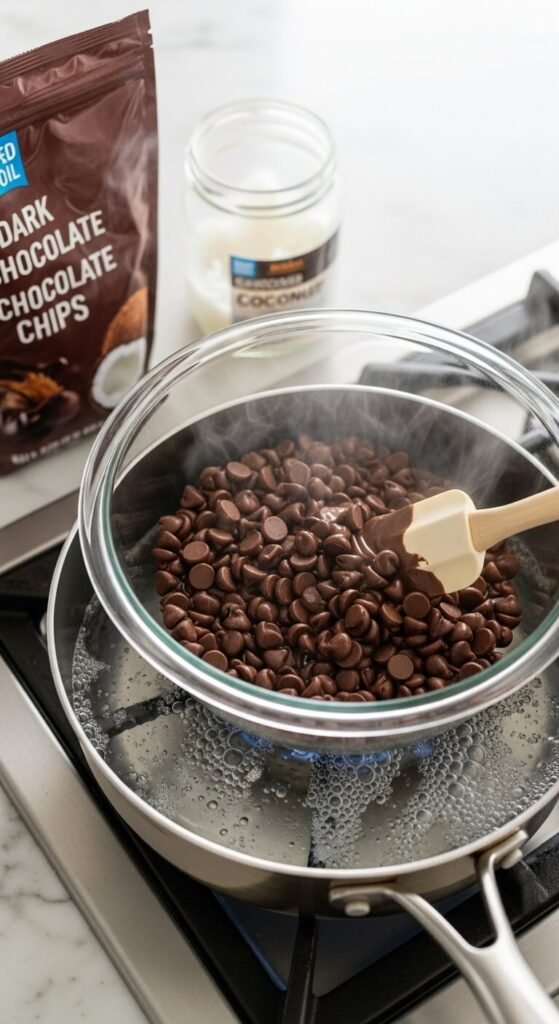
Chocolate seizes — turns grainy and unusable — when it overheats or when any water gets into the bowl.
The safest method — double boiler:
- Fill a saucepan with two inches of water and bring to a gentle simmer
- Place a heatproof bowl on top — the bottom of the bowl should not touch the water
- Add chocolate chips and coconut oil to the bowl
- Stir slowly until just melted and smooth — remove from heat the moment it is fully liquid
- Let cool for five minutes before using — too-hot chocolate takes longer to set in the molds
Microwave method (if you prefer):
Microwave in 30-second intervals at 50% power, stirring between each interval. The 50% power setting prevents overheating. Three intervals of 30 seconds is usually sufficient.
Make the Peanut Butter Filling
Stir together the peanut butter, powdered sugar, melted coconut oil, vanilla, and salt until completely smooth.
The filling should be thick enough to hold a shape when pressed but soft enough to spread with a spoon. If it feels too thin, add an extra tablespoon of powdered sugar. If it feels too stiff, add a teaspoon of coconut oil.
Taste the filling before assembling. Adjust the salt level now — it is almost impossible to add more after the cups are assembled. The filling should taste slightly saltier than you expect a dessert filling to taste — the chocolate shell will balance it significantly.
Assemble the Cups: Bottom Layer, Filling, Top Layer
Use a silicone muffin tray for the easiest release — the cups pop out cleanly without any sticking. A standard metal muffin tin lined with paper cases works equally well.
The assembly process:
- Bottom chocolate layer: Spoon one tablespoon of melted chocolate into each cup and tilt to coat the bottom evenly. Freeze for ten minutes until the base is fully set.
- Peanut butter layer: Add one heaped tablespoon of filling to each cup, pressing down gently with the back of a spoon to create an even, flat disc. Leave a small border of space around the edge so the top chocolate layer can seal around the filling. Freeze for ten minutes.
- Top chocolate layer: Spoon one tablespoon of chocolate over each filling disc, spreading to the edges to seal the filling completely inside. Tap the tray gently on the counter two or three times to level the chocolate surface.
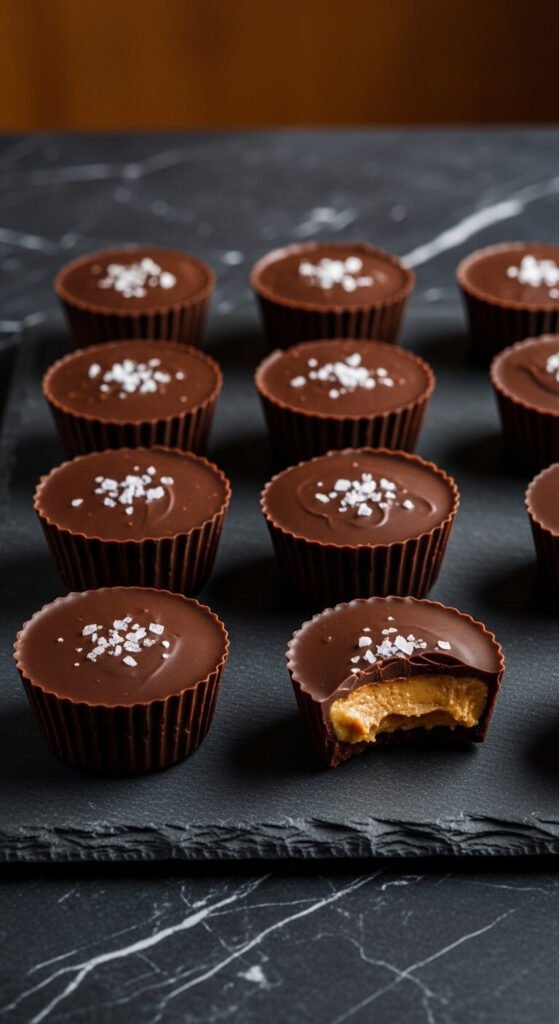
- Salt finish: Immediately press two or three Maldon sea salt flakes onto the top of each cup before the chocolate begins to set.
- Final freeze: Freeze for a minimum of two hours until completely solid.
The Detail That Makes Them Better Than Store-Bought
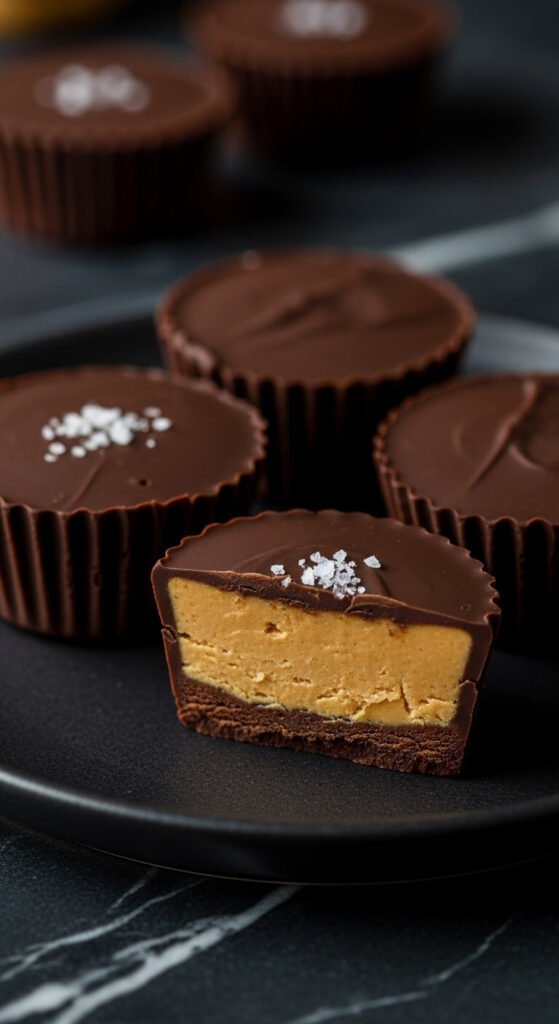
Here is the specific quality that separates homemade from every packaged version: the thickness of the peanut butter filling.
Store-bought peanut butter cups have a filling-to-chocolate ratio that is heavily weighted toward chocolate — the filling is a thin layer surrounded by a thick candy shell. Homemade cups reverse that ratio. The filling takes up approximately half the cup. The chocolate shells are thin and snapping rather than thick and waxy.
That ratio — and the real sea salt in the filling — is what makes someone take a bite, pause, and say these are better than the real thing.
Storing and Serving
Keep the cups in the freezer in a sealed container for up to six weeks — they genuinely last that long, though they rarely need to.
Serve directly from the freezer. Let them sit at room temperature for two minutes if you prefer the filling slightly softer. Do not refrigerate — refrigerated peanut butter cups lose the snap of the chocolate shell and become waxy.
Save this recipe and pin it — because once you make your own frozen peanut butter cups, buying them at the store feels like a step backward you will not want to take again.