Imagine having homemade cookies ready in under 15 minutes — any time, any day, with zero planning required. No mixer, no measuring, no scrambling to soften butter because someone unexpected dropped by. That’s the quiet superpower of icebox cookies. You make the dough once, shape it into a log, wrap it tightly, and tuck it in the freezer. Then, whenever the craving — or the company — arrives, you pull out the log, slice a few rounds, bake them, and have warm, freshly baked cookies on the table before anyone has finished their first cup of tea. It’s the most practical cookie technique you’ll ever learn. Here’s how to do it perfectly.
What Makes Icebox Cookie Dough Different
Not every cookie dough is suited to the icebox treatment. Icebox cookies — sometimes called refrigerator cookies or slice-and-bake cookies — use a specific style of dough that’s stiff enough to hold its cylindrical shape under pressure, slices cleanly without crumbling or distorting, and bakes into a consistently crisp, tender round every time.
The key characteristics of good icebox cookie dough:
- Higher butter ratio — more butter than a typical drop cookie makes the dough pliable enough to roll into a tight log without cracking
- Lower liquid content — no eggs or only egg yolks; minimal liquid keeps the dough firm and sliceable
- Fine dry ingredients — no chunky add-ins in the base dough that would prevent clean slicing. Chocolate chips, nuts, and dried fruit are added carefully and in moderation.
- Chill time baked in — the dough needs the cold to firm up before slicing. This isn’t a shortcut recipe — it’s a make-ahead one. The payoff is enormous.
The Master Icebox Cookie Dough
This is your foundation recipe — classic, buttery, and endlessly adaptable. Learn this and you have the base for dozens of variations.
What you need (makes about 40 cookies):
- 1 cup (225g) unsalted butter, softened to room temperature
- ¾ cup (150g) granulated sugar
- 1 large egg yolk — just the yolk keeps the dough firm
- 1 teaspoon pure vanilla extract
- 2 cups (250g) all-purpose flour, spooned and leveled
- ¼ teaspoon salt
How to make it:
- Beat the softened butter and sugar together until pale and fluffy — about 3 minutes with an electric mixer or 5 minutes by hand
- Add the egg yolk and vanilla and beat until fully incorporated
- Add flour and salt all at once and mix on low speed until the dough just comes together — it will look crumbly at first, but keep mixing. Stop as soon as it forms a cohesive dough.
- Turn the dough out onto a lightly floured surface and divide into two equal portions

How to Shape and Wrap the Log
This is the step that makes or breaks icebox cookies — a tightly, evenly shaped log means uniform rounds that bake consistently.
The rolling method:
- Place one portion of dough on a large sheet of parchment paper or plastic wrap
- Shape it roughly into a log with your hands — aim for about 1½ to 2 inches (4–5cm) in diameter
- Roll the parchment around the log and twist the ends tightly, like a candy wrapper
- Roll the wrapped log back and forth on the counter with firm, even pressure — this compacts and evens out the diameter along the full length
- Twist the ends tighter and refrigerate for a minimum of 2 hours, or freeze for up to 3 months
Pro shaping tips:
- Use a ruler to check the diameter if you want perfectly uniform cookies
- If the dough feels too soft to roll cleanly, refrigerate it for 15 minutes first to firm slightly
- Label your frozen logs with the flavor and date — future you will be very grateful
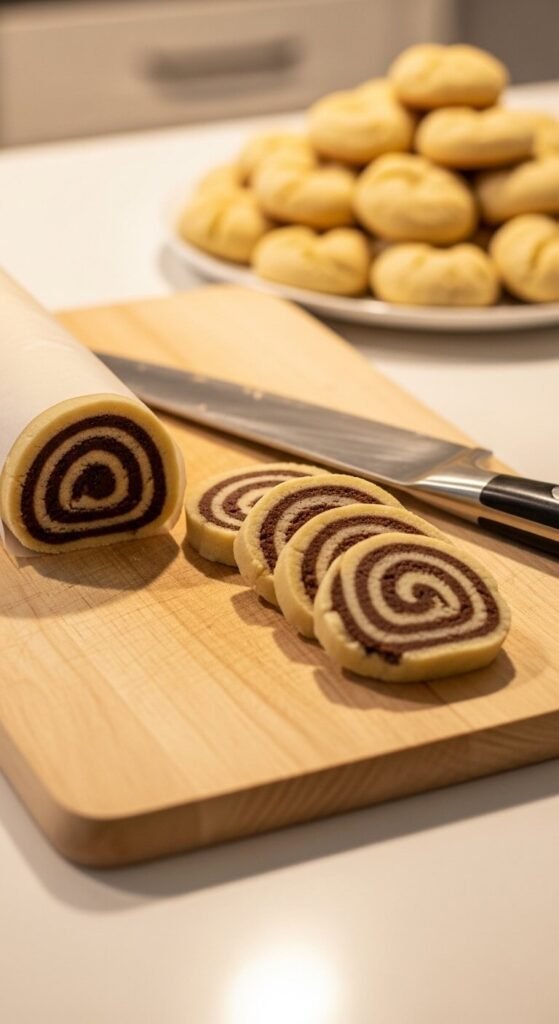
How to Slice and Bake
When you’re ready to bake, the process couldn’t be simpler.
- Preheat your oven to 350°F (175°C). Line a baking sheet with parchment.
- Remove the log from the fridge or freezer. If frozen, let it sit at room temperature for 10 minutes — just enough to take the edge off without fully thawing.
- Using a sharp chef’s knife, slice rounds ¼ inch (6mm) thick using a single decisive downward cut rather than a sawing motion. A sawing motion distorts the round shape.
- Arrange on the prepared baking sheet about 1 inch apart — they spread minimally.
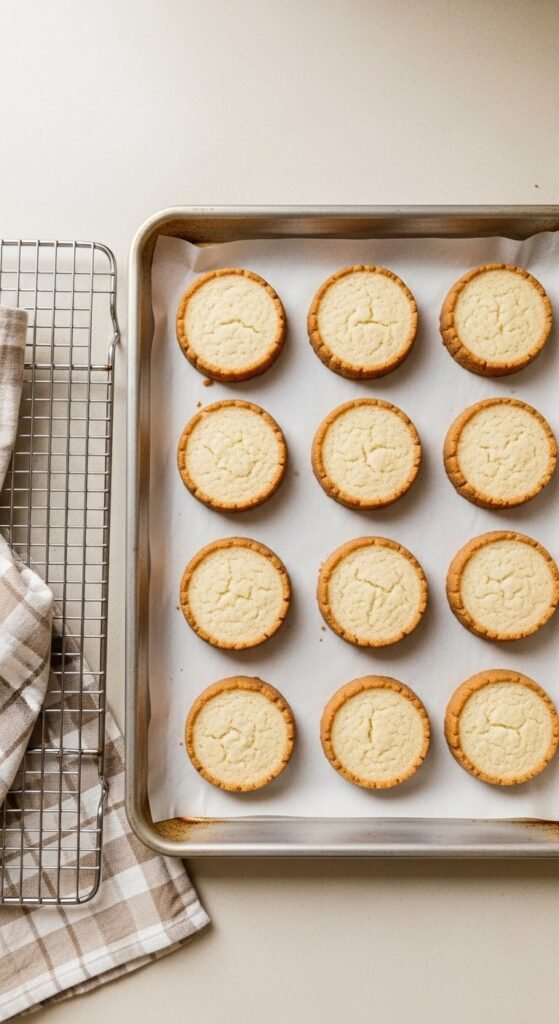
- Bake for 10–12 minutes until the edges are just turning golden. The centers will look slightly underdone — that’s correct. They firm up as they cool.
- Cool on the baking sheet for 5 minutes before transferring.
From freezer to cookie: You can slice and bake frozen dough logs without thawing — just add 2 extra minutes to the bake time. This is the ultimate “cookies in fifteen minutes from nothing” move.
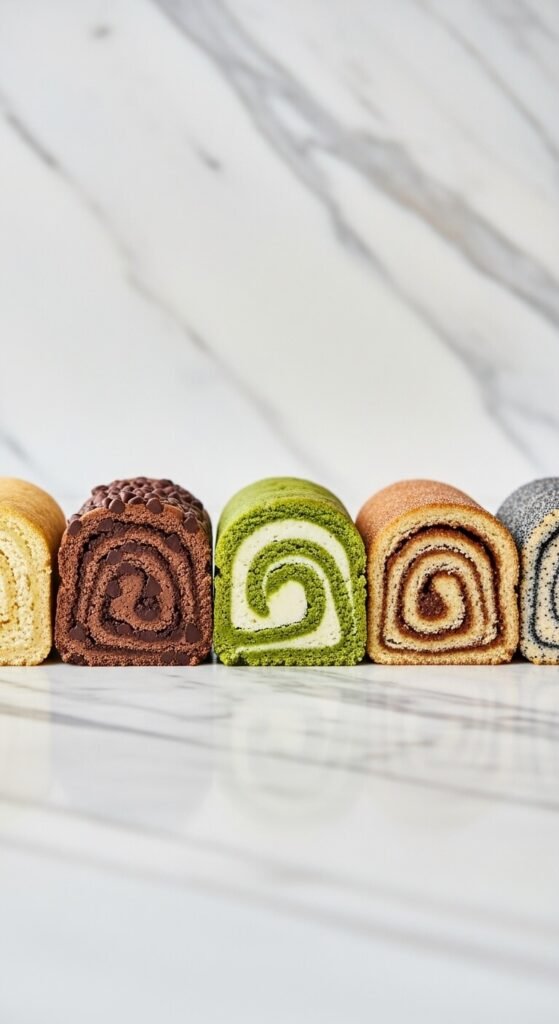
Five Flavor Variations to Keep in Your Freezer
Once you have the master dough, the variations are as simple as adding ingredients before you roll the log. Always mix add-ins in gently by hand to avoid overworking the dough.
1. Brown Butter Chocolate Chip Brown the butter first and let it resolidify before creaming. Fold in ½ cup of mini chocolate chips after mixing the dough. The nuttiness of the browned butter is extraordinary.
2. Lemon Poppy Seed Add the zest of two lemons and 2 tablespoons of poppy seeds to the base dough. Finish with a dip of the baked cookies in lemon glaze once cooled.
3. Espresso Walnut Add 1 tablespoon of instant espresso powder dissolved in the vanilla, and fold in ⅓ cup of finely chopped walnuts. Sophisticated and deeply flavored.
4. Cinnamon Sugar Swirl After mixing, roll the dough flat into a rectangle, brush with melted butter, and sprinkle generously with cinnamon sugar. Roll tightly into a log — the cross-section reveals a beautiful swirl.
5. Matcha White Chocolate Add 2 tablespoons of culinary-grade matcha powder to the flour and fold in ½ cup of white chocolate chips. The green color is visually stunning once sliced.
The Freezer Strategy That Changes Everything
Here’s the move that makes icebox cookies genuinely life-changing: make multiple flavors in one session and freeze all of them.
One hour of work on a Sunday afternoon can stock your freezer with three or four different cookie log flavors. Then for the next three months, fresh warm cookies are genuinely 15 minutes away — any time, any occasion, any unexpected guest.
Keep a small sticky note on each log listing the flavor, the bake temperature, and the time. That’s it. The rest takes care of itself.
The Takeaway
Icebox cookies are the most quietly brilliant technique in home baking — make once, enjoy for months, bake only what you need exactly when you need it.
Save this recipe and make a double batch this weekend — keep one log in the fridge for this week and two in the freezer for every moment between now and whenever cookies are called for. Which, in most households, is basically always. 🍪✨