Classic French mousse uses egg whites for its airy, cloud-like texture — but egg-free mousse made with whipped cream and cream cheese is not a compromise. It is a different and, many people would argue, better version of the same dessert. It is safer to eat (no raw egg concerns), quicker to make (no whipping egg whites to stiff peaks), easier to get right on the first attempt, and sets more reliably in the fridge without collapsing or weeping liquid. The flavor is richer, the texture is silkier, and it holds its shape cleanly for up to three days — which a traditional egg-white mousse simply does not. This is the mousse that non-bakers can make confidently, that families with young children can serve without hesitation, and that tastes genuinely elegant regardless of the occasion it is served at.
Here is everything you need to know to make egg-free mousse that is genuinely light, genuinely fluffy, and genuinely good.
The Two Ingredients Doing the Heavy Lifting
Egg-free mousse relies on two specific ingredients working together — and understanding what each one contributes explains why this version works as well as it does.
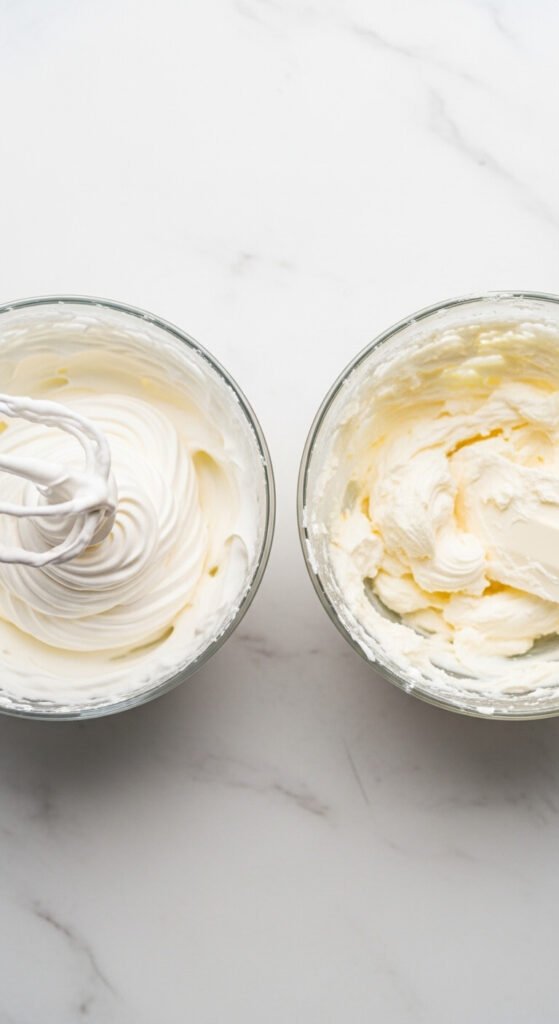
Heavy whipping cream (at least 36% fat):
This is the structure of the mousse. When whipped to stiff peaks, the fat in the cream traps air in a stable foam that holds its shape when chilled. The higher the fat content, the more air is trapped and the more stable the foam.
- Use the highest-fat cream available — labeled “heavy whipping cream” or “double cream” depending on the country
- The cream and the bowl should be cold before whipping — refrigerate the bowl for ten minutes if your kitchen is warm
Full-fat cream cheese (softened to room temperature):
This is the body of the mousse. It provides the silky, slightly tangy richness that prevents egg-free mousse from tasting like sweetened whipped cream, adds structural stability so the mousse holds its shape after chilling, and acts as the base into which flavoring ingredients are stirred.
- Full-fat only — reduced-fat cream cheese contains more water and produces a thinner, less stable mousse
- Room temperature only — cold cream cheese creates lumps that no amount of folding will eliminate
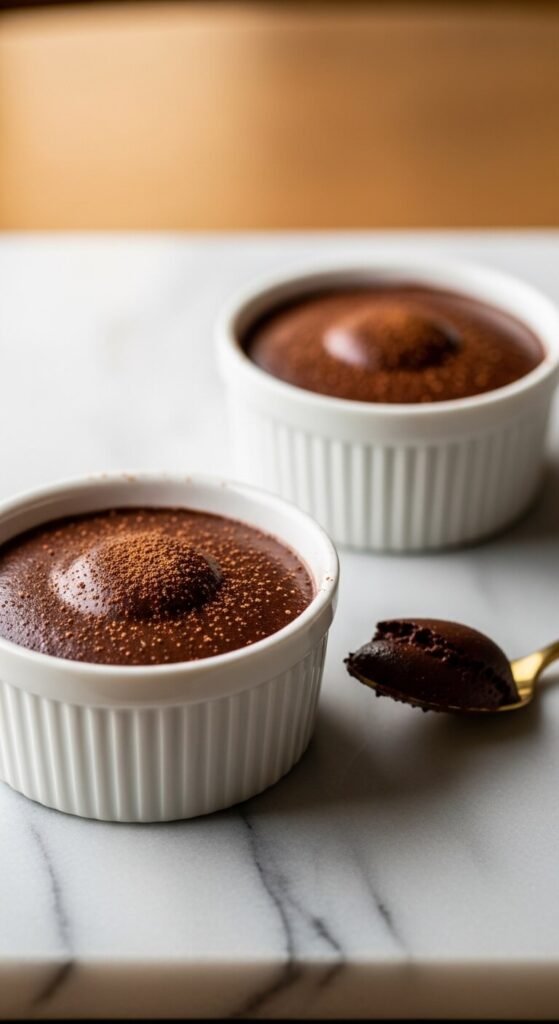
The Base Recipe: Dark Chocolate Mousse
This is the foundation — master this, and every other flavor variation follows the same method.
Ingredients (serves 6):
- 8 oz (225g) full-fat cream cheese, room temperature
- ¾ cup powdered sugar, sifted
- ⅓ cup unsweetened cocoa powder, sifted
- 1 teaspoon vanilla extract
- Pinch of fine sea salt
- 1 cup heavy whipping cream, cold
The method:
- Beat the room-temperature cream cheese on medium-high speed for two full minutes until completely smooth and slightly fluffy — no lumps
- Add the sifted powdered sugar, cocoa powder, vanilla, and salt — beat until fully combined and the mixture looks like a thick, dark chocolate frosting
- In a separate cold bowl, whip the cold heavy cream to stiff peaks — the cream should hold firm peaks that do not droop when the beater is lifted
- Add the whipped cream to the chocolate mixture in two additions, folding gently with a large rubber spatula each time
- Spoon into individual cups and refrigerate for two hours minimum
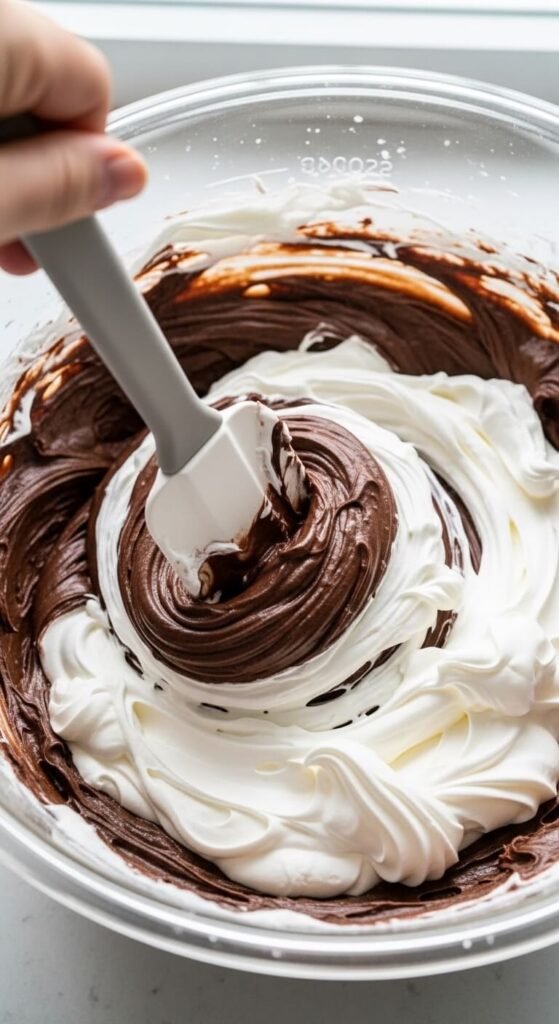
The Fold: The Step That Makes It Fluffy
This is the technique that separates a light, airy mousse from a dense, heavy one.
Folding — rather than mixing — preserves the air bubbles trapped in the whipped cream. Each air bubble is the mousse’s lightness. Every unnecessarily vigorous stir collapses bubbles and produces a denser, heavier result.
How to fold correctly:
- Use a large rubber spatula, not a whisk or electric beater
- Cut the spatula down through the center of the mixture
- Sweep along the bottom of the bowl
- Fold up and over the top in one continuous motion
- Rotate the bowl slightly and repeat
Stop as soon as the two mixtures are just combined — a few faint white streaks are acceptable and will disappear during chilling. Over-folding deflates the cream just as much as mixing does.
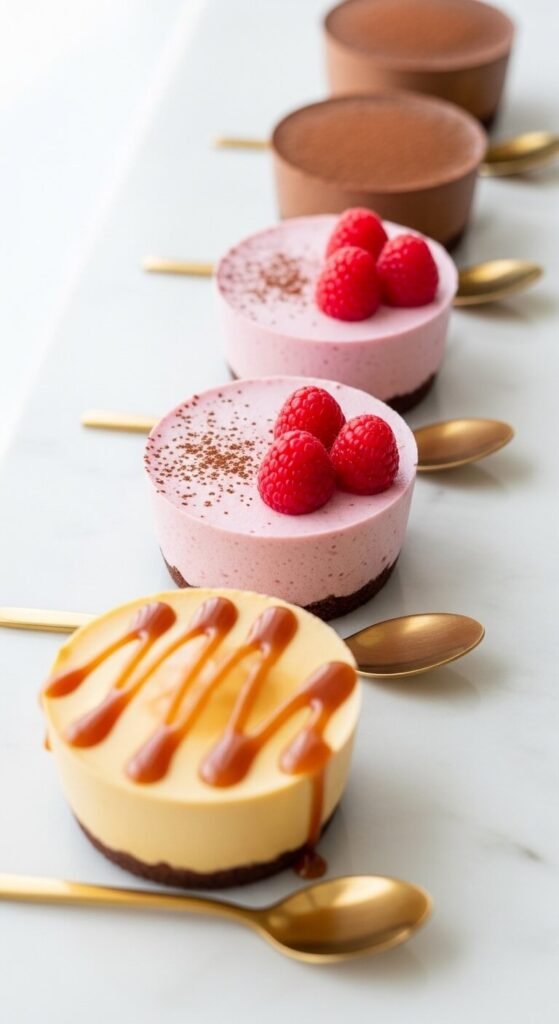
Flavor Variations That Work Perfectly
Once you have the base recipe, changing the flavor requires nothing more than swapping the flavoring ingredients in step two. The cream cheese and whipped cream quantities stay exactly the same.
Six variations to try:
- Lemon mousse: Replace cocoa with 3 tablespoons lemon curd + zest of one lemon. Omit vanilla. Color will be pale yellow.
- Raspberry mousse: Replace cocoa with 3 tablespoons strained raspberry purée. Color will be a vivid natural pink.
- Salted caramel mousse: Replace cocoa with 3 tablespoons dulce de leche + extra pinch of sea salt. Color will be pale golden.
- Matcha mousse: Replace cocoa with 1 tablespoon culinary matcha powder. Color will be pale sage green.
- White chocolate mousse: Omit cocoa entirely. Fold 3 tablespoons of melted and cooled white chocolate into the cream cheese before adding the whipped cream.
- Peanut butter mousse: Replace cocoa with 3 tablespoons natural peanut butter. Reduce powdered sugar by one tablespoon — peanut butter adds its own natural sweetness.
The flavor rule: Add flavoring to the cream cheese base before folding in the cream — flavoring after the cream is incorporated requires additional folding that deflates the mousse.
Serving and Storing
Serving: Spoon or pipe into individual cups, ramekins, or glasses before refrigerating. The mousse is easier to portion while still soft than after it has set firm. For a piped finish, use a star-tip piping bag after the initial chilling and pipe a rosette on top of the set mousse just before serving.
Chilling time: Two hours minimum for a soft-set mousse. Four hours for a firmer result that slices or scoops cleanly.
Storage: Covered in the fridge for up to three days. The mousse may firm slightly on day two and three — this is normal and does not affect the flavor or quality.
The Mousse Everyone Thinks Required More Work
Twenty minutes of active time. Two hours in the fridge. A dessert that looks and tastes like something from a restaurant menu — without a single egg, without a double boiler, and without any technique more complex than folding and waiting.
Save this recipe and pin it — because once you make egg-free mousse this way, it becomes the dessert you reach for every time you want to impress without the stress.