If you’ve never made cookies before — or if your oven is broken, your kitchen is sweltering, or you simply don’t want to deal with preheating anything today — no-bake cookies are the place to start. They require one saucepan, a handful of pantry ingredients, and about 15 minutes from start to finish. No mixer. No dough chilling. No wondering if they’re done in the middle. You make them on the stove, drop them on parchment paper, and walk away. That’s the whole process.
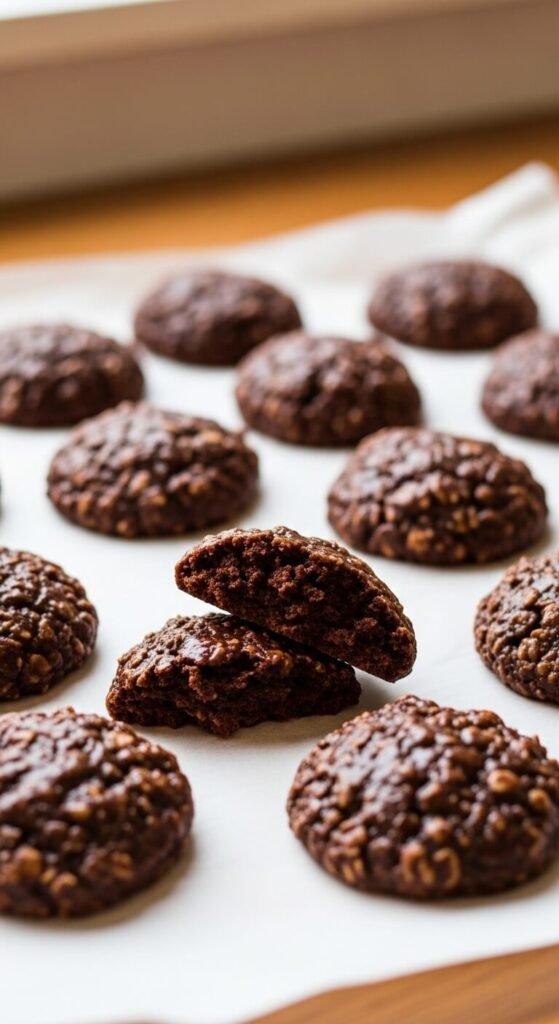
They also happen to taste like a chocolate peanut butter fudge situation crossed with an oatmeal cookie — which means they taste like something considerably more sophisticated than their ingredient list suggests.
What You Need Before You Start
One of the best things about this recipe is that everything in it lives in most kitchen pantries already. No specialty grocery run required.
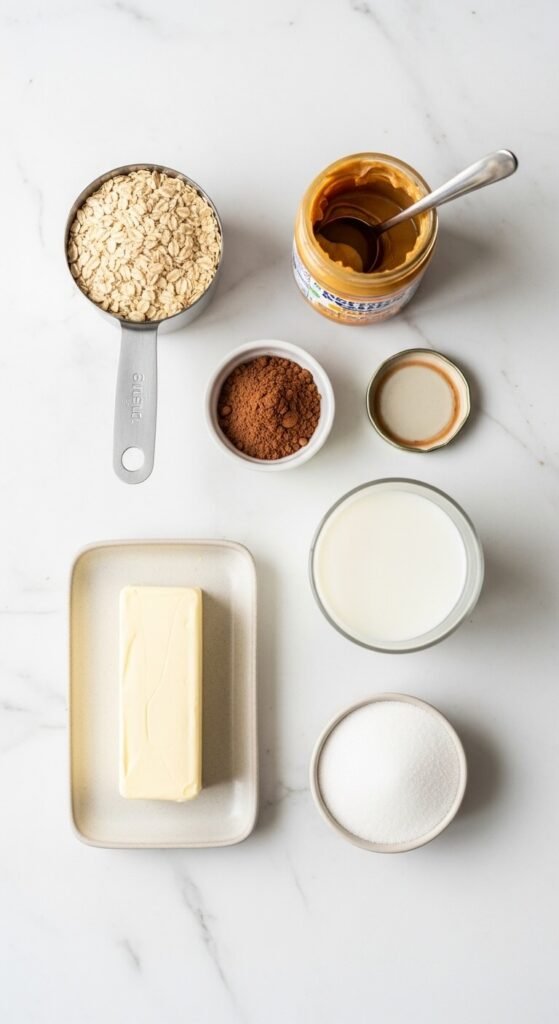
Ingredients for approximately 30 cookies:
- 2 cups granulated white sugar
- ½ cup whole milk
- ½ cup unsalted butter (1 stick)
- ¼ cup unsweetened cocoa powder
- ½ teaspoon salt
- 1 teaspoon pure vanilla extract
- ½ cup creamy peanut butter
- 3 cups old-fashioned rolled oats
Equipment you’ll need:
- A medium or large heavy-bottomed saucepan
- A wooden spoon or heat-safe silicone spatula
- Two baking sheets lined with parchment paper
- A tablespoon-sized cookie scoop or regular tablespoon
- A kitchen timer — this is not optional
A few ingredient notes for beginners:
- Use old-fashioned rolled oats, not quick oats or instant. Quick oats absorb too much moisture and produce a mushy, dense cookie that doesn’t have the characteristic chewy texture.
- Whole milk gives the mixture the right fat content. Skim milk produces a drier cookie that’s more likely to crumble.
- Standard creamy peanut butter — Jif, Skippy, or similar. Natural peanut butter with separated oil behaves inconsistently in this recipe and can affect how the cookies set.
Set Up Before You Turn on the Heat
This is the single most important piece of advice for a first-time no-bake cookie maker: have everything measured and ready before the stove goes on.
Once the mixture starts boiling, it moves fast. You won’t have time to measure oats or find the peanut butter while monitoring a boiling sugar mixture. A few seconds of inattention at the wrong moment is the difference between perfect cookies and a batch that never sets.
Pre-cook checklist:
- Oats measured into a bowl beside the stove
- Peanut butter measured into the same bowl or a small dish
- Vanilla measured into a small cup
- Parchment paper laid flat on both baking sheets
- Cookie scoop beside the baking sheets and ready to go
The Cooking Process — Step by Step
This is where beginners feel the most uncertain, so here’s exactly what to do at every stage.
Step 1: Combine the sugar, milk, butter, cocoa, and salt in the saucepan over medium heat. Stir continuously as the butter melts and everything combines into a smooth, dark brown liquid.
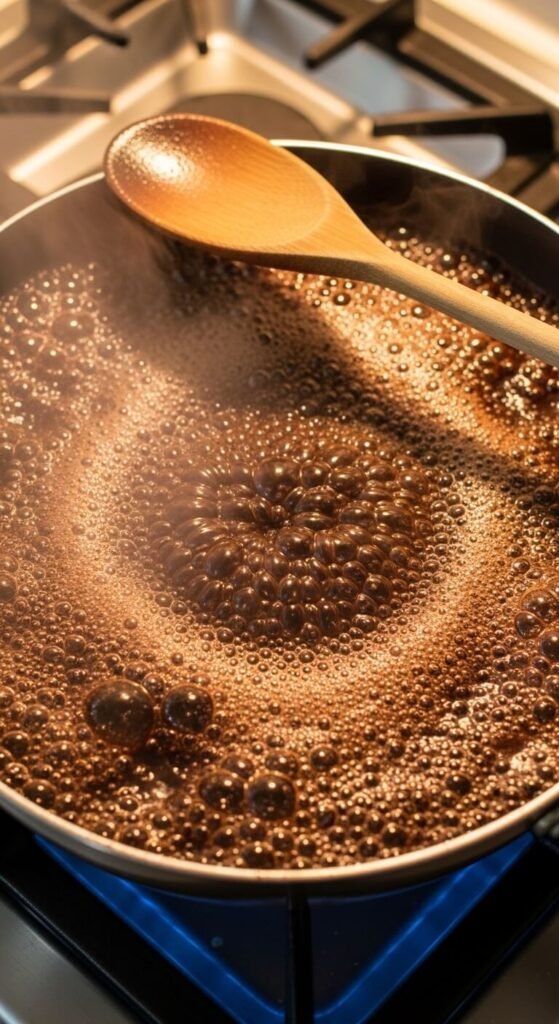
Step 2: Bring to a full rolling boil. A rolling boil means the entire surface is bubbling vigorously — not just around the edges. Keep stirring. This stage takes 3 to 5 minutes depending on your stove.
Step 3: The moment it reaches a full rolling boil, start your timer for 60 seconds. Keep stirring the entire time. This 60-second boil is the technical heart of the recipe — it cooks the sugar to the soft ball stage, which is what allows the cookies to set at room temperature.
Step 4: Remove from heat immediately when the timer goes off. Do not estimate or guess — use the timer every single time.
Step 5: Add the vanilla, peanut butter, and oats all at once. Stir quickly and thoroughly until everything is combined and every oat is coated in the chocolate mixture.
Drop the Cookies Quickly
Work fast here. The mixture begins setting almost immediately once it leaves the heat — especially in a cool kitchen.
Use a tablespoon-sized cookie scoop or a regular tablespoon to drop rounded portions onto the parchment-lined baking sheets. Don’t worry about perfect shape — they’ll settle slightly and look more uniform as they cool.
Space them about 2 inches apart so they don’t touch as they spread slightly during the first few minutes.
Once all the cookies are dropped, leave them completely alone for 30 to 45 minutes. Room temperature setting is what gives them the right texture. The refrigerator cools them too quickly and can cause the sugar to crystallize on the outside, producing a gritty surface texture.
The cookies are ready when they lift cleanly off the parchment without sticking or deforming.
How to Know If Your Cookies Set Correctly
Perfectly set cookies: Firm enough to hold their shape when lifted, with a slightly fudgy interior that yields a little when bitten. Surface looks matte rather than wet.
Cookies that are too soft after 45 minutes: The mixture was under-boiled. Return everything to the saucepan, bring back to a full rolling boil for 60 seconds, and re-drop. This rescue method works.
Cookies that are crumbly and dry: The mixture was over-boiled. They still taste great crumbled over ice cream — and next time, pull the pan off the heat the moment 60 seconds is up.

Simple Variations Once You’ve Got the Basics Down
The base recipe is delicious on its own — but once you’ve made it once and feel confident, these small additions take the cookies somewhere even better:
- Coconut no-bake cookies: Replace ½ cup of oats with sweetened shredded coconut for a chewy, tropical variation
- Sunflower butter version: Swap peanut butter for sunflower seed butter for a completely nut-free cookie with a very similar flavor profile
- Espresso chocolate: Add 1 teaspoon of instant espresso powder to the saucepan with the cocoa — the coffee deepens the chocolate flavor without making the cookies taste like coffee
You’re Ready — Make Your First Batch Today
No-bake cookies are the recipe that proves you don’t need advanced skills, special equipment, or hours of free time to make something genuinely delicious from scratch. One saucepan, a timer, and 15 minutes is all it takes.
Save this recipe to your beginner baking collection and make your first batch today — and once you’ve nailed the 60-second boil, you’ll make these on repeat for the rest of your life.