No-bake cookies are one of those recipes that sounds like a guaranteed win — no oven, done in 20 minutes, chocolate and peanut butter involved. And then you make them and end up with a sticky pile of something that never quite sets, glues itself to the parchment paper, and leaves a chocolatey residue on everything it touches. Sound familiar? The problem isn’t the recipe — it’s a few small but critical technique mistakes that almost every first-timer makes. Fix those, and no-bake cookies become exactly what they’re supposed to be: firm, fudgy, deeply satisfying cookies that hold their shape, come cleanly off the paper, and disappear from the plate in minutes.
The Classic No-Bake Cookie Recipe
Before the technique tips, the foundation — the classic chocolate peanut butter oat cookie that’s been a beloved American staple for decades. Once you’ve made this version perfectly, every variation becomes easy.
What you need (makes about 24 cookies):
- 2 cups (400g) granulated sugar
- ½ cup (115g) unsalted butter
- ½ cup (120ml) whole milk
- ¼ cup (25g) unsweetened cocoa powder
- ½ teaspoon salt
- 3 cups (270g) quick-cooking oats — not rolled oats (more on this in a moment)
- ½ cup (125g) creamy peanut butter — natural or conventional, not chunky
- 2 teaspoons vanilla extract
That’s it. Eight ingredients, one saucepan, and the technique knowledge that makes all the difference between perfect cookies and a sticky disaster.
The Most Important Step — The Boil
This is where most no-bake cookie failures begin and end. The boiling step isn’t just about heating the ingredients — it’s about reaching the right temperature to activate the sugar’s setting properties. Too little time at the boil and your cookies stay soft and sticky forever. Too long and they turn dry, crumbly, and grainy.
The exact method:
- Combine sugar, butter, milk, cocoa powder, and salt in a medium saucepan over medium heat
- Stir constantly while the mixture comes to a full rolling boil — this means large bubbles breaking across the entire surface, not just at the edges
- The moment you reach a full rolling boil, set a timer for exactly 60 seconds and keep stirring
- After 60 seconds, remove immediately from heat — do not keep it on the burner “just a little longer”
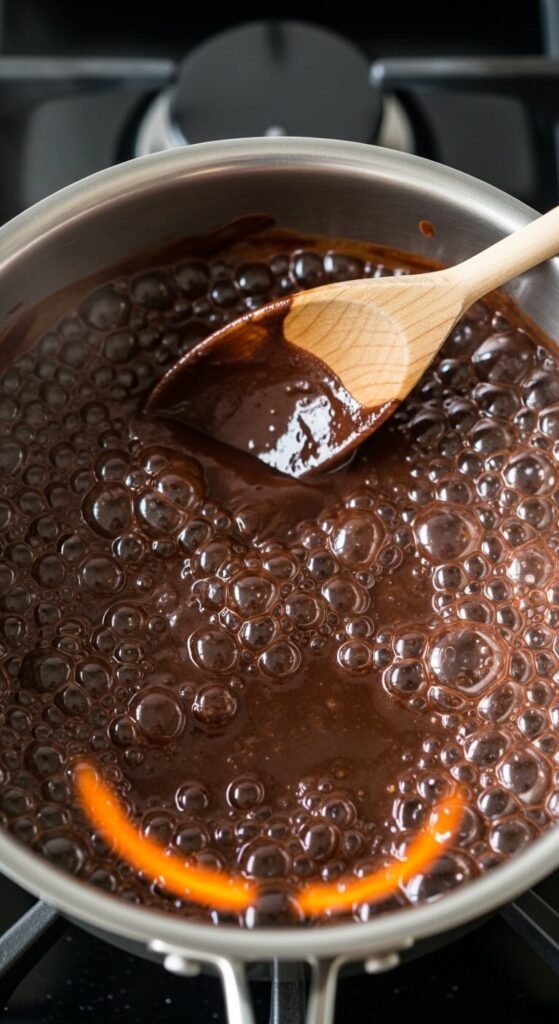
Why 60 seconds matters so much: The sugar needs to reach approximately 235°F (soft ball stage) to set properly when cooled. In most home kitchens at medium heat, a full rolling boil held for 60 seconds gets you there reliably. If you have a candy thermometer, use it — 235°F is your target. If you don’t, the 60-second rolling boil method works beautifully.
The most common mistake: Calling a gentle simmer a “boil” and removing the pan too early. If the cookies consistently come out sticky, this is almost always why. Wait for the full, vigorous, whole-surface boil before starting your timer.
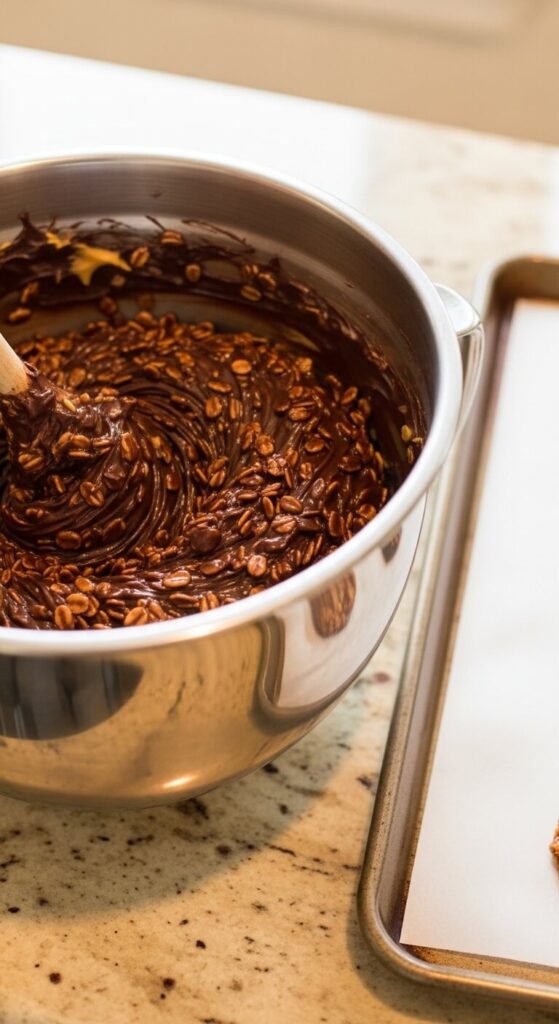
Mix-In Technique for Clean, Firm Cookies
Once your boiled mixture comes off the heat, you have a narrow window to work quickly and confidently. Here’s how to handle it:
- Immediately stir in the peanut butter until completely melted and smooth — no streaks
- Add the vanilla extract and stir to combine
- Add the oats all at once and stir quickly until every oat is fully coated in the chocolate mixture
Work fast — the mixture begins setting the moment it’s off the heat. You want the oats fully incorporated before it thickens too much to stir easily.
Why quick-cooking oats? Quick oats absorb the chocolate mixture faster and more evenly than old-fashioned rolled oats. Rolled oats can leave you with a mixture that’s too wet in some spots and too dry in others — and cookies that never set uniformly. Quick oats are the right tool for this specific job.
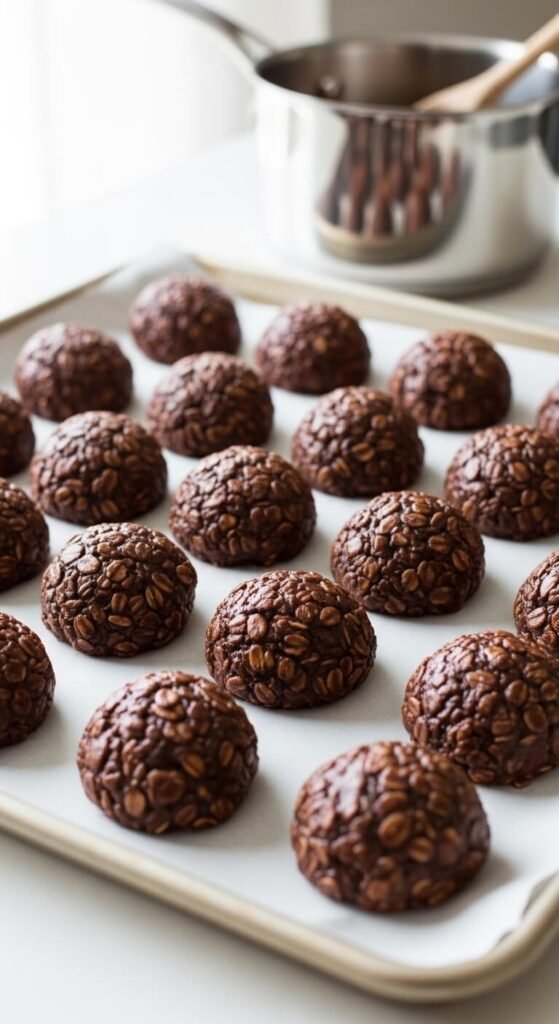
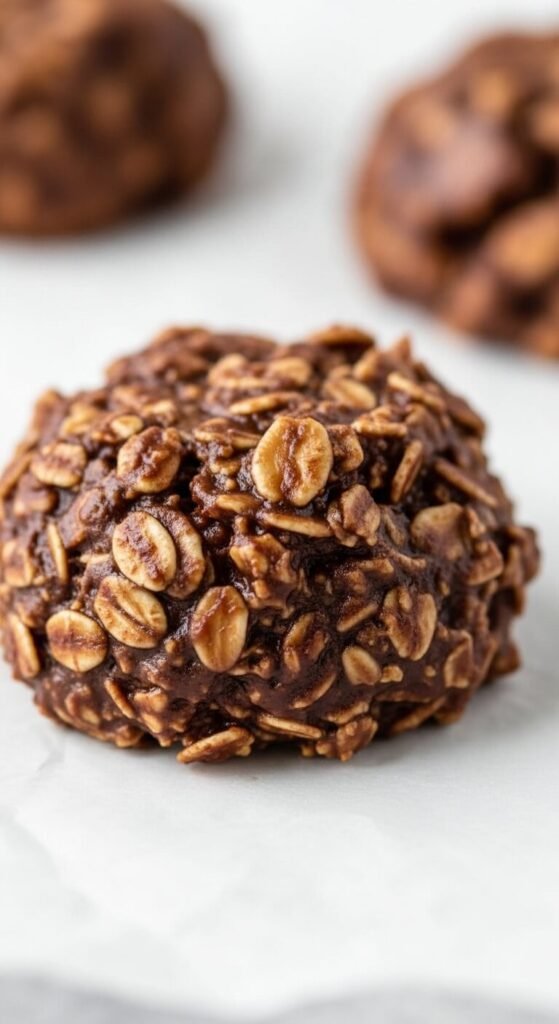
Drop and Shape for Perfect Rounds
Speed and consistency are your goals here. The mixture continues thickening as it cools, so the faster you work, the more evenly shaped your cookies will be.
- Use a cookie scoop or two spoons to drop uniform mounds onto parchment-lined baking sheets — not wax paper, which can stick as the cookies set
- Aim for golf ball-sized portions for the classic size — about 2 tablespoons each
- Slightly flatten each mound with the back of your spoon for a more finished, even look
- Space them about 1 inch apart — they don’t spread, but you need room to lift them cleanly once set
- Work in batches — if the mixture starts getting too stiff to scoop cleanly, briefly warm it over very low heat for 30 seconds while stirring
If the mixture becomes too thick to drop smoothly before you finish, don’t panic. Press the remaining mixture into a parchment-lined pan, smooth the top, and cut into bars once set. They taste identical and look completely intentional.
How Long to Let Them Set
This is the other major patience test of no-bake cookies. Set time varies depending on your kitchen temperature, humidity, and how precise your boil was.
Setting guidelines:
- Room temperature setting — 30 to 60 minutes in a cool, dry kitchen
- Refrigerator setting — 15 to 20 minutes if you’re in a hurry or your kitchen is warm
- The test — gently press the top of one cookie. It should feel firm and not leave an indent. If it’s still soft, give it more time.
Important: Don’t refrigerate them until after they’ve started setting at room temperature. Moving them too early can cause condensation on the surface that makes the tops look dull and slightly damp.
Flavor Variations Worth Trying
Once you’ve mastered the classic, the formula is endlessly adaptable:
- Almond joy version — add ½ cup shredded coconut and swap peanut butter for almond butter
- Mocha version — dissolve 1 tablespoon of instant espresso powder into the milk before boiling
- S’mores version — stir in ½ cup mini marshmallows and crush a few graham crackers on top before setting
- Butterscotch version — swap cocoa powder for butterscotch chips added at the end with the peanut butter
- Nut-free version — replace peanut butter with sunflower seed butter or tahini for a school-safe option
The Takeaway
Perfect no-bake cookies come down to two things: reaching a true full rolling boil for exactly 60 seconds, and working quickly once the pan comes off the heat. Get those two things right and everything else follows naturally.
Save this recipe before your next craving hits — because once you’ve made a batch that sets perfectly, peels cleanly off the parchment, and holds its shape all the way to the last cookie, you’ll never go back to guessing. 🍫🥜✨