There’s a specific kind of joy that comes from biting into a chocolate bar and hearing that crisp, airy crunch — the kind that makes you pause, look at it, and immediately take another bite. That texture is the whole personality of a crunch bar, and the wonderful news is that you can recreate it at home without an oven, without a candy mold, and without any special confectionery skills. These No-Bake Crunch Bars are rich, chocolatey, and deliver that signature snap-and-crunch that makes them impossible to eat just one of.
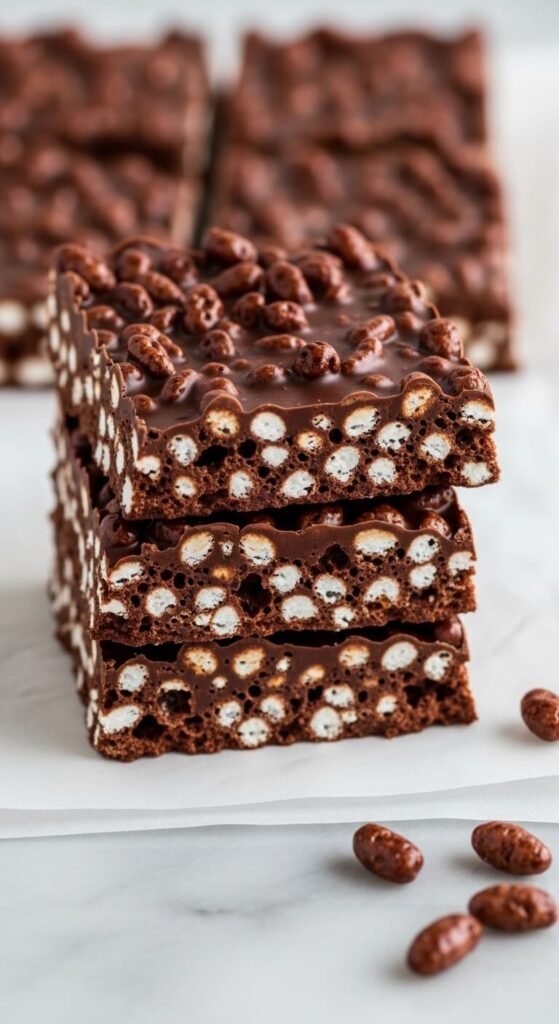
Five ingredients. One pan. Pure, crunchy, chocolate bliss.
What Makes the Crunch So Perfect
That iconic crunch bar texture isn’t magic — it’s just crispy rice cereal suspended in smooth, quality chocolate. The combination creates tiny pockets of air inside each bite that give you that light, satisfying snap the moment your teeth break through.
Making it at home gives you full control over what goes in:
- Better chocolate means a deeper, more complex flavor than any candy bar wrapper can deliver.
- The cereal-to-chocolate ratio is entirely yours to dial up or down based on how crunchy you want each bar.
- No preservatives, no mystery fats, no artificial flavoring — just real chocolate and crispy rice doing what they do best together.
- Completely customizable — dark chocolate, milk chocolate, white chocolate, peanut butter swirls, sea salt, you name it.
Once you make these, you’ll wonder why you ever paid convenience store prices for something this simple.
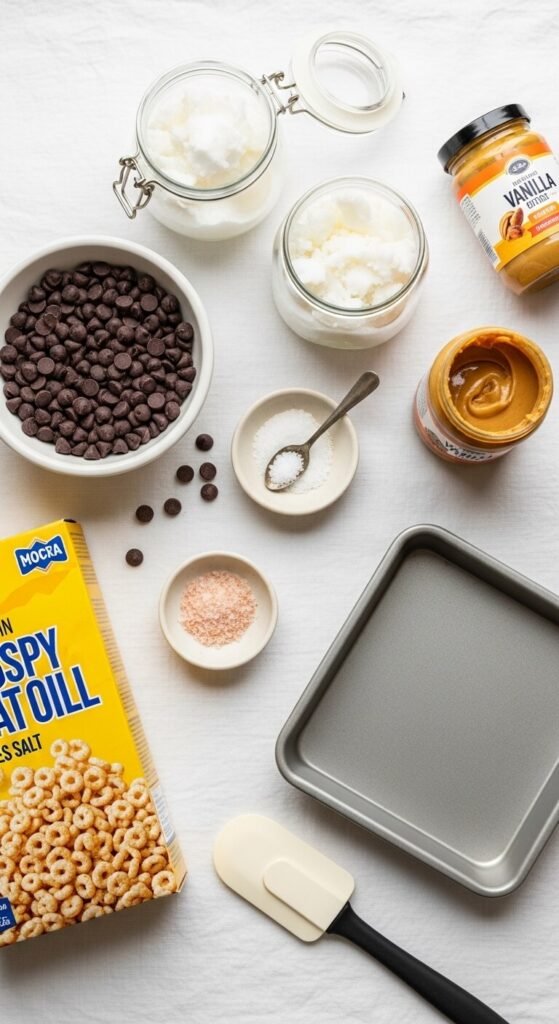
What You’ll Need
Short list. Big payoff.
The core recipe:
- 2 cups high-quality dark or milk chocolate chips (or finely chopped chocolate bars — quality matters here)
- 2 tablespoons coconut oil (for that glossy finish and smooth melt)
- 2 cups crispy rice cereal (Rice Krispies or any equivalent)
- 1 teaspoon vanilla extract
- ¼ teaspoon fine sea salt
Optional mix-ins and toppings:
- ¼ cup creamy peanut butter or almond butter (stirred into the melted chocolate for a nutty depth)
- Flaky sea salt sprinkled on top before setting
- White chocolate drizzle for a two-tone finish
- 2 tablespoons crushed freeze-dried raspberries for a fruity contrast
- A handful of mini marshmallows for a rocky road-style variation
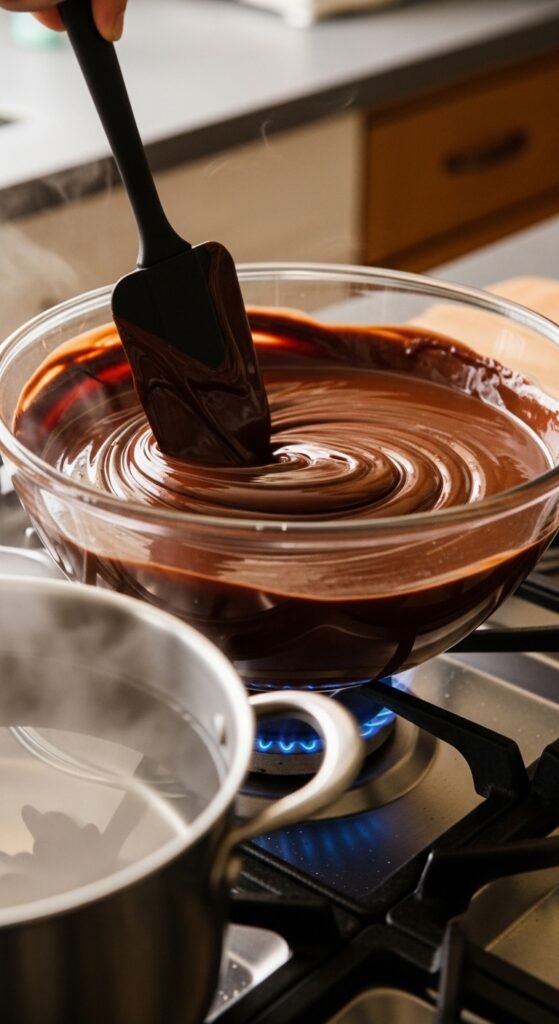
Step 1: Melt the Chocolate Low and Slow
Chocolate is temperamental — high heat turns it grainy, scorched, and dull. Low and slow is the way to go, and it makes all the difference in the final texture and shine of your bars.
- Combine the chocolate chips and coconut oil in a large, heatproof mixing bowl.
- Melt using a double boiler: set the bowl over a pot of barely simmering water, stirring gently and consistently until the chocolate is completely smooth and glossy.
- Alternatively, microwave in 20-second bursts, stirring thoroughly between each interval. Stop the moment the last few chips melt into the mixture from the residual heat.
- Remove from heat and stir in the vanilla extract and sea salt.
If you’re adding peanut butter, stir it in now while the chocolate is still warm and fluid — it blends in seamlessly and creates a gorgeous rippled flavor in every bite.
Step 2: Fold In the Crispy Rice Cereal
This step takes about 30 seconds and is deeply satisfying.
- Pour all the crispy rice cereal into the warm melted chocolate at once.
- Fold gently with a rubber spatula, turning the mixture over itself rather than stirring aggressively.
- Keep folding until every single piece of cereal is fully coated in chocolate — no dry pockets, no bare white cereal showing through.
The gentle fold is important. Vigorous stirring crushes the cereal and robs you of that airy crunch. Treat it like you’re folding egg whites into a batter — with care and patience.
The mixture should look like a thick, lumpy, gloriously chocolatey mass. That’s exactly right.
Step 3: Press Into the Pan
- Line an 8×8-inch or 9×9-inch square baking pan with parchment paper, leaving overhang on two sides so you can lift the slab out cleanly later.
- Pour the chocolate cereal mixture into the pan.
- Use a spatula or the back of a lightly greased spoon to press it into an even, compact layer.
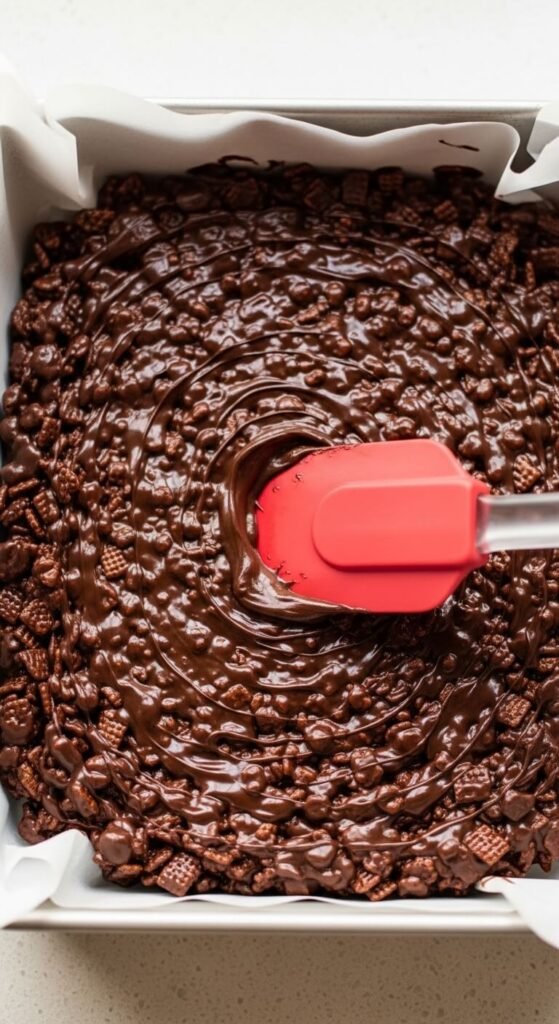
Press firmly. A well-compacted layer means bars that hold together cleanly when sliced rather than crumbling at the edges. Take an extra minute here and the payoff is significant.
If you’re adding toppings — flaky sea salt, a white chocolate drizzle, crushed freeze-dried fruit — do it immediately before the surface chocolate begins to set.
Step 4: Chill Until Set, Then Slice
- Transfer the pan to the refrigerator and chill for a minimum of 1 hour, or until the chocolate is completely firm and set throughout.
- Once set, lift the entire slab out of the pan using the parchment overhang and place it on a cutting board.
- Use a large, sharp knife to cut it into bars, squares, or rectangles — whatever shape suits your serving situation.
The clean-cut trick: Run your knife under hot water, dry it completely, then cut in one smooth downward press rather than sawing back and forth. Repeat between cuts for sharp, clean edges that look genuinely professional.
Store the finished bars in an airtight container in the fridge for up to two weeks, or freeze for up to two months. They taste phenomenal eaten straight from the fridge — cold, snappy, and intensely chocolatey.
Flavor Variations Worth Every Attempt
Once the base recipe is mastered, these combinations are all waiting for you:
- Peanut Butter Crunch Bars — swirl ¼ cup peanut butter into the melted chocolate before adding the cereal. Absolute crowd-pleaser.
- White Chocolate Crunch Bars — swap dark for white chocolate and add a pinch of freeze-dried raspberry powder for a sweet-tart contrast.
- S’mores Crunch Bars — fold mini marshmallows and crushed graham crackers into the mixture along with the rice cereal.
- Salted Caramel Crunch Bars — drizzle store-bought caramel sauce over the pressed mixture before chilling and finish with a generous pinch of flaky sea salt.
- Mocha Crunch Bars — add 1 teaspoon of instant espresso powder to the melted chocolate for a coffee-chocolate depth that’s completely addictive.
Tips for Getting It Right Every Time
- Use good chocolate — this is a minimal-ingredient recipe, so the quality of your chocolate is everything. A chocolate you’d happily eat on its own will make a far better bar than budget baking chips.
- Don’t overheat the chocolate — scorched chocolate turns grainy and dull. Low, slow, and patient wins every time.
- Let it chill fully before slicing — cutting too early gives you crumbly, messy edges instead of clean, sharp bars.
- Double the batch — an 8×8 pan disappears fast. A 9×13 pan is never a bad idea.
The Bar Your Snack Drawer Has Been Missing
These No-Bake Crunch Bars prove that the best homemade treats don’t need a complicated process — they just need good ingredients, a little technique, and the discipline not to eat the entire pan in one sitting (no judgment if you don’t quite manage it).
Rich chocolate, perfectly crispy cereal, a satisfying snap in every single bite — and the quiet pride of knowing you made something this good yourself.
Save this recipe, share it with your fellow crunch bar devotees, and make a batch this weekend — your snack game is about to level up significantly. 🍫✨