A lemon bar that gets the balance right is one of the most satisfying things in the entire dessert world. The tartness hits first — bright, sharp, and unmistakably citrus — and then the sweetness arrives just behind it, rounding out the edges and keeping the whole thing from puckering your face. Getting that balance in a baked lemon bar requires precise oven timing and the right egg-to-curd ratio. Getting it in a no-bake version requires understanding exactly two things: how much lemon juice your filling base can hold without breaking down, and which sweetener produces the cleanest, brightest lemon flavor without muddying it. Once you know both, the tart-sweet balance becomes something you can dial in deliberately rather than stumble into accidentally.
Why the Tart-Sweet Balance Is Harder Than It Looks
Most no-bake lemon bar recipes fall into one of two failure modes:
Too sweet, not tart enough. The lemon gets overwhelmed by the cream cheese and sugar. The bar tastes like vanilla cheesecake with a faint lemon suggestion rather than something that actually tastes like lemon.
Too tart, won’t set properly. Lemon juice is acidic, and acid interacts with dairy proteins in ways that affect texture. Too much fresh lemon juice in a cream cheese-based filling causes it to curdle slightly or prevent it from setting to a clean, sliceable consistency.
The solution to both problems is a combination of fresh lemon juice and lemon zest working together — and understanding that zest carries flavor while juice carries acid. You can intensify lemon flavor dramatically by adding more zest without adding more acid. This is the technique that makes these bars taste more lemon than anything else while still setting correctly.
The Ingredients
For the crust:
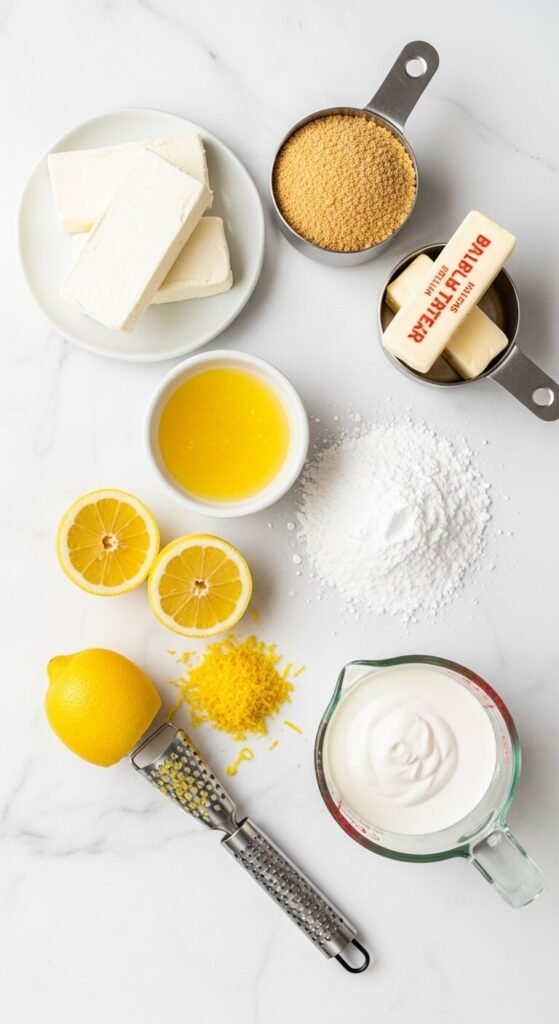
- 2 cups graham cracker crumbs — about 14 full cracker sheets
- 6 tablespoons unsalted butter, melted
- 3 tablespoons granulated sugar
- Pinch of salt
For the lemon filling:
- 16 oz full-fat block cream cheese, room temperature — two blocks
- 1 cup powdered sugar, sifted
- 3 tablespoons fresh lemon juice — from approximately 2 lemons
- 2 tablespoons fresh lemon zest — this is where the real flavor lives
- 1 teaspoon pure vanilla extract
- ¼ teaspoon salt
- 1 cup heavy whipping cream, cold — whipped to firm peaks separately
On the lemon juice and zest ratio: Three tablespoons of juice provides the tartness backbone without pushing the filling into acid-heavy territory that compromises the set. The two tablespoons of zest — which most recipes use far too little of — doubles the lemon intensity without adding a single drop more acid. Zest first, taste, then adjust juice by a half-tablespoon in either direction to hit your personal tart-sweet preference.
Build the Crust
The crust for lemon bars should be slightly firmer and more buttery than a standard cheesecake crust — it needs to hold up against the acidic, moist filling above it without softening into mush.
Step by step:
- Combine graham cracker crumbs, melted butter, sugar, and salt and stir until the mixture holds together like wet sand when squeezed
- Press firmly into a parchment-lined 9×13 inch pan — use the flat bottom of a measuring cup and apply genuine pressure, especially at the corners and edges
- Freeze for 15 minutes — not just refrigerate. A frozen crust holds up against the wet filling significantly better than a merely chilled one
The thickness matters here: Aim for a crust layer about ¼ to ⅓ inch thick. Too thin and it crumbles when cut. Too thick and the bar tastes more like crust than filling. Four bars wide out of a 9×13 pan is the right proportion.
Make the Lemon Filling
The filling comes together in stages and the order produces a noticeably smoother result than simply dumping everything in at once.
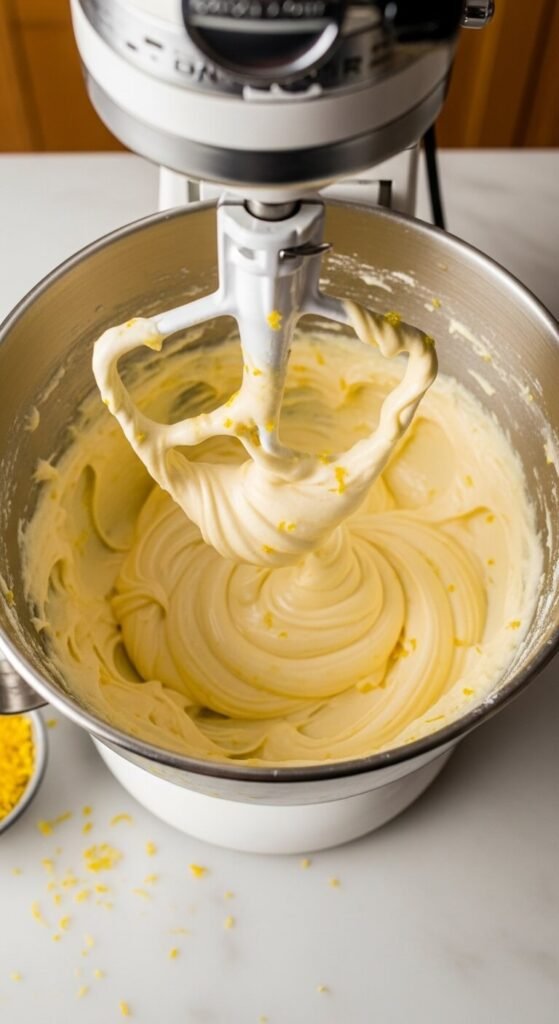
Step 1: Beat the room temperature cream cheese alone for 2 to 3 minutes on medium-high speed until completely smooth and slightly fluffy. Zero lumps before anything else goes in.
Step 2: Add the sifted powdered sugar, vanilla, and salt. Beat on medium until fully incorporated.
Step 3: Add the lemon zest and beat for 30 seconds — the zest needs to distribute through the filling evenly at this stage while the mixture is still stiff enough to disperse it properly.
Step 4: Add the lemon juice one tablespoon at a time, beating between each addition. Adding it gradually prevents the acid from shocking the cream cheese proteins. The filling should look glossy and smooth after each addition — not curdled or grainy.
Step 5: In a separate cold bowl, whip the cold heavy cream to firm, standing peaks. Fold the whipped cream into the lemon cream cheese mixture in three additions using a rubber spatula and slow, sweeping motions.
Assemble and Chill
Pour the lemon filling over the frozen crust. Use an offset spatula to spread it into an even layer reaching all four edges. Smooth the surface with a single pass of the spatula in one direction for the cleanest finish.
Cover with plastic wrap pressed directly against the filling surface — this prevents a skin from forming on the top.
Refrigerate for a minimum of 4 hours. The lemon bars need to be fully set before cutting — the acid in the lemon juice slows the setting process slightly compared to a plain cheesecake filling, which is why 4 hours is the minimum rather than the standard 6. Overnight produces the most reliable, cleanest-cutting result.
Cut and Finish
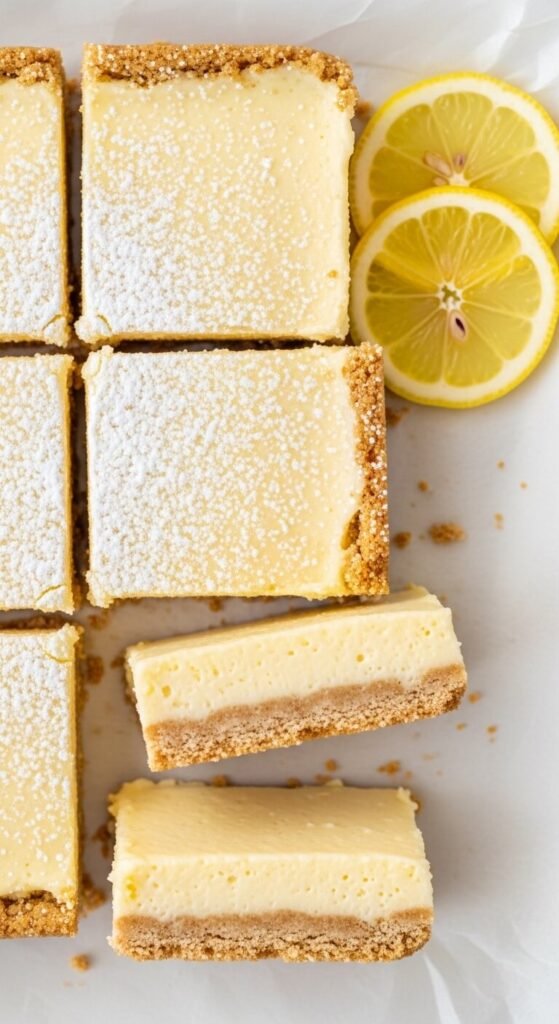
- Remove from the refrigerator and lift the full slab out of the pan using the parchment overhang
- Cut into bars using a sharp knife run under hot water and dried before each cut
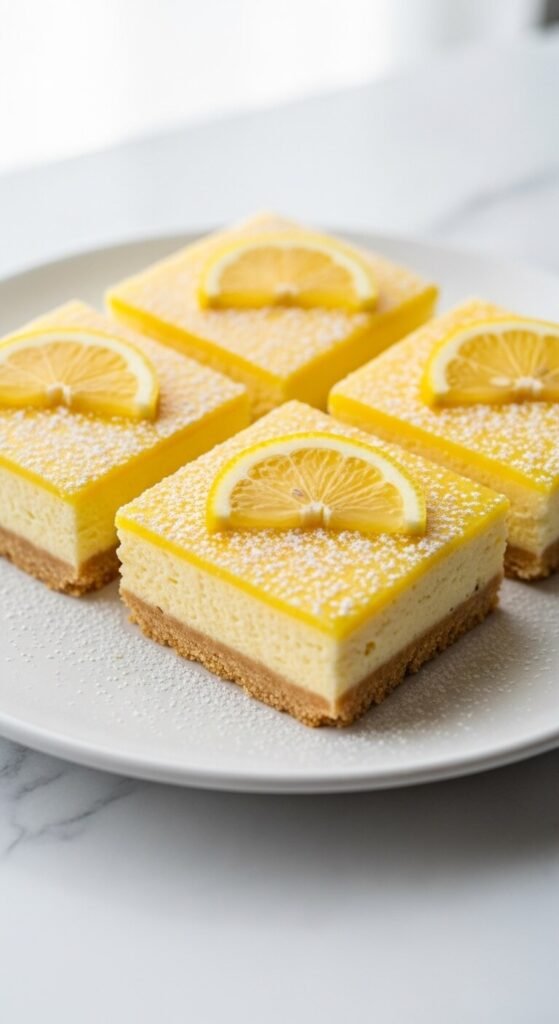
- Dust generously with powdered sugar through a fine mesh sieve immediately before serving — not ahead of time, as the filling’s moisture absorbs the powdered sugar quickly and it disappears
- Garnish each bar with a thin half-wheel of fresh lemon laid flat or a small curl of additional zest
The tart-sweet final check: Taste a corner piece before serving. If you want more tartness, a tiny additional squeeze of lemon juice on the surface of the bars — applied with a pastry brush right before dusting with powdered sugar — amplifies the citrus without disrupting the set. If the filling tastes slightly too tart for your audience, the powdered sugar dusting adds just enough sweetness at the surface to rebalance.
Save This Recipe — Lemon Bars Just Got Easier
No-bake lemon bars with the right tart-sweet balance come down to one fundamental insight: use more zest, less juice, and beat the cream cheese until it’s completely smooth before the acid ever touches it. Everything else follows naturally from those three things.
Pin this recipe to your no-bake desserts board right now and make a batch for your next gathering — bright, clean, perfectly balanced lemon bars that required zero oven time and produce maximum admiration every single time they’re served.