Everything about a s’more is perfect — except for the part where you need a campfire, a stick, and the patience to not set your marshmallow on fire every single time. The good news is that the full s’more experience — graham cracker crunch, melted chocolate richness, sticky marshmallow sweetness — translates beautifully into a no-bake bar that you can make in your kitchen in under 20 minutes of active work. No fire, no smoke, no burnt fingers. Just the exact flavor combination that makes s’mores one of the most universally loved desserts in existence, pressed neatly into a pan and ready to slice.

Why No-Bake S’mores Bars Work Better Than You’d Expect
The s’more’s three elements — graham cracker, chocolate, marshmallow — each hold up well in a no-bake bar format for a specific reason.
Graham crackers bind into a firm, sliceable crust when combined with melted butter. The texture is crunchier and more structured than a campfire s’more base — which is actually an improvement.
Chocolate sets into a dense, fudgy ganache layer when combined with cream or condensed milk. Instead of one thin square of barely-melted Hershey’s, you get a full, rich chocolate layer that tastes genuinely indulgent.
Marshmallows can be melted into a smooth, chewy top layer or left as whole mini marshmallows pressed into the chocolate before setting. Either approach delivers that signature sweetness and pull. And a quick pass under the broiler — just 2 minutes — gets you the toasted, golden top without a single burning stick in sight.
The whole thing sets in the fridge, slices cleanly, and tastes exactly like a s’more — just better structured, more consistent in every bite, and easier to share.
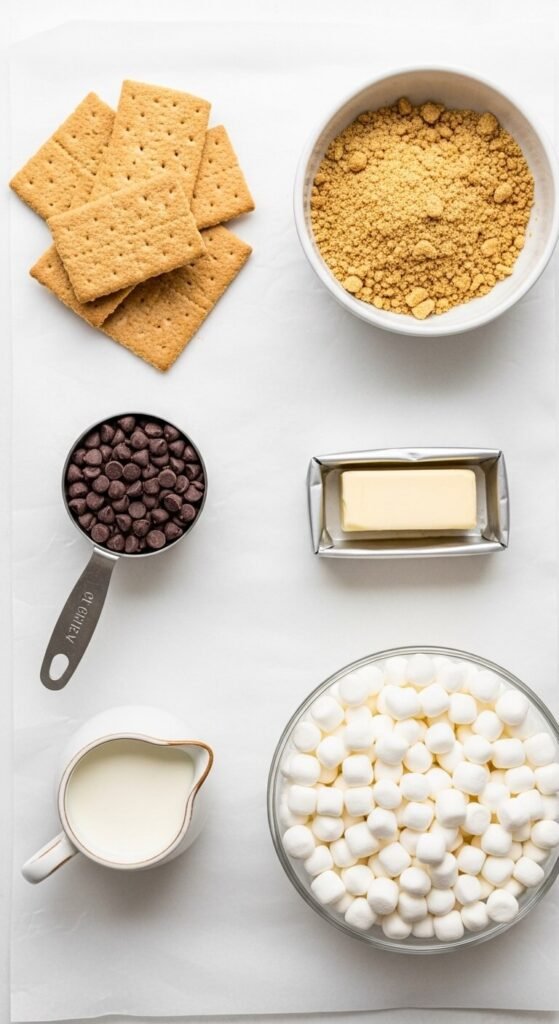
What You Need
The ingredient list is short and almost certainly already in your kitchen.
For the crust:
- 2 cups graham cracker crumbs (about 14 full crackers, crushed)
- 6 tablespoons unsalted butter, melted
- 2 tablespoons granulated sugar
- Pinch of salt
For the chocolate layer:
- 2 cups semi-sweet chocolate chips
- ¾ cup heavy cream (or full-fat coconut cream for dairy-free)
- 1 tablespoon unsalted butter
- ½ teaspoon vanilla extract
For the marshmallow top:
- 3 cups mini marshmallows (or 2 cups for a thinner layer)
That’s it. No eggs, no flour, no specialty ingredients. Everything here is available at any grocery store.
How to Make Them: Step by Step
Step 1 — Make the graham cracker crust
Crush graham crackers in a zip-lock bag with a rolling pin, or pulse briefly in a food processor until you have fine, even crumbs. Mix crumbs with melted butter, sugar, and salt until the mixture resembles wet sand and clumps when pressed between your fingers.
Press firmly and evenly into a parchment-lined 9×9 inch pan. Use the bottom of a flat glass to compact it thoroughly — a well-pressed crust holds clean slices; a loose one crumbles. Refrigerate for 15 minutes while you make the chocolate layer.
Step 2 — Make the chocolate ganache
Combine chocolate chips and heavy cream in a microwave-safe bowl. Microwave in 30-second intervals, stirring between each, until completely smooth. Stir in butter and vanilla.
Pour over the chilled crust and spread evenly with a spatula. The layer should be about ½ inch thick — deep enough to set firmly but not so thick it overwhelms the other layers.
Refrigerate for 30 minutes until the chocolate is set but not completely hard. You want it firm enough to hold the marshmallows but still slightly tacky on the surface so they adhere.

Step 3 — Add and toast the marshmallows
Scatter mini marshmallows in an even layer across the set chocolate surface. Press them down gently so they make contact with the chocolate underneath.
Now comes the campfire moment — no stick required.
Move your oven rack to the top position and set your oven to broil. Slide the pan under the broiler and watch it constantly — this takes 1 to 2 minutes and can go from perfectly golden to burnt very quickly. Pull the pan out as soon as the marshmallows are golden and lightly charred in spots across the surface.
Let cool at room temperature for 10 minutes, then refrigerate for at least 1 hour before slicing.
Getting the Perfect Slice
Cold s’mores bars slice dramatically cleaner than room-temperature ones. For the sharpest, most photogenic cut:
- Use a large, sharp chef’s knife — not a serrated bread knife
- Run the blade under hot water and dry it thoroughly between each cut
- Slice in one confident downward motion — don’t saw back and forth
- Clean the blade between every cut for edges that show all three layers clearly
If the marshmallow top is sticking to the knife, a very light spray of cooking oil on the blade helps.
Variations Worth Trying
Once you have the base recipe down, a few small changes take these bars in entirely new directions:
- Peanut butter s’mores bars: Swirl 3 tablespoons of creamy peanut butter into the warm chocolate ganache before it sets
- Dark chocolate and sea salt: Use 70% dark chocolate chips and scatter flaky sea salt over the marshmallow layer after broiling
- Cookie butter crust: Replace half the graham cracker crumbs with crushed Biscoff cookies for a caramel-spiced base
- Nutella layer: Spread a thin layer of Nutella directly on the graham cracker crust before pouring the chocolate ganache on top

Storage and Make-Ahead Tips
These bars are actually better the next day once the layers fully meld together.
- Refrigerator: Store in an airtight container for up to 5 days, layers separated by parchment
- Freezer: Wrap individual bars in plastic wrap and freeze for up to 2 months. Thaw in the fridge for 30 minutes before serving
- Make-ahead: Complete the crust and chocolate layers the night before, then add and broil the marshmallows 2 hours before serving for the freshest toasted top
The Campfire Is Optional — The Bars Are Not
You don’t need a weekend in the woods, a fire pit, or even good weather to get that s’more experience. You need 20 minutes, one pan, and a broiler. The result is everything you love about s’mores — packaged into a bar that slices, stacks, wraps, gifts, and travels in ways that a campfire s’more never could.
Save this recipe for your next gathering — and share it with anyone who’s ever burned a marshmallow and wished there was a better way.