Some desserts are all about the process — the mixing, the baking, the decorating. Refrigerator bars are all about the result. Press them in a pan, let the fridge do all the heavy lifting, and what comes out hours later is a perfectly layered, cleanly sliced slab of something that looks like it took real skill and tastes even better than it looks. No oven. No special equipment. Just layers of flavour, a little patience, and a sharp knife moment that is genuinely one of the most satisfying things in home cooking.
These are the bars people ask you to bring to every gathering — and the bars you’ll make on a quiet Sunday just because you can.
Why Refrigerator Bars Are a Total Game Changer
If you’ve never made refrigerator bars before, prepare to wonder where they’ve been your whole life. They hit a very specific sweet spot that most desserts miss entirely:
- No baking required — the fridge sets everything, which means no timing stress, no burnt bases, and no waiting for an oven to preheat.
- Make-ahead perfection — they’re actually better the next day once the layers have fully melded and firmed up overnight.
- Clean, beautiful slices — when done right, each cut reveals distinct, defined layers that look stunning on a plate or platter.
- Completely customisable — swap the base, change the filling, vary the topping. The formula is endlessly flexible.
- Crowd-pleasing every single time — rich, satisfying, and portioned into neat bars that are easy to serve and eat.
Think of them as the no-fuss, no-oven cousin of a layered tart — with none of the complexity and all of the wow factor.
The Classic Three-Layer Formula
The beauty of refrigerator bars is their structure. Most great versions follow the same reliable blueprint:
Layer 1 — The Base: A pressed, firm foundation. Usually made from crushed biscuits or graham crackers mixed with melted butter. This is your anchor.
Layer 2 — The Filling: The creamy, flavourful middle that defines the bar’s personality. Could be chocolate ganache, cream cheese, caramel, peanut butter, coconut, fruit curd — anything rich and spreadable.
Layer 3 — The Topping: The finishing layer that sets firm and makes that clean slice possible. Typically melted chocolate, but also white chocolate, ganache, or a set cream layer.
Each layer needs to be fully chilled before the next goes on. This is the non-negotiable rule that makes the difference between gorgeous defined layers and a swirled, muddy mess.
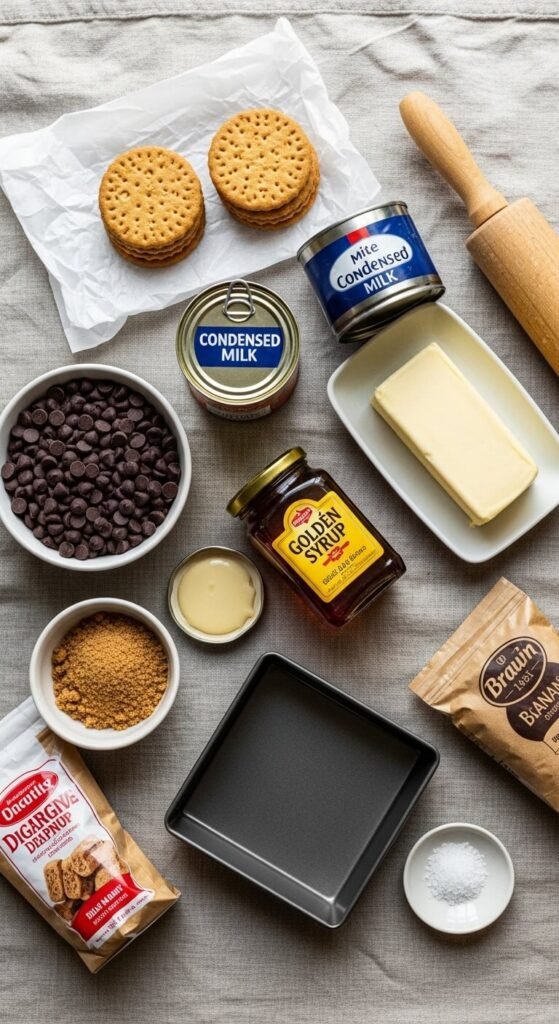
What You’ll Need
This is the classic chocolate-caramel refrigerator bar — crowd favourite, endlessly reliable, and visually stunning.
For the biscuit base:
- 2 cups digestive biscuits or graham crackers, finely crushed
- ½ cup unsalted butter, melted
- 2 tablespoons brown sugar
- Pinch of sea salt
For the caramel filling:
- 1 can (14 oz) sweetened condensed milk
- ½ cup unsalted butter
- ¼ cup brown sugar
- 1 tablespoon golden syrup or light corn syrup
- 1 teaspoon vanilla extract
- ¼ teaspoon sea salt
For the chocolate topping:
- 1½ cups dark chocolate chips or finely chopped dark chocolate
- 1 tablespoon coconut oil
Step 1: Make and Press the Base
- Crush the biscuits into fine crumbs using a food processor or by placing them in a zip-lock bag and rolling firmly with a rolling pin.
- Combine the crumbs with melted butter, brown sugar, and sea salt until the mixture resembles wet sand and holds together when pressed.
- Pour into a parchment-lined 8×8 or 9×9-inch square pan.
- Press the mixture down firmly and evenly using the back of a flat measuring cup or the bottom of a glass.
The firmer you press, the more structural integrity your base will have — and the cleaner your slices will be later.
- Refrigerate for at least 20 minutes until firm before adding the filling.
Step 2: Cook the Caramel Filling
This is the one step that involves the stove, and it’s worth every minute.
- Combine the condensed milk, butter, brown sugar, and golden syrup in a medium saucepan over medium-low heat.
- Stir constantly as it melts and comes together — patience here is everything.
- Once fully combined, increase to medium heat and stir continuously for 8–10 minutes until the caramel thickens, deepens in colour, and pulls away slightly from the sides of the pan.
- Remove from heat, stir in the vanilla and sea salt, and let it cool for 5 minutes.

Pour the warm caramel over the chilled biscuit base and spread it into a smooth, even layer with a spatula. Refrigerate for a minimum of 1 hour — or until completely firm to the touch.
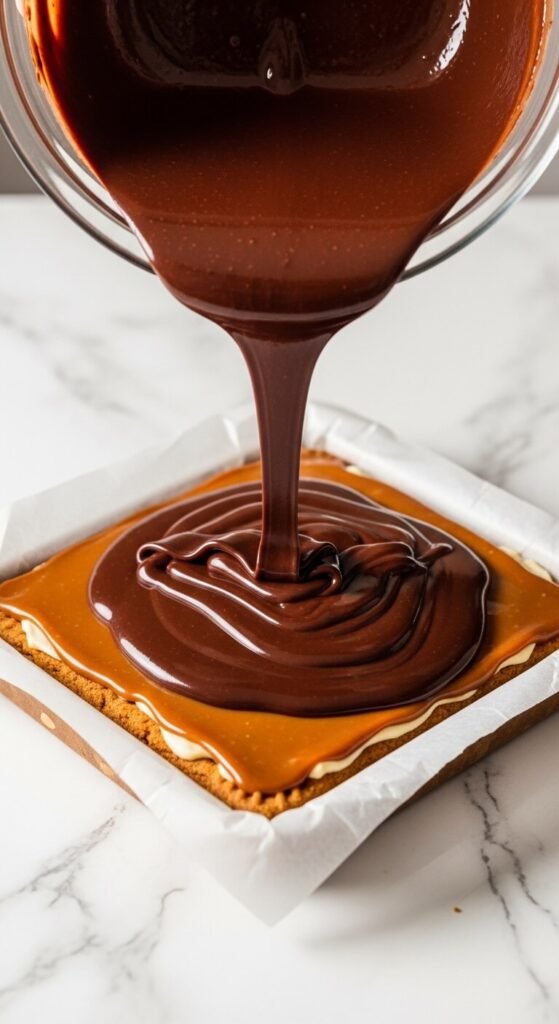
Step 3: Add the Chocolate Topping
Once the caramel is fully set and cold, it’s time for the final layer.
- Melt the chocolate chips and coconut oil together in the microwave in 30-second bursts, stirring between each, until completely smooth and glossy.
- Let it cool for 3–4 minutes — you want it pourable but not steaming hot, which can soften the caramel layer beneath.
- Pour the melted chocolate over the set caramel and tilt the pan gently to spread it into an even, level layer.
- For a finishing touch, sprinkle flaky sea salt over the chocolate immediately before it sets.
Refrigerate for another 1–2 hours until the chocolate topping is completely firm and set.
The Slice — Making It Beautiful
This is the moment the whole recipe builds toward, and a few small steps make it genuinely spectacular.
- Lift the entire slab out of the pan using the parchment overhang and place it on a cutting board.
- Run a large sharp knife under very hot water and dry it completely before each cut.
- Press the knife straight down in one clean motion — don’t saw back and forth.
- Wipe the blade clean and repeat the hot water step between every single cut.
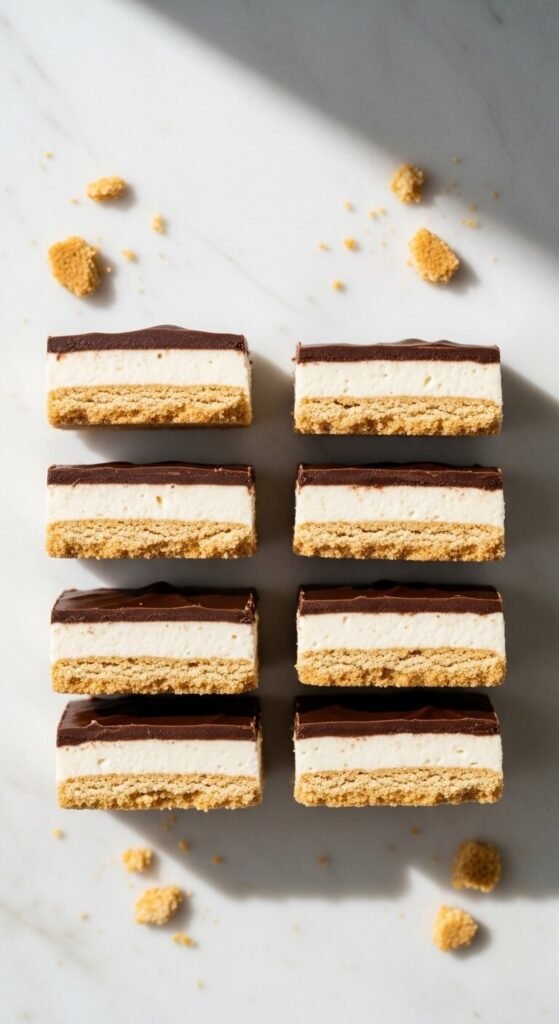
The result: sharp, defined edges with each distinct layer on full display — biscuit, caramel, chocolate — stacked and perfect.
Tips for Perfect Bars Every Single Time
- Chill each layer fully before adding the next — this is the single most important rule in the recipe.
- Line your pan generously with parchment and leave plenty of overhang — unmoulding becomes effortless.
- Score the chocolate topping lightly before it fully sets to mark your cut lines — this prevents the top layer cracking unpredictably when you slice.
- A ruler and a sharp knife are genuinely useful here if you want perfectly even, uniform bars.
- Store in the fridge in an airtight container for up to one week — they firm up even more by day two.
Variations to Keep Things Interesting
- Peanut Butter Refrigerator Bars — replace the caramel layer with a thick, sweetened peanut butter filling for a Reese’s-inspired take.
- Lemon Coconut Bars — use a coconut biscuit base, a lemon curd filling, and a white chocolate topping.
- Mint Chocolate Bars — add a drop of peppermint extract to the chocolate topping and use a dark cocoa biscuit base.
- Berry Cheesecake Bars — swap the caramel for a sweetened cream cheese filling topped with a quick berry compote set under white chocolate.
Your Fridge’s Best Feature
Refrigerator bars are proof that the best things don’t always need heat to happen. Give them time, chill them properly, use good ingredients, and slice them with intention — and what comes out is a dessert that looks like it came from a patisserie counter, made quietly in your own kitchen.
They’re generous, beautiful, make-ahead friendly, and deeply, completely satisfying — in the making, in the slicing, and most of all, in the eating.
Save this recipe, share it with someone who loves a good layered bar, and make a batch this weekend — your fridge is about to become everyone’s favourite appliance. 🍫✨