The rice crispy treat you remember from childhood was probably made from a recipe on the back of a cereal box — and it was fine. It was sweet, it held together, it tasted like marshmallow and butter, and by the next morning it was a brick. What we’re making today is something categorically different. Thick, pull-apart, stretchy, cloud-soft treats with a marshmallow-to-cereal ratio that makes them genuinely gooey rather than merely sticky. The kind that leave marshmallow strings when you pull a piece apart. The kind people ask about at every party, every bake sale, every gathering where they appear.
The difference between a good rice crispy treat and a legendary one comes down to four specific techniques. None of them are complicated. All of them matter.

The Ingredient Ratios That Change Everything
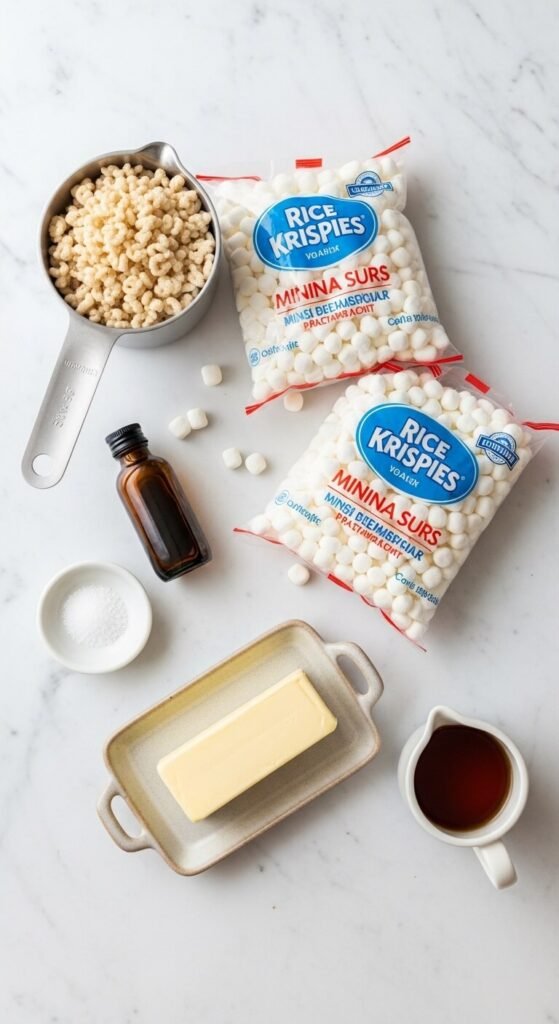
The standard box recipe uses a 1:1 ratio of cereal to marshmallows by volume — approximately 6 cups of cereal to one 10-ounce bag of marshmallows. That produces a treat that’s serviceable but not remarkable.
For extra gooey treats, shift the ratio:
- 6 cups Rice Krispies cereal
- Two 10-ounce bags of mini marshmallows — divided
- 6 tablespoons unsalted butter
- 1 teaspoon pure vanilla extract
- ¼ teaspoon salt
- 1 tablespoon light corn syrup (the secret weapon)
Why each addition matters:
- Double marshmallows — one bag melts into the base, one bag gets folded in at the end for stretchy, intact marshmallow pockets throughout
- Extra butter — more fat produces a softer, richer treat that stays tender longer
- Corn syrup — a single tablespoon keeps the marshmallow mixture soft and pliable instead of setting hard as it cools
- Vanilla and salt — vanilla rounds out the sweetness and salt makes every other flavor taste more like itself
Brown the Butter First
This is the technique that most standard recipes skip entirely — and it’s responsible for the complex, almost caramel-like depth of flavor that makes these treats taste like something you’d pay $4 each for at a bakery.
How to brown butter:
- Place butter in a light-colored saucepan over medium heat — a light pan lets you see the color change clearly
- Stir constantly as the butter melts, foams, and begins to smell nutty
- Watch for the milk solids at the bottom to turn golden amber — this takes about 3 to 4 minutes
- Remove from heat the moment the butter is golden and fragrant — it goes from perfectly browned to burnt in about 20 seconds
The brown butter flavor infuses the entire treat with a warmth that plain melted butter simply doesn’t produce. Once you make them this way, going back feels like a downgrade.
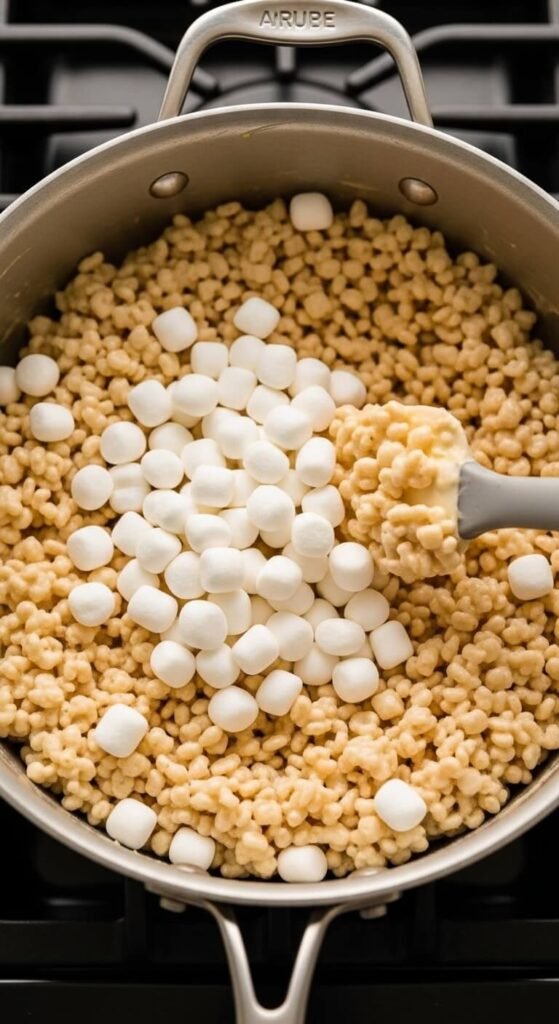
The Two-Marshmallow Method for Maximum Gooeyness
This single technique is responsible for the stretchy, pull-apart texture that separates extraordinary rice crispy treats from ordinary ones.
Step by step:
- Add the corn syrup to the brown butter in the saucepan and return to low heat
- Add one full bag of mini marshmallows and stir continuously until completely melted and smooth
- Add vanilla and salt and stir to combine
- Remove from heat immediately
- Add the cereal and stir until fully coated
- Now add the second bag of mini marshmallows — fold them in quickly with a spatula
The key is that the second bag goes in off the heat. They soften from the residual warmth but don’t fully melt — which creates visible marshmallow pockets and stretchy threads throughout the finished treat instead of a uniform, dense slab.
Press Gently — This Is Where Most People Go Wrong
The pressing step is where the gooeyness either survives or gets compacted into a dense, hard slab.
What not to do: Press firmly and evenly with a spatula using full hand pressure. This crushes out all the air and marshmallow structure you just built.
What to do instead:
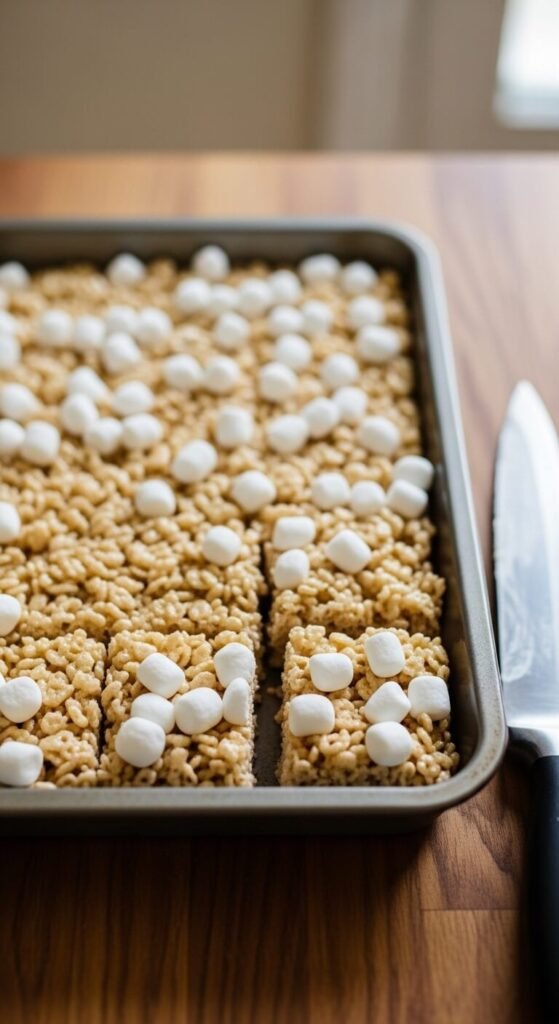
- Transfer the mixture to a parchment-lined 9×13 inch pan that has been lightly greased or sprayed
- Use lightly buttered fingertips to press gently and loosely into the pan — you’re guiding it into place, not compacting it
- The surface should look slightly uneven and textured, not smooth and compressed
- Aim for a layer about 1.5 to 2 inches thick — using a smaller pan is better than pressing them flat in a large one
The gentle press preserves pockets of air and intact marshmallow throughout the treat. Cut into these and they pull apart with that satisfying stretch instead of snapping cleanly.
Let Them Set at Room Temperature — Never the Fridge
This is one of the most counterintuitive parts of making soft, gooey rice crispy treats.
The refrigerator is the enemy of texture here.
Cold air causes the marshmallow to set hard and the butter to solidify, producing that stiff, slightly stale texture that makes day-old treats disappointing. Room temperature setting allows the marshmallow to firm up slowly while retaining its soft, chewy quality.
- Let treats set at room temperature for 30 to 45 minutes before cutting
- Cut with a sharp knife wiped clean between cuts for the most defined edges
- Store at room temperature in an airtight container — they stay soft for 2 to 3 days this way versus becoming hard overnight in the fridge
Extra Touches That Push Them Over the Top
Once you’ve mastered the base technique, these additions create treats worth putting on a dessert table:
- Flaky sea salt sprinkled on top immediately after pressing — the salt contrast against sweet marshmallow is genuinely extraordinary
- Stir in ½ cup of chocolate chips at the same time as the second marshmallow addition — they melt just enough to create chocolate ribbons
- Add ¼ cup of sprinkles folded in at the end for a celebration version that looks as good as it tastes
- Brown butter and Nutella swirl: Drop tablespoons of Nutella over the surface immediately after pressing and swirl gently with a knife
Save This Recipe — Your Next Batch Starts Here
The gap between a decent rice crispy treat and an unforgettable one is brown butter, doubled marshmallows, corn syrup, and a gentle hand at the pressing stage. Twenty minutes of work. Zero baking required. Results that genuinely surprise people who think they already know what a rice crispy treat tastes like.
Save this recipe to your no-bake desserts collection right now — and make a batch this week for proof that the most familiar recipes often have the most room to become something remarkable.