You made the filling. You pressed the crust. You smoothed everything perfectly flat and now the recipe is telling you to refrigerate for six to eight hours. Possibly overnight. You need this cheesecake in three hours. Maybe two. The recipe isn’t being flexible and neither is your timeline — so something has to give.
Good news: the cheesecake can give. With the right techniques, you can dramatically cut the setting time without sacrificing the creamy, sliceable texture that makes no-bake cheesecake worth making in the first place.
Here’s exactly what works — and why — when you need your cheesecake ready faster than the recipe allows.
Understand Why No-Bake Cheesecake Takes So Long
Before you start rushing the process, it helps to know what’s actually happening during those long refrigerator hours.
No-bake cheesecake sets through a combination of two things:
- Fat solidifying — the cream cheese and heavy cream both contain significant fat that firms up as the temperature drops
- Air stabilizing — the whipped cream folded into the filling needs time to maintain its structure as the mixture cools and tightens
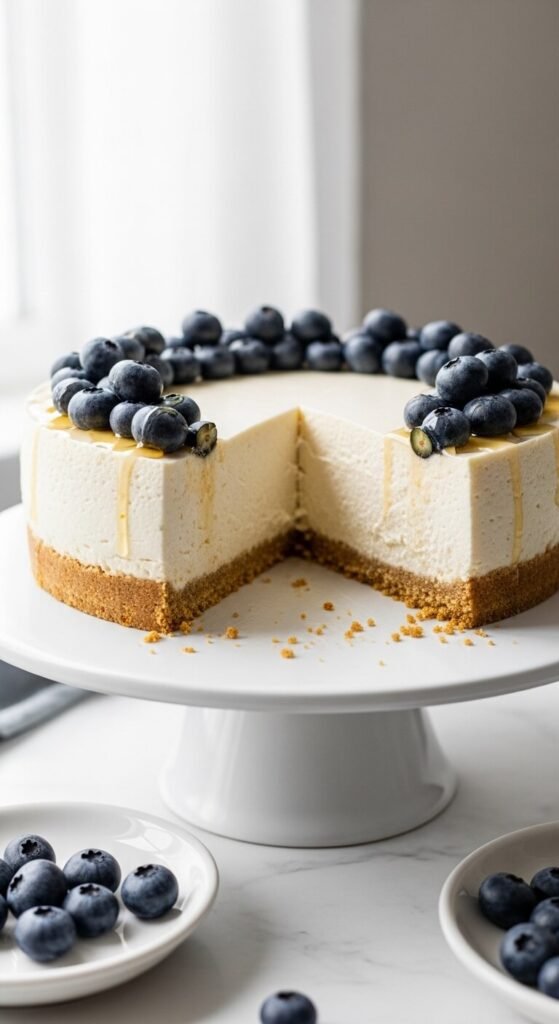
The problem with rushing? If the cheesecake hasn’t fully set and you slice it too early, the filling collapses. It looks beautiful until the moment the knife goes in, and then it slides off the crust like a melting snowdrift.
The goal of any fast-setting method is to drop the temperature of the filling as quickly and evenly as possible without introducing ice crystals or condensation that create a watery, uneven texture.
Method 1: The Freezer Technique (Best for Speed)
The freezer is your most powerful tool here — but only if you use it correctly.
What to do:
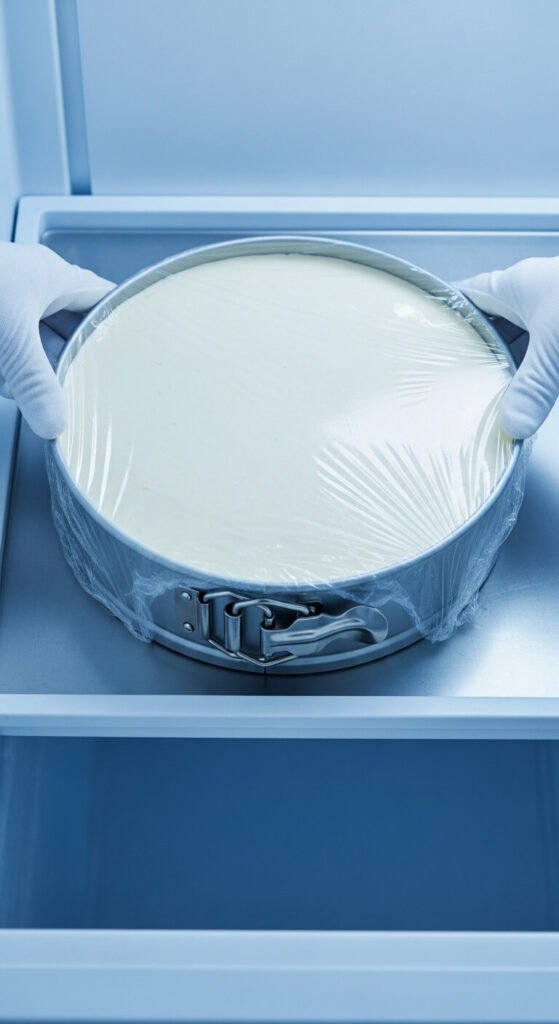
- Assemble your cheesecake as normal in a springform pan
- Smooth the top completely flat with an offset spatula
- Cover the surface loosely with plastic wrap — press it gently against the filling surface to prevent a skin from forming
- Place in the freezer on a flat, level surface for 60 to 90 minutes
After 60 to 90 minutes in the freezer, transfer the cheesecake to the refrigerator for at least one additional hour before serving. This two-stage process gives you a properly set cheesecake in 2.5 to 3 hours total.
The rules for freezer-setting:
- Never freeze longer than 90 minutes at the initial stage — the edges will over-freeze while the center stays soft
- Always finish with fridge time — going straight from freezer to table gives you a partially frozen filling that doesn’t slice cleanly
- Keep the pan completely flat in the freezer — a tilted cheesecake is a lopsided cheesecake
Method 2: Optimize Your Filling for Faster Setting
The filling recipe itself can be adjusted to set faster without the texture suffering. These two additions make a measurable difference:
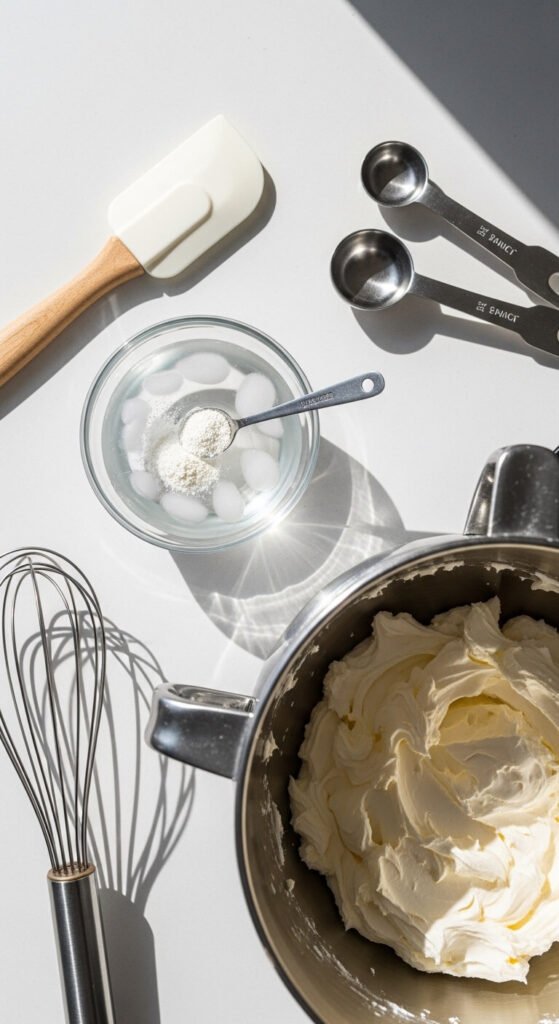
Add gelatin to the cream cheese mixture. Dissolve 1 teaspoon of unflavored powdered gelatin in 2 tablespoons of cold water. Let it bloom for 5 minutes, then microwave for 10 seconds until just melted. Cool slightly and fold into the cream cheese mixture before adding the whipped cream. Gelatin-stabilized cheesecake sets in 3 to 4 hours in the fridge — or under 2 hours using the freezer method above.
Use slightly less heavy cream. Reducing the heavy cream from 1½ cups to 1¼ cups creates a denser filling with less moisture to chill down. The texture is slightly firmer and sets faster. It’s a small adjustment with a noticeable impact on setting time.
Method 3: Make Individual Portions Instead
If you’re truly short on time, individual cheesecake cups set dramatically faster than a whole cheesecake because of the reduced volume and increased surface area exposed to cold air.
Here’s how:
- Press the crust into the bottoms of small mason jars or dessert glasses
- Spoon or pipe the filling on top
- Refrigerate for 45 to 60 minutes — that’s it
Individual portions set in a fraction of the time and they look intentionally styled rather than like a workaround. Add toppings directly before serving and nobody will know these came together in under an hour.
What Not to Do When Setting Cheesecake Fast
A few shortcuts that seem logical but actually backfire:
- Don’t pack ice around the pan. Condensation seeps into the crust and makes it soggy.
- Don’t crank the freezer to its coldest setting. Uneven extreme cold creates ice crystals in the filling that turn grainy as it thaws.
- Don’t skip the plastic wrap. An uncovered cheesecake surface in the freezer develops a dry, rubbery top layer that doesn’t soften back to a creamy texture.
- Don’t slice straight from the freezer. Always allow at least 20 to 30 minutes at room temperature after removing from the freezer for clean, smooth slices.
How to Tell When It’s Actually Set
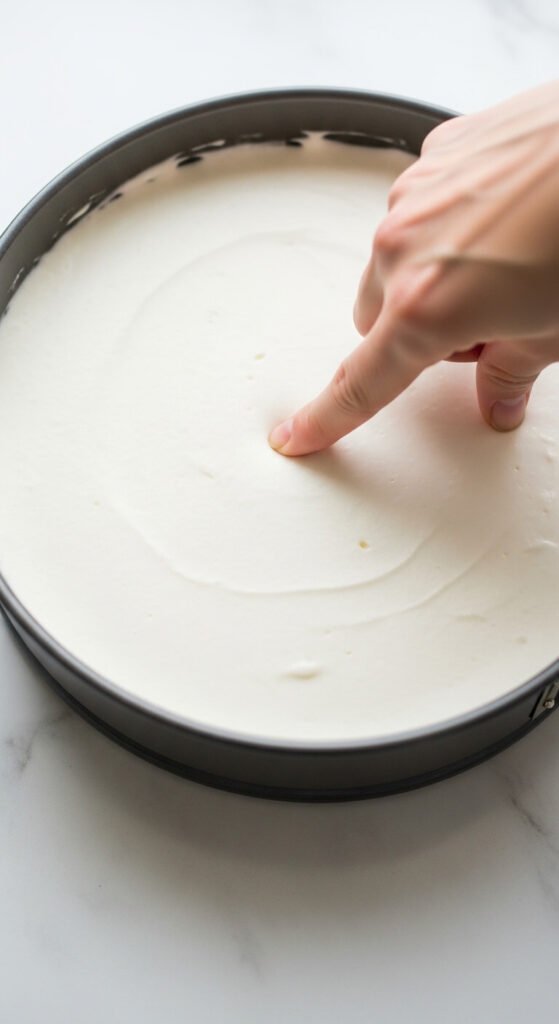
Before you release the springform or start slicing, do this quick test: gently press the center of the cheesecake with one finger. It should feel firm and spring back slightly — not jiggle, not sink, not leave an indentation.
If the center still feels soft, give it another 30 minutes in the fridge. Patience at this final stage saves the whole cheesecake.
You’ve Got This — Now Go Make That Cheesecake
No-bake cheesecake doesn’t have to be a plan-ahead-by-24-hours commitment. With the freezer technique, a gelatin addition, or individual jar portions, you can have a properly set, sliceable, beautiful cheesecake ready in time for whatever occasion prompted you to make it in the first place.
Save this article the next time someone asks you to bring dessert on short notice — this is the answer every time.